Appetizers & Snacks – The Fancy Pants Kitchen https://thefancypantskitchen.com Quick and Easy Recipes Sun, 09 Feb 2025 03:52:46 +0000 en-US hourly 1 https://wordpress.org/?v=6.7.2 https://thefancypantskitchen.com/wp-content/uploads/2021/02/cropped-Favicon-1-32x32.jpg Appetizers & Snacks – The Fancy Pants Kitchen https://thefancypantskitchen.com 32 32 Maple Mustard Candied Bacon https://thefancypantskitchen.com/recipe/maple-mustard-candied-bacon/ https://thefancypantskitchen.com/recipe/maple-mustard-candied-bacon/#respond Fri, 07 Feb 2025 03:57:12 +0000 https://thefancypantskitchen.com/?post_type=ranna_recipe&p=26495

The first taste of this Maple Mustard Candied  Bacon is going to make you holler “YUM”!!  This tasty treat is smoky, salty, sweet like candy, and oh-so-addictive!

It works beautifully on a charcuterie board, crumbled into a salad or over pasta or pizza!

This recipe is very simple to make.  I think the hardest part is preparing the sheet pan! If you follow the instructions in the recipe, the clean-up is a breeze.  Otherwise, better just toss the pan! 

Cut the bacon into one-inch pieces.  Combine the remaining ingredients together and add the bacon in, tossing gently to coat the bacon completely.

Place the bacon on a wire rack that’s set in the sheet pan and bake for 35-50 minutes.

Brush the bacon halfway through the cooking process with any remaining marinade.  The actual time in the oven will depend on the thickness of the bacon but you want it to get crispy and brown.

Take it out of the oven and let it cool for a minute or two and then transfer to a piece of parchment paper.

The bacon will harden up as it cools.  Serve it warm or at room temperature.

It also will stay in the refrigerator for days but I suggest heating it slightly before serving as the fat can congeal.  Pop it into the microwave for a few seconds or place it in a dry skillet over low heat for a minute or two.

Share Your Thoughts...

Lastly, if you make Maple Mustard Candied Bacon, be sure to leave a review down below at the bottom of this page (stars are also appreciated)! Above all, I love to hear from you and always do my best to respond to each and every review. And of course, if you do make this recipe, don’t forget to tag me on Instagram! Looking through the photos of recipes you all have made is one of my favorite things to do!

Maple Mustard Candied Bacon

Makes: 24 pieces

Prep Time: 10 minutes

Bake Time: 50 minutes

Total Time: 1 hour

Ingredients

  • 1 pound thick-cut smoky bacon (I really like Applewood cured bacon.)
  • 1/2 cup light or dark brown sugar
  • 2 tbsp coarse-grain mustard
  • 2 tbsp maple syrup
  • 1 tsp cayenne pepper

Instructions

Preheat the oven to 350°F. Place a piece of parchment paper, about 18 inches long, on the counter for cooling the bacon once it’s baked.

Line a half sheet pan with foil with edges extending over the top of the pan. You could also use parchment paper, but be sure to use a piece large enough that the edges extend over the pan. Set a cooling rack with a fairly tight mesh into the pan. Spray the wires of the rack with non-stick cooking spray.

Cut the bacon into 1-inch squares and set aside.

Mix the brown sugar, mustard, maple syrup and cayenne pepper in a large bowl. Add the bacon to the brown sugar mixture and stir gently to coat. Place the bacon squares on the wire rack that’s been set over a foil-covered sheet pan and reserve any remaining sauce for basting.

Bake for 35-50 minutes, until the bacon, is a deep mahogany color and crisp. Brush the bacon with the remaining maple-mustard mixture halfway through baking. (The exact cooking time will depend on the thickness of your bacon.)

Let the bacon cool for a minute or two then transfer to the parchment paper. It will be a bit flexible while it’s still hot from the oven but will cool into crisp pieces.

Serve the bacon warm or at room temperature. Store in the refrigerator in an airtight container, layered with parchment paper or wax paper in between. You can warm it in the microwave or in a dry pan over low heat.

Recipe from The Cafe Sucre Farine

]]>
https://thefancypantskitchen.com/recipe/maple-mustard-candied-bacon/feed/ 0
Crispy Miso Lime Tofu Lettuce Wraps https://thefancypantskitchen.com/recipe/crispy-miso-lime-tofu-lettuce-wraps/ https://thefancypantskitchen.com/recipe/crispy-miso-lime-tofu-lettuce-wraps/#respond Thu, 02 Jan 2025 18:47:33 +0000 https://thefancypantskitchen.com/?post_type=ranna_recipe&p=26183

These delicious Crispy Miso Lime Tofu Lettuce Wraps are a wonderful way to get your “healthy” back on.  After weeks and weeks of unhealthy eating (you know what I’m talking about), I’m craving clean, light eating!  

Crispy chunks of delightfully flavored tofu are wrapped in tender butter lettuce leaves and topped with sesame seeds, chopped peanuts and cilantro.  Fresh, tasty and perfect as an appetizer or light main course.

The sauce is delicious!  Combine lime juice, soy sauce, miso, vinegar, honey, ginger and spices and mix it into a smooth sauce.  You’ll have to mash the miso against the side of the bowl to break it up.

Either crumble the tofu by hand and squeeze it dry or press the tofu ahead of time and then break into chunks.

Add oil to a very hot skillet and then add the crumbled tofu in an even layer.  Let it sit undisturbed for a few minutes.  Give it a stir and let it sit another 3 minutes or so.  Keep doing this until a crispy browned crust is all over the tofu bits.  

Add the sauce and stir until it’s all absorbed into the tofu.  This will take about one minute.

To serve, fill lettuce leaves with crispy tofu and top with any of the toppings recommended in the recipe.  I like sesame seeds, chopped nuts and cilantro!

Share Your Thoughts...

Lastly, if you make Crispy Miso Lime Tofu Lettuce Wraps, be sure to leave a review down below at the bottom of this page (stars are also appreciated)! Above all, I love to hear from you and always do my best to respond to each and every review. And of course, if you do make this recipe, don’t forget to tag me on Instagram! Looking through the photos of recipes you all have made is one of my favorite things to do!

Crispy Miso Lime Tofu Lettuce Wraps

Makes: 2-4 servings

Prep Time: 15 minutes

Cook Time: 15 minutes

Total Time: 30 minutes

Ingredients

  • 1 head butter lettuce
  • 2 limes
  • 2 tbsp low-sodium soy sauce
  • 1 tbsp white or yellow miso
  • 1 tbsp rice vinegar
  • 2 tbsp honey
  • 1/2 tsp ground ginger
  • 1/2 tsp garlic powder
  • 1/4 tsp red pepper flakes
  • 1 (14- to 16-ounce) block extra firm tofu, pressed if time permits, see notes below
  • 3 tbsp neutral oil or extra-virgin olive oil

Toppings (optional):

  • sesame seeds, sliced scallions, fresh herbs (mint and cilantro are nice), chopped peanuts or cashews

Instructions

Pull the leaves off the head of butter lettuce, then wash and dry them. Cut the limes in half. (Note: Depending on the size, you’ll need roughly 8 to 10 lettuce leaves.)

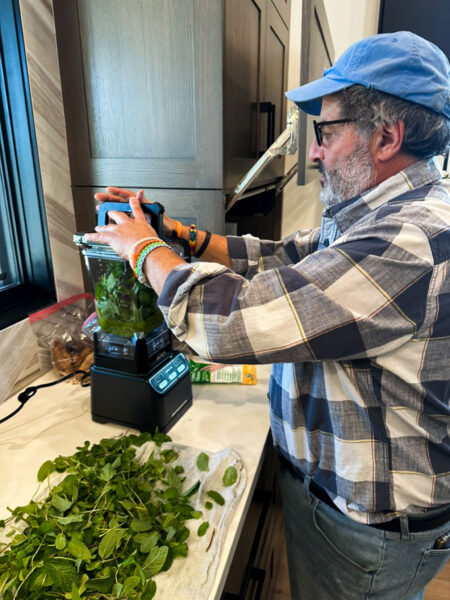
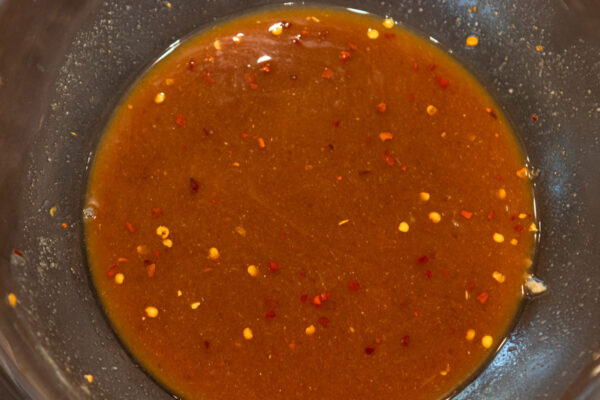
In a medium bowl or liquid measuring cup, stir together the juice of 1 lime (about 3 tablespoons), the soy sauce, 2 tablespoons water, the miso, vinegar, honey, ginger, garlic powder, and red pepper flakes. Smash the miso against the side of the cup to be sure it incorporates to make a smooth sauce.

Warm your largest skillet over medium-high heat. If you did not press the tofu ahead of time, working over the sink, remove the tofu from the container, pour out any liquid, and reserve the container. Use your hands to break the tofu into a few pieces and squeeze out as much liquid as you possibly can. This won’t be pretty! It’ll break apart into little bits. That’s perfect, you’re doing it right. When you feel like you’ve squeezed all the liquid you can out of the tofu, place it back in the container it came in. If you did press the tofu ahead of time, crumble the tofu into a medium bowl.

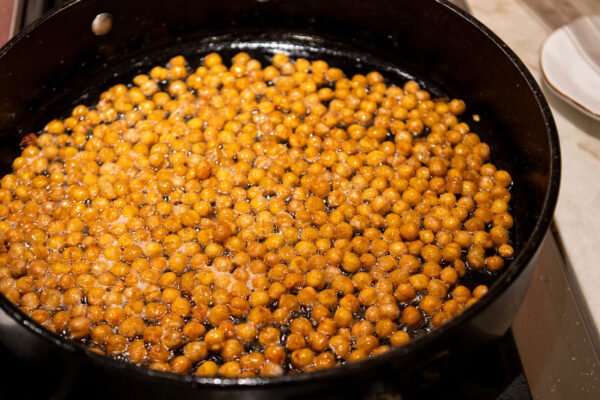
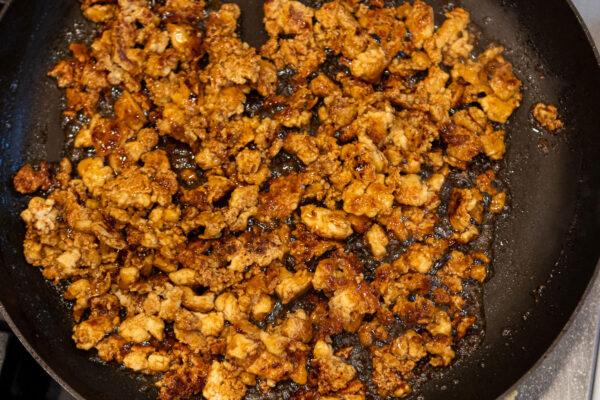
Add the oil to the super hot skillet. When it shimmers, add the squeezed, crumbled tofu in an even layer and let it sit, undisturbed, for 3 minutes. Give it a stir, then let it sit for 3 minutes more. It should start to look crispy and golden brown at this point. Keep going with this stir-and sit pattern once or twice more, adding more oil to the pan as needed, until the tofu is crispy all over (9 to 12 minutes total). Add the sauce and stir rapidly until it’s all absorbed into the tofu, not even a minute. Turn off the heat.

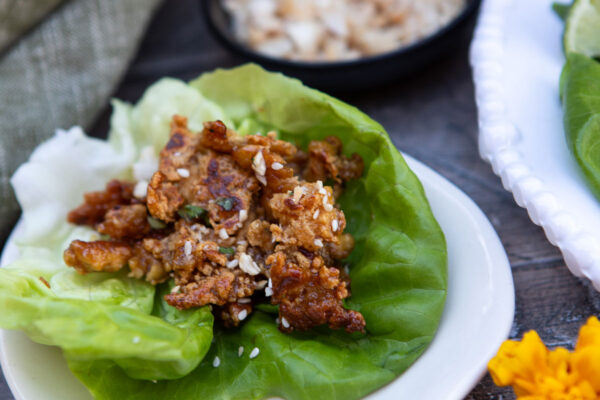
To serve, fill the lettuce leaves with the crispy tofu and any of the suggested toppings. Squeeze the juice from the remaining lime over top just before eating.

Chef’s Notes:

I find that the tofu browns up a little easier if you press it ahead of time. You absolutely do not have to press it ahead of time, so don’t let this deter you — again I have made it several times without pressing it — but if you have the time, press it. I like to wrap my block in a clean dish towel, set it on a cooling rack over a tray, and weigh it down with a 28-ounce can of tomatoes set in the container the tofu was packaged in. Let it sit for 30 minutes or more.

Honey: To make this vegan, replace the honey with maple syrup, agave or brown sugar.

Recipe from Alexandra’s Kitchen

]]>
https://thefancypantskitchen.com/recipe/crispy-miso-lime-tofu-lettuce-wraps/feed/ 0
Sausage and Apple Stuffing Bites https://thefancypantskitchen.com/recipe/sausage-and-apple-stuffing-bites/ https://thefancypantskitchen.com/recipe/sausage-and-apple-stuffing-bites/#respond Sat, 16 Nov 2024 17:49:10 +0000 https://thefancypantskitchen.com/?post_type=ranna_recipe&p=25793

Take all the wonderful ingredients of Thanksgiving stuffing and make them into these tasty Sausage and Apple Stuffing Bites.  They are the perfect little appetizers with the combination of sweet Italian sausage pieces, tiny chunks of Granny Smith apples and toasted bread.

Surprise your guest with these delicious morsels of lovin’ goodness!

Begin this recipe by tossing the bread cubes with olive oil.  Season with salt and pepper and toast in a preheated oven about 10 minutes.  Transfer the croutons to a bowl.

In a large skillet, cook the onion and celery in olive oil until golden, about 5 minutes.  Add the sausage, garlic and sage and cook another 5 minutes or so, breaking up the sausage.  There shouldn’t be any traces of pink left in the sausage.

Stir the sausage mixture, apple chunks, eggs and broth into the croutons and let sit for 5 minutes.

Pack the stuffing into prepared muffin cups and bake for 20-25 minutes or until they are golden.  Transfer the muffin pan to a rack and let sit for 5 minutes.  Carefully loosen the muffins with a sharp knife and lift them out.

Serve warm.

Share Your Thoughts...

Lastly, if you make Sausage and Apple Stuffing Bites, be sure to leave a review down below at the bottom of this page (stars are also appreciated)! Above all, I love to hear from you and always do my best to respond to each and every review. And of course, if you do make this recipe, don’t forget to tag me on Instagram! Looking through the photos of recipes you all have made is one of my favorite things to do!

Sausage and Apple Stuffing Bites

Makes: 24 mini muffins

Prep Time: 15 minutes

Bake Time: 45 minutes

Total Time: 1 hour

Ingredients

  • Vegetable cooking spray
  • 4 ounces white country bread, cut into 1/2-inch cubes (3 cups)
  • 1/4 cup extra-virgin olive oil, divided
  • Kosher salt
  • Freshly ground pepper
  • 2 tbsp unsalted butter
  • 2/3 cup finely chopped onion
  • 2/3 cup finely chopped celery
  • 1/2 pound sweet Italian sausage, casings removed
  • 6 garlic cloves, finely chopped
  • 3/4 tsp dried sage
  • 1 small Granny Smith apple, peeled and finely chopped
  • 4 large eggs, beaten
  • 2 tbsp chicken broth

Instructions

Preheat the oven to 350°F. Grease two 12-cup mini-muffin pans with cooking spray.

On a baking sheet, toss together the bread and 2 tablespoons of the oil; season with salt and pepper. Bake in preheated oven until toasted, about 10 minutes. Transfer the croutons to a bowl. (Do not turn the oven off.)

Meanwhile, in a large skillet, melt the butter in the remaining 2 tablespoons oil. Add the onion and celery, and cook over moderately high heat, stirring occasionally, until golden, about 5 minutes. Add the sausage, garlic, and sage; cook, stirring and breaking up the meat, until no trace of pink remains, about 5 minutes.

Stir the sausage mixture, apple, eggs, and broth into the croutons. Season with salt and pepper. Let stand for 5 minutes.

Pack the stuffing into the muffin cups, and bake for 20 to 25 minutes, until golden. Transfer to a rack, and let stand for 5 minutes. Carefully loosen the muffins with a sharp paring knife and lift them out. Serve warm.

Recipe from Food & Wine

]]>
https://thefancypantskitchen.com/recipe/sausage-and-apple-stuffing-bites/feed/ 0
Piled-High Tostada Cups https://thefancypantskitchen.com/recipe/piled-high-tostada-cups/ https://thefancypantskitchen.com/recipe/piled-high-tostada-cups/#comments Fri, 18 Oct 2024 20:14:57 +0000 https://thefancypantskitchen.com/?post_type=ranna_recipe&p=25594

Here’s an idea for a delicious appetizer:  Piled-High Tostada Cups!  Made with chicken and black beans, this tasty concoction is easy to make ahead and is a hit at all gatherings!

Easily make your own little tostada cups and fill them with a Mexican-inspired chicken mixture and top them with guacamole.  Set them on a platter and watch them disappear!

Making the tostada cups is a snap!  Cut a flour tortilla into 8 wedges and gently form each wedge to fit into a muffin cup.  Bake it for 8 minutes and set it aside to cool.

To make the chicken-bean mixture, poach the chicken breasts with onion, garlic, parsley, mint, bay leaf and salt in water for 10 minutes.  Turn off the heat and let the chicken sit covered in the pot for another 10 minutes.  Remove the chicken from the water and once cool, shred the chicken.

For the beans, heat a saucepan and olive oil and add the beans and cumin.  Stir in the remaining ingredients and cook over low heat until syrupy.  Add the chicken and stir.  Remove from the heat.

To assemble, top each tostada cup with a spoonsful of the chicken-bean mixture followed by a dollop of guacamole.

I love that I can make all of the components ahead of time and just reheat the chicken-bean mixture prior to assembling.  It makes it so easy!

Share Your Thoughts...

Lastly, if you make Piled-High Tostada Cups, be sure to leave a review down below at the bottom of this page (stars are also appreciated)! Above all, I love to hear from you and always do my best to respond to each and every review. And of course, if you do make this recipe, don’t forget to tag me on Instagram! Looking through the photos of recipes you all have made is one of my favorite things to do!

Piled-High Tostada Cups

Makes: 32 cups

Prep Time: 25 minutes

Cook Time: 35 minutes

Total Time: 1 hour

Ingredients

Tortilla Cups:

  • 4 (8-inch) flour tortillas
  • 2 tbsp olive oil
  • 1 tsp kosher salt

Chicken:

  • 4 boneless, skinless chicken breast halves
  • 1 small white onion, quartered
  • 2 large garlic cloves, peeled and smashed
  • 1/4 cup coarsely chopped fresh flat-leaf parsley
  • 3 fresh mint leaves
  • 1 dried bay leaf
  • 1 tsp kosher salt

Bean Mixture:

  • 1 tsp vegetable oil
  • 2 cups canned black beans, rinsed and drained
  • 1 tsp ground cumim
  • 1 cup ketchup
  • 2 tbsp honey
  • 2 tbsp orange juice
  • 2 tbsp soy sauce
  • 2 tbsp sherry vinegar
  • 1 tbsp chipotle chilis in adobo sauce, chopped

To Finish:

  • 1 cup guacamole, homemade or store-bought

Instructions

Tortilla Cups:

Preheat the oven to 400°F. Coat a standard size muffin tin with non-stick cooking spray. Brush both side of the tortillas with olive oil and sprinkle with salt. Cut each tortilla into 8 wedges.

Working in batches, mold each tortilla triangle to fit the muffin cups and bake 7-8 minutes until crisp and golden.Remove from muffin tin and set aside.

Chicken:

In a large pot, combine all of the ingredients for the chicken. Add 8 cups of water and bring to a boil over high heat. Reduce heat and simmer covered for 10 minutes. Turn heat off and let sit covered an additional 10 minutes.Remove chicken from broth, allow to cool slightly and then shred chicken.

Beans:

In a medium saucepan, heat oil over high heat. Add beans and cumin, stirring 1 minute. Add remaining ingredients. Lower heat to medium and continur to cook umtil sauce is syrupy, about 5 minutes. Add shredded chicken, stir to coat, and remove from heat.

To Assemble:

Top each baked tortilla cup with a heaping spoonful of the chicken and bean mixture followed by a dollop of guacamole. Serve immediately.

Recipe from Bite Me More

]]>
https://thefancypantskitchen.com/recipe/piled-high-tostada-cups/feed/ 2
Ultimate Burrata Board https://thefancypantskitchen.com/recipe/ultimate-burrata-board/ https://thefancypantskitchen.com/recipe/ultimate-burrata-board/#respond Mon, 26 Aug 2024 17:44:15 +0000 https://thefancypantskitchen.com/?post_type=ranna_recipe&p=25107

With summer about to leave us, how about this Ultimate Burrata Board to celebrate the end of the season?  Ripe cherries, fresh peaches, gorgeous heirloom tomatoes and creamy burrata all combine to make this the easiest and most delightful appetizer I’ve served in a long time!

The beauty is that it is interchangeable with other fruit, meat and herbs.  Feel free to use nectarines, melon and plums, salami and jamon, oregano…you get the idea!  

Begin by framing the top and the bottom of the board with peach slices and tomato wedges.  In between, lay out the burrata.  Slice it open and spread it out.  The creamy filling will spill out onto the board which makes it easier to scoop onto crackers.  Drizzle the burrata with olive oil, salt and freshly ground pepper.

Lay the prosciutto next to the burrata.  I like to fold a slice back and forth to create a ribbon.  Center cherry halves in the middle of the board.

Sprinkle basil on the cherries and mint leaves on the peaches.  Serve with crackers or toasted country bread.  Enjoy!

Share Your Thoughts...

Lastly, if you make Ultimate Burrata Board, be sure to leave a review down below at the bottom of this page (stars are also appreciated)! Above all, I love to hear from you and always do my best to respond to each and every review. And of course, if you do make this recipe, don’t forget to tag me on Instagram! Looking through the photos of recipes you all have made is one of my favorite things to do!

Ultimate Burrata Board

Makes: 6 servings

Prep Time: 15 minutes

Total Time: 15 minutes

Ingredients

  • 2 balls burrata cheese
  • 2 ripe peaches, cut into uniform wedges
  • 2 heirloom tomatoes, cut into uniform wedges like the tomatoes
  • 2 cups ripe cherries, pitted and sliced
  • 3 ounces prosciutto
  • Basil leaves
  • Mint leaves
  • Olive Oil
  • Kosher salt
  • Freshly ground pepper

Instructions

Place tomatoes at the bottom of the board. Lay peaches at the top of the board.

Place two rows of burrata (1 ball each, which likely means two containers of burrata). Cut the burrata balls on the board so that the delicious creamy inside was still sitting inside some of the mozzarella outer shell. Drizzle burrata with olive oil and sprinkle salt + pepper

Lay out the prosciutto. Pre-cut pieces in half width wise, so it’s easier to serve. In order to make the presentation look pretty, simply place the bottom end of the prosciutto slices and have the rest ripple down to create a subtle ribbon look.

Add basil on top of the tomatoes and mint on top of the peaches. Sprinkle with kosher salt and freshly ground pepper. Serve with crackers or toasted bread.

]]>
https://thefancypantskitchen.com/recipe/ultimate-burrata-board/feed/ 0
Summer Ricotta with Grilled Vegetables https://thefancypantskitchen.com/recipe/summer-ricotta-with-grilled-vegetables/ https://thefancypantskitchen.com/recipe/summer-ricotta-with-grilled-vegetables/#respond Sun, 04 Aug 2024 17:01:18 +0000 https://thefancypantskitchen.com/?post_type=ranna_recipe&p=24973

Summer Ricotta with Grilled Vegetables is a wonderful starter to a summer gathering.  Homemade ricotta is the star of this dish…it’s so easy to make, you’ll wonder why you’ve never done it before! Grilled zucchini, peppers, eggplant, lemons and sourdough bread are the perfect accompaniment to this creamy ricotta.

I make homemade ricotta a lot!  It’s so easy and far more superior than store-bought.  But, if you’re in a pinch, you can use store-bought…I won’t judge!

To make it, line a colander with cheesecloth and set it over a large bowl.

In a saucepan, heat the milk, cream and salt until just below a simmer.  Stir in the lemon juice and let it sit for about 5 minutes.  This will curdle the milk.  Then pour it through the cheesecloth.

Let it sit for a bit until it’s drained to the consistency that you like.  Transfer it to a serving bowl and drizzle olive oil over and sprinkle with salt and pepper.

Drizzle the vegetables and bread with olive oil.  Grill them until there is a light char to the veggies and bread.  Flip and repeat. 

Season everything with salt and pepper and transfer to a serving platter.

Right before serving, drizzle everything with more olive oil, squeeze some of the lemon over the top and season with additional salt and pepper.

You can also drizzle with balsamic vinegar, if you like.

Share Your Thoughts...

Lastly, if you make Summer Ricotta with Grilled Vegetables, be sure to leave a review down below at the bottom of this page (stars are also appreciated)! Above all, I love to hear from you and always do my best to respond to each and every review. And of course, if you do make this recipe, don’t forget to tag me on Instagram! Looking through the photos of recipes you all have made is one of my favorite things to do!

Summer Ricotta with Grilled Vegetables

Makes: 4 servings

Prep Time: 15 minutes

Cook Time: 25 minutes

Total Time: 40 minutes

Ingredients

Ricotta:

  • 4 cups whole milk
  • 1/4 cup heavy cream
  • 1/2 tsp kosher salt
  • 3 tbsp freshly squeezed lemon juice

To Serve:

  • 1 pound (455 grams) mixed summer vegetables, thinly sliced
  • 8 slices from a large sourdough loaf
  • Olive oil
  • Kosher salt and freshly ground black pepper
  • 1 lemon, halved

Instructions

Make the Ricotta:

Line a fine-mesh or other tiny-holed strainer with a layer or two of cheesecloth and set it over a large bowl with enough clearance that the bottom of the strainer won’t touch the bowl once it has 4 cups of liquid in it, or the cheese won’t drain.

In a heavy medium-large saucepan, heat the milk, cream, and salt over medium-high heat until just below a simmer (it will look like it’s foaming and register just below 200°F). Remove the pot from the heat and stir in lemon juice. Let it sit for 5 minutes, then pour it through the cheesecloth.

Drain for 10 minutes, or until it’s a nice soft ricotta consistency, and up to 10 minutes longer if needed. The amount of time it takes to drain has to do with the size of your cheesecloth holes. Transfer ricotta to a bowl to serve. Drizzle with olive oil, and finish with salt and pepper.

Grill the bread and vegetables: Brush or drizzle your vegetables and bread with olive oil. Grill the vegetables, bread, and lemon halves until they’re lightly charred underneath (depending on how robust your grill is, this could take 2 to 6 minutes), then flip the vegetables and bread and cook on the second side. Season with the vegetables with salt and pepper and transfer everything to a serving platter.

Right before serving, drizzle everything with additional olive oil, squeeze at least one lemon half over the vegetables (leave the second half on the platter), and season with additional salt and pepper. You could also drizzle some balsamic vinegar over, or keep it on the side.

Leftover ricotta is not a thing that exists, but it theoretically keeps for 3 days in the fridge.

Recipe by Smitten Kitchen

]]>
https://thefancypantskitchen.com/recipe/summer-ricotta-with-grilled-vegetables/feed/ 0
Tomato Peach Crostini https://thefancypantskitchen.com/recipe/tomato-peach-crostini/ https://thefancypantskitchen.com/recipe/tomato-peach-crostini/#comments Tue, 09 Jul 2024 16:31:03 +0000 https://thefancypantskitchen.com/?post_type=ranna_recipe&p=24808

I can’t think of a more perfect appetizer during fresh peach and tomato season than Tomato Peach Crostini!  Peach wedges and tomatoes get tossed in a lovely bacon dressing and then topped over grilled bread that has been shmeared with goat cheese.  Summer in a bite!

In less than 30 minutes you have a delicious appetizer that reflects all the beauty and wonder of summer stonefruit.

Combine all of the ingredients for the dressing (except for the bacon) in a jar and and whisk until smooth.  Champagne or white balsamic vinegar is used here to not darken up the dressing (in a pinch, use balsamic vinegar).  Adding fig jam or honey provides a tasty sweetness.  Mix in some fresh basil and chili flakes for a touch of heat and herbiness.

Cook the bacon pieces in a skillet until they are crisp.  Drain them on paper towels and then stir into the dressing.

Go ahead and preheat your grill.  If you are one of the unfortunate folks who do not have a grill, an oven preheated to 400°F will also work but won’t provide the lovely grill marks that I adore.

Drizzle the sliced baguette with garlic oil and then grill for 2-3 minutes per side, watching closely to not burn the bread.

Toss the peaches and tomatoes with a few tablespoons of the dressing.

Spread the bread with softened goat cheese and top with peaches, tomatoes, fresh basil leaves and more dressing.

Serve these tasty bites with a cold glass of rosé!

Share Your Thoughts...

Lastly, if you make Tomato Peach Crostini, be sure to leave a review down below at the bottom of this page (stars are also appreciated)! Above all, I love to hear from you and always do my best to respond to each and every review. And of course, if you do make this recipe, don’t forget to tag me on Instagram! Looking through the photos of recipes you all have made is one of my favorite things to do!

Tomato Peach Crostini

Makes: 8 servings

Prep Time: 15 minutes

Cook Time: 15 minutes

Total Time: 30 minutes

Ingredients

Dressing:

  • 6 thick-cut slices of bacon, chopped
  • 1/4 cup extra virgin olive oil
  • 2 tbsp champagne or white balsamic vinegar
  • 1 tbsp fig preserves or honey
  • 1/4 cup fresh basil, chopped
  • chili flakes
  • kosher salt and black pepper

Crostini:

  • 1/4 cup extra virgin olive oil
  • 2 cloves garlic, chopped
  • 1 sourdough or french baguette, sliced
  • 1 log goat cheese, at room temperature
  • 2 peaches, chopped or sliced
  • 1 cup cherry tomatoes, halved

Instructions

To make the dressing, combine all ingredients except the bacon in a glass jar and whisk until smooth.

Cook the bacon in a large skillet over medium heat until crisp. Drain onto a paper towel. Stir the bacon into the dressing.

Preheat your grill to high heat or preheat your oven to 400° F.

To make the crostini, mix the olive oil, garlic, and a pinch of salt. Place the bread on a baking sheet and rub/drizzle with the garlic oil. Place the bread on the grill and grill both sides for 2-3 minutes per side or until lightly toasted. Remove from the grill.

Toss the peaches and tomatoes with a few tablespoons of dressing. Spread the goat cheese over the warm bread. Top with the dressing, peaches/tomatoes, and fresh basil. Drizzle over the remaining dressing.

Recipe by Half Baked Harvest

]]>
https://thefancypantskitchen.com/recipe/tomato-peach-crostini/feed/ 2
Parmesan Candied Bacon Crackers https://thefancypantskitchen.com/recipe/parmesan-candied-bacon-crackers/ https://thefancypantskitchen.com/recipe/parmesan-candied-bacon-crackers/#comments Wed, 26 Jun 2024 20:35:55 +0000 https://thefancypantskitchen.com/?post_type=ranna_recipe&p=24772

For the simplest and most crowd-pleasing appetizer, you must try Parmesan Candied Bacon Crackers.  With only 5 ingredients, you can prep these ahead of time and pop them in the oven before serving.

The flavor is amazing…combining dark brown sugar, Parmesan cheese and bacon over a buttery Club cracker and sprinkled with a bit of heat…well, all I can say is “delish”!!!

Place a thin slice of parmesan cheese on a Club cracker, then top in with a slice of bacon.  Sprinkle brown sugar and red pepper flakes over the bacon and bake for 35-45 minutes.

You can turn the broiler on for a minute or two if you want the bacon a little more caramelized but watch them carefully so they don’t burn!

Serve these warm or at room temperature.  They are addictive!!

Share Your Thoughts...

Lastly, if you make Parmesan Candied Bacon Crackers, be sure to leave a review down below at the bottom of this page (stars are also appreciated)! Above all, I love to hear from you and always do my best to respond to each and every review. And of course, if you do make this recipe, don’t forget to tag me on Instagram! Looking through the photos of recipes you all have made is one of my favorite things to do!

Parmesan Candied Bacon Crackers

Makes: 44 crackers

Prep Time: 15 minutes

Bake Time: 40 minutes

Total Time: 55 minutes

Ingredients

  • 1 pound thin-sliced bacon
  • 1 & 1/2 sleeves Club crackers (about 44 crackers)
  • 8 ounces Parmesan cheese wedge
  • 1/2 cup dark brown sugar
  • 1 tbsp red pepper flakes

Instructions

Preheat oven to 300°F. Line a baking sheet with foil or parchment paper to catch the drippings from the crackers and place a cooling rack on top the lined baking sheet.

To prep, thinly slice parmesan wedge, trying to match the width and length of the Club crackers. Slice the bacon into fours so they also match the length of the crackers.

To assemble, place one piece of parmesan onto the cracker, top with bacon, followed by the brown sugar, and finally the red pepper flakes. Repeat with remaining crackers.

Place each cracker onto the cooling rack side by side. Bake in the oven for 35-45 minutes, rotating the pan halfway through. Begin checking on them at 30 minutes. Once the bacon is cooked through and the edges of the crackers begin to brown, they are finished.

Serve warm or at room temperature.

Chef’s Note:

Store in the fridge in an air tight container for up to 4 days. To serve from the fridge, simply allow the crackers to return to room temp before serving.

Recipe by Bad Batch Baking

]]>
https://thefancypantskitchen.com/recipe/parmesan-candied-bacon-crackers/feed/ 5
The Best Chex Mix https://thefancypantskitchen.com/recipe/the-best-chex-mix/ https://thefancypantskitchen.com/recipe/the-best-chex-mix/#respond Sat, 08 Jun 2024 23:36:12 +0000 https://thefancypantskitchen.com/?post_type=ranna_recipe&p=24688

This is The Best Chex Mix, hands down!  I’ve tried many different recipes, but this one is addictive.  You won’t be able to stop!

While there are lots of ways to make this and many ingredients you can add, I like the simplicity of Chex cereal (any one or combination is great), goldfish, mini pretzel twists and honey-roasted mixed nuts.  No reason to complicate things, in my opinion!

Bake them with a tangy sauce of butter, Worcestershire, spices and tabasco for a bit of heat. 

That’s all there is to it!

Place the cereal, pretzels, crackers and nuts in a large bowl.  

Combine all of the sauce ingredients in a separate bowl and then pour over the chex mix.

Toss gently to coat all of the chex mix ingredients.

Bake at a low heat for about an hour, stirring often.  Remove from the oven and let cool.

Enjoy the heck out of this delicious snack!

Share Your Thoughts...

Lastly, if you make The Best Chex Mix, be sure to leave a review down below at the bottom of this page (stars are also appreciated)! Above all, I love to hear from you and always do my best to respond to each and every review. And of course, if you do make this recipe, don’t forget to tag me on Instagram! Looking through the photos of recipes you all have made is one of my favorite things to do!

The Best Chex Mix

Makes: 10 servings

Prep Time: 5 minutes

Bake Time: 1 hour

Total Time: 1 hour & 5 minutes

Ingredients

  • 3 cups Chex cereal (any one or a combination)
  • 3 cups cheese crackers of goldfish crackers
  • 3 cups mini pretzel twists
  • 1 cup honey-roasted mixed nuts

For the Sauce:

  • 1/3 cup unsalted butter , melted
  • 3 tbsp Worcestershire sauce
  • 2 tsp seasoned salt (I recommend Lawry’s)
  • 1 & 1/2 tsp garlic powder
  • 1/2 tsp onion powder
  • 1/4 tsp cayenne pepper (for spice) or smoked paprika
  • 1 tbsp tabasco or hot pepper sauce, optional

Instructions

Place the cereal, cheese crackers, pretzels and nuts into a large bowl.

Mix together the melted butter, Worcestershire sauce, seasoned salt, garlic powder, onion powder and cayenne.

Slowly drizzle the butter mixture over the cereal, while tossing gently, to coat.

Preheat the oven 250°F. Transfer the Chex Mix onto two baking sheets, spreading it into an even layer. Bake for 1 hour, stirring every 20 minutes. Remove from oven and allow to cool before serving.

Make Ahead Instructions:

Chex mix tastes freshest when served within 2-3 days of making it, but it will last stored in an air-tight container at room temperature for up to 2 weeks.

Freezing Instructions:

Chex mix freezes great! Store in freezer-safe container or bag for up to 3 months. Serve immediately or store in a sealed container for up to 2 weeks.

Other Mix-in’s and Variations:

Substitute your favorite mix-in’s in a ratio of 1:1 for the mix ins in this recipe.

  • Plain Cheerios
  • Variety of nuts: choose your favorite- pistachio, cashews, macadamia, etc.
  • Bagel chips
  • Popcorn
  • Cheetos
  • Corn chips or Bugles
  • Raisins
  • Make it spicy: Add 1-2 tablespoons Tabasco or hot pepper sauce to the melted butter mixture.
  • Make sweet Chex mix- Substitute honey, cinnamon, chocolate or vanilla chex and use mix-ins like honey grahams, craisins, m&m’s, coconut, chocolate chips, marshmallows, or small candies. Drizzle with a sweet syrup or melted chocolate.
  • Substitute cereal: This recipe uses 9 cups of chex cereal. Substitute any other type of chex cereal to total 9 cups.
  • For nut Allergy: omit the nuts and use more of the crackers or pretzels.
]]>
https://thefancypantskitchen.com/recipe/the-best-chex-mix/feed/ 0
Charoset https://thefancypantskitchen.com/recipe/charoset/ https://thefancypantskitchen.com/recipe/charoset/#respond Wed, 10 Apr 2024 19:07:56 +0000 https://thefancypantskitchen.com/?post_type=ranna_recipe&p=24349

Charoset is a traditional part of the Passover seder and this recipe is the best!  My father, of blessed memory, used to make this every Passover and it was one that we could never get enough of!!

Charoset is meant to symbolize the mortar that was used by the Israelites when they were enslaved in Ancient Egypt.  

It is a combination of apples, nuts, spices, honey and red wine.  And, boy, is it good!  We get to eat it twice during the seder.  The first time is with a bite of bitter herb (maror) and the second time we make it into a “hillel” sandwich between two pieces of matzah with a slice of the bitter herb.  And then we just eat it because it’s so darn good!

This is a very simple recipe.  Begin by peeling, coring and chopping the apples.  I like to use Honeycrisp or Granny Smith apples.  I like the crunch of these two types.  The Honeycrisp will be a little sweeter so if you like a tart apple, try the Granny Smiths.

Once chopped, toss them together with the chopped nuts, ginger, cinnamon, sugar and honey.

Stir in red wine and then cover and place in the refrigerator for at least 6 hours for the flavors to ripen.

Right before serving, stir in another tablespoon of red wine.

This recipe will be a hit for your Passover celebration!

Share Your Thoughts...

Lastly, if you make Charoset, be sure to leave a review down below at the bottom of this page (stars are also appreciated)! Above all, I love to hear from you and always do my best to respond to each and every review. And of course, if you do make this recipe, don’t forget to tag me on Instagram! Looking through the photos of recipes you all have made is one of my favorite things to do!

Charoset

Makes: 1 & 1/2 cups

Prep Time: 5 minutes

Chill Time: 6-24 hours

Total Time: 5 minutes & 6 hours minimum

Ingredients

  • 3 medium apples (I like Honey Crisp or Granny Smiths)
  • 1/2 cup chopped walnuts or almonds
  • 1/2 tsp ground ginger
  • 1/2 tsp cinnamon
  • 1 & 1/2 tbsp sugar
  • 2 tbsp honey
  • 3 tbsp red Concord grape wine

Instructions

Peel, core and chop the apples moderately coarse. In a bowl, toss with the chopped nuts. Mix in the ginger, cinnamon, sugar and honey.

Stir in 2 tablespoons red wine and adjust the seasonings. This should ripen in the refrigerator, covered, for at least 6 hours before it is served and is even better if it sits for 24 hours.

Before serving, stir in the remaining 1 tablespoon wine.

]]>
https://thefancypantskitchen.com/recipe/charoset/feed/ 0