EASY PEASY COOKIES, DONUTS & BITES – The Fancy Pants Kitchen https://thefancypantskitchen.com Quick and Easy Recipes Sun, 11 May 2025 23:48:47 +0000 en-US hourly 1 https://wordpress.org/?v=6.8.1 https://thefancypantskitchen.com/wp-content/uploads/2021/02/cropped-Favicon-1-32x32.jpg EASY PEASY COOKIES, DONUTS & BITES – The Fancy Pants Kitchen https://thefancypantskitchen.com 32 32 Perfect Chocolate Chip Cookies https://thefancypantskitchen.com/recipe/perfect-chocolate-chip-cookies/ https://thefancypantskitchen.com/recipe/perfect-chocolate-chip-cookies/#respond Sun, 11 May 2025 23:48:47 +0000 https://thefancypantskitchen.com/?post_type=ranna_recipe&p=27362

Perfect Chocolate Chip Cookies are, well, perfect!  Made in a saucepan (yes, I know, weird but cool), the deep flavors of butter and brown sugar flow through each bite. Studded with dark chocolate chunks and chips, they are delicious and riddled with chocolate.  Could we ask for anything more?  I don’t think so!

Begin by melting butter in a saucepan and adding the sugars. It will begin as a grainy mixture but as the butter melts the sugar, it will become more like caramel.  Set it aside to cool before adding the eggs.

Then whisk in the eggs and vanilla.  Fold in the dry ingredients and when the dough is no longer warm, add the chocolate chunks.

Chill for 30 minutes and then use a scoop to make balls of dough.

Add a few extra chocolate chips to the top of each ball and bake until golden brown in color.  Once out of the oven, you can use a spatula, if desired, to form into perfect circles, or not.  It’s up to you.  I like a more rustic look, so I left them unformed.

Enjoy these delicious snacks!

Share Your Thoughts...

Lastly, if you make Perfect Chocolate Chip Cookies, be sure to leave a review down below at the bottom of this page (stars are also appreciated)! Above all, I love to hear from you and always do my best to respond to each and every review. And of course, if you do make this recipe, don’t forget to tag me on Instagram! Looking through the photos of recipes you all have made is one of my favorite things to do!

Perfect Chocolate Chip Cookies

Makes: 24 cookies

Prep Time: 15 minutes

Bake Time: 8 minutes per sheet

Total Time: 30 minutes plus chill time 45 minutes 

Ingredients

  • 1 cup unsalted butter
  • 1 cup dark brown sugar
  • 1/2 cup sugar
  • 2 large eggs
  • 2 tsp vanilla extract
  • 2 & 1/3 cups all-purpose flour
  • 1 tsp baking soda
  • 1 tsp salt
  • 1 & 3/4 to 2 cups semi-sweet chocolate chips or chunks

Instructions

Heat a deep saucepan over medium heat. Add butter and let it completely melt. Once the butter is completely melted (see notes if you would like to brown the butter), remove from heat and add sugars and whisk together until completely smooth and no longer grainy at all. It should look smooth like dark caramel. Set aside for 15-20 minutes to allow to come to room temperature before adding the eggs.

Stir in vanilla extract and eggs and mix until it is completely combined.

Fold in flour, baking soda, and salt. Stir until combined. Check to make sure the cookie dough isn’t too warm before adding the chocolate. If the cookie dough is too warm, it will melt the chocolate. If it is warm at all, I suggest covering the pan and placing it in the refrigerator for 5-10 minutes.

Remove from the refrigerator and fold in the chocolate chips or chocolate chunks. Cover and place in the refrigerator to chill for 30 minutes. You can chill for 24-48 hours if you prefer. If you chill the dough for 24 hours, let the dough sit at room temperature for 1 hour (to make it easier to scoop and to be less crumbly).

Preheat oven to 375°F. Use a cookie scoop and place 3-ounce chocolate chip cookie balls on light-colored baking sheets. The dough may be slightly difficult to scoop so I suggest using a cookie scoop. Roll into balls (make sure they look smooth) and press several chocolate chips or chunks on the top of each cookie. Bake for 8-10 minutes or just until a light golden color. Do not over-bake! The cookies will continue to bake on the hot cookie sheet once removed from the oven.

Form and shape your cookies after baking. After removing from the oven, take a spatula and press the edges toward the center to form a perfect circle, or take a glass slightly larger than the cookie and place it on the top of each cookie and just move it around the cookie until a perfectly round circle is formed.

Chef’s Note:

To brown the butter, melt butter over medium-low heat. The butter will go through different phases. It will begin to melt and bubble. Take a wooden spoon or spatula and stir often and around the sides of the pan. Let the butter melt and watch for it to begin changing colors from a creamy yellow to a deep amber yellow.elt butter over medium-low heat. The butter will go through different phases. It will begin to melt and bubble. Take a wooden spoon or spatula and stir often and around the sides of the pan. Let the butter melt and watch for it to begin changing colors from a creamy yellow to a deep amber yellow.

The butter will begin to foam and this is why it is important to stir often so you can see what is going on below the foam. Small brown bits will begin to form and that will be a signal that the butter is officially browned. Butter can burn quickly so watch carefully. It is better to pull off of the heat a little early instead of browning too long and risk burning it.

Recipe from Modern Honey

]]>
https://thefancypantskitchen.com/recipe/perfect-chocolate-chip-cookies/feed/ 0
Sweet and Salty Matzah Crunch https://thefancypantskitchen.com/recipe/sweet-and-salty-matzah-crunch/ https://thefancypantskitchen.com/recipe/sweet-and-salty-matzah-crunch/#comments Fri, 04 Apr 2025 21:19:37 +0000 https://thefancypantskitchen.com/?post_type=ranna_recipe&p=26996

If you’ve ever had Matzah Crack, then you know that Sweet and Salty Matzah Crunch is an over-the-top version.  If you didn’t think it could get any better, think again!

A yummy caramel sauce is poured over matzah squares, baked and then topped with swirled melted chocolate, roasted salted almonds, toasted coconut flakes and flaky sea salt.   Hmmm…gotta try it!

Spread out matzah in a sheet  pan that’s been covered with aluminum foil and a sheet of parchment.  Do NOT skip this step…you will probably decide to throw the pan out rather than attempt to clean it if you don’t cover it in foil!  And you will hate me!  Foil, it is!

In a saucepan, combine butter and brown sugar.  Once melted, stir until the sauce comes together.  At first it will separate and look awful.  Keep stirring until it comes together.  This will take a few minutes.  When you feel it’s done, be sure that the sugar is all melted.  Nothing worse than making this and having the sugar crystallize.

Pour the caramel sauce over the matzah and bake for about 10 minutes.  Let it cool for a few minutes and then spread melted milk chocolate over the top.  Drop dollops of white and bittersweet chocolate over the milk chocolate and use a skewer or toothpick to swirl the chocolates together,

Sprinkle the nuts,  toasted coconut and sea salt over the top and refrigerate for a few hours until it’s firm.

Cut into squares when you are ready to serve it!  Enjoy!

Share Your Thoughts...

Lastly, if you make Sweet and Salty Matzah Crunch, be sure to leave a review down below at the bottom of this page (stars are also appreciated)! Above all, I love to hear from you and always do my best to respond to each and every review. And of course, if you do make this recipe, don’t forget to tag me on Instagram! Looking through the photos of recipes you all have made is one of my favorite things to do!

Sweet and Salty Matzah Crunch

Makes: 18 pieces

Prep Time: 15 minutes

Cook Time: 20 minutes

Total Time: 35 minutes plus chill time 2 hours

Ingredients

  • 4 pieces matzah
  • 1 cup unsalted butter
  • 1 cup brown sugar
  • 12 ounces milk chocolate, finely chopped
  • 4 ounces white chocolate, finely chopped
  • 2 ounces bittersweet chocolate, finely chopped
  • 3 ounces (2/3 cup) roasted salted almonds, coarsely chopped or left whole
  • 1 & 1/2 ounces (1/3 cup) toasted shredded coconut or coconut flakes
  • 1 tsp flaky sea salt (I used Maldon)

Instructions

Preheat oven to 325°F. Cover an 18×13 inch rimmed cookie sheet with foil and then cover the foil with a sheet of parchment paper. Do not leave this step out or you will be cursing me when it comes time to cleanup! Cover the parchment paper evenly with the matzah. You will have to trim some of the matzah with a sharp knife to make it fit into a flat even layer. You will have some matzah scraps leftover. Slather the scraps with salted butter and jam and eat.

In a large heavy bottomed saucepan, melt butter. Add brown sugar and cook over medium heat, stirring every minute or so with a wooden spoon, until the mixture comes to a boil. This will take about 2-4 minutes. At one point it will look like the butter is separating from the sugar and it will appear to be an oily mess. Just keep stirring, it will come together again. Once mixture comes to a boil, switch to a whisk and whisk vigorously for another two to three minutes. Be sure the sugar has melted completely. Carefully pour caramel onto matzahh. Using an offset metal spatula, spread it out into an even layer.

Place baking sheet into oven and bake for about 8-10 minutes until the caramel topping is golden brown and bubbling.

While caramel is baking, place milk chocolate in a glass bowl and melt in microwave on 50% power for 1 minute. Stir and melt for a further 10-20 seconds if not completely melted. There may be a few lumps, just stir and let sit for a few minutes to completely melt.

Repeat melting with white and bittersweet chocolate.

Remove caramel-covered matzah from oven and let cool for a few minutes. Pour milk chocolate over the matzah and smooth it out into an even layer with an offset spatula.

Drizzle the white and bittersweet chocolate over the milk chocolate. Using a wooden skewer or the tip of a paring knife, swirl the wet chocolate to make a marbled design.

While chocolate is still wet, sprinkle with almonds, coconut and sea salt. Chill pan for several hours until chocolate is firm. Peel off foil and parchment paper and place marble matzah crunch on a large cutting board. Using a very large sharp knife, cut matzah into large squares. For an 18×13 inch pan, I usually get about 18 pieces. Store matzah crunch in an airtight container in the fridge. It keeps well for about 2 weeks. That is, if no one else in the house knows it’s there!

Recipe from Salt & Serenity

]]>
https://thefancypantskitchen.com/recipe/sweet-and-salty-matzah-crunch/feed/ 2
Chanukah Shortbread Cookies https://thefancypantskitchen.com/recipe/chanukah-shortbread-cookies/ https://thefancypantskitchen.com/recipe/chanukah-shortbread-cookies/#respond Tue, 24 Dec 2024 00:10:52 +0000 https://thefancypantskitchen.com/?post_type=ranna_recipe&p=26120

Everyone needs Chanukah cookies and these Chanukah Shortbread Kisses are no exception.  A tender shortbread cookie dough is rolled in blue and white nonpareils and baked.  Topped with either chocolate coins (Chanukah gelt) or peppermint kisses, they make a spectacular, easy and mouthwatering treat!

These cookies are so easy to make.  In a mixer, combine softened butter sugar and vanilla and beat until creamy.  Add flour and beat until just combined.  

Shape the dough into 1-inch balls (I like to use a small scoop). Roll each ball in the nonpareils and place 2 inches apart on a cookie sheet.

Bake for about 15 minutes or until the bottoms are lightly browned. Remove from the oven and place a kiss or chocolate coin in the center of each cookie, barely pressing down into the cookie.  If you press too hard, you’ll crack the cookie.

Let the cookies cool completely.  The kisses will take a while to firm up so you don’t want to move them too soon.

Enjoy the holidays!

Share Your Thoughts...

Lastly, if you make Chanukah Shortbread Cookies, be sure to leave a review down below at the bottom of this page (stars are also appreciated)! Above all, I love to hear from you and always do my best to respond to each and every review. And of course, if you do make this recipe, don’t forget to tag me on Instagram! Looking through the photos of recipes you all have made is one of my favorite things to do!

Chanukah Shortbread Cookies

Makes: 36 cookies

Prep Time: 20 minutes

Bake Time: 20 minutes

Total Time: 40 minutes

Ingredients

  • 1 cup salted butter, softened
  • 2/3 cup sugar
  • 1/2 tsp vanilla extract
  • 2 cups all-purpose flour
  • 1/2 cup blue & white nonpareil sprinkles
  • 1 (10- ounce) bag Hershey’s Holiday Candy Cane Kisses
  • 18 pieces Chanukah chocolate gelt (coins)

Instructions

Heat oven to 350°F. Pour sprinkles into shallow bowl. Unwrap Candy Cane Kisses and gelt.

Combine butter, sugar and 1/2 teaspoon vanilla extract in bowl. Beat at medium speed, scraping bowl often, until creamy. Add flour; beat at low speed, scraping bowl often, until well mixed. Shape dough into small 1-inch balls (I use a small ice cream scoop).

Roll balls of dough in sprinkles, patting sprinkles gently onto any areas where sprinkles have not adhered. You want to have the little balls covered with sprinkles. Place 2 inches apart onto ungreased cookie sheets.

Bake 14-18 minutes or until bottoms are lightly browned. Remove from oven and quickly place a kiss or coin in the center of each cookie, pressing down barely (about 1/4-inch or less) into the cookie. Don’t be tempted to press the kiss too deeply into the cookies as they will crack at the edges. If you do have any cracking, gently push the crack back together while the cookies are still warm.

Let the cookies stand 5 minutes on sheet pan, then carefully remove to cooling rack. Cool completely before moving or touching. The kisses will take a while to firm up. If you try to move them too soon the kisses will collapse or distort in shape.

]]>
https://thefancypantskitchen.com/recipe/chanukah-shortbread-cookies/feed/ 0
Pumpkin Pie Rice Krispie Treats https://thefancypantskitchen.com/recipe/pumpkin-pie-rice-krispie-treats/ https://thefancypantskitchen.com/recipe/pumpkin-pie-rice-krispie-treats/#respond Thu, 17 Oct 2024 15:03:22 +0000 https://thefancypantskitchen.com/?post_type=ranna_recipe&p=25588

These Pumpkin Pie Rice Krispie Treats are the perfect Halloween snack to enjoy this holiday!  Scarily delicious and frighteningly fun to look at, each treat is topped with a candy pumpkin to make them perfect to serve for any gathering!

Blending pumpkin purée and pumpkin pie spices with melted marshmallows gives these treats an orange-y color and the flavor of pumpkin pie in the all-too-familiar Ricke Krispie treat.

Melt butter in a large saucepan and then add pumpkin purée.  Once mixed in, add the mini marshmallows and stir until completely melted.  Stir in the spices and vanilla and remove from the heat.

Let the mixture cool down about 20 minutes or until room temperature.  It’s important to do this or the cereal, once added, will get soggy if the mixture is too hot.

Add the rice Krispies to the pumpkin-marshmallow mixture, stir well, and then transfer to a baking pan.  Allow the mixture to sit at least 30 minutes prior to cutting into squares.

Drizzle the melted white chocolate over each square (or over the entire pan prior to cutting as I did). Place a mellow creme pumpkin on the top of each square.

Enjoy!

Share Your Thoughts...

Lastly, if you make Pumpkin Pie Rice Krispie Treats, be sure to leave a review down below at the bottom of this page (stars are also appreciated)! Above all, I love to hear from you and always do my best to respond to each and every review. And of course, if you do make this recipe, don’t forget to tag me on Instagram! Looking through the photos of recipes you all have made is one of my favorite things to do!

Pumpkin Pie Rice Krispie Treats

Makes: 24 squares

Prep Time: 30 minutes

Cook Time: 15 minutes

Total Time: 45 minutes

Ingredients

  • 3 tbsp unsalted butter
  • 1/4 cup canned pumpkin purée, blotted dry
  • 1 (10 ounce) bag mini marshmallows
  • 1/4 tsp pure vanilla extract
  • 1/2 tsp ground cinnamon
  • 1/4 tsp ground nutmeg
  • 1/4 tsp ground ginger
  • 1/8 tsp ground cloves
  • 1/8 tsp kosher salt
  • 6 cups crispy rice cereal
  • 4 ounces white chocolate
  • optional: 24 mellowcreme pumpkins

Instructions

Generously spray a 9×13-inch baking pan with non-stick spray. Set pan aside.

In a large saucepan, melt butter over medium-low heat. Add the pumpkin purée and continue to cook until it is warmed through. Fold marshmallows, stirring frequently until almost completely melted. Stir in vanilla, cinnamon, nutmeg, ginger, cloves, and salt, and then remove from heat.

Allow the marshmallow mixture to cool for 20 minutes or until it is at room temperature (failure to cool the mixture will result in soggy Rice Krispie treats). Add the cereal and stir until combined.

Pour mixture into prepared baking pan and gently spread out evenly. I sprayed the back of a large spatula with non-stick spray and gently pressed the mixture without packing it down. Allow to set for about 30 minutes before cutting into squares. Melt white chocolate and drizzle on top. Place pumpkins on each square.

Store in an airtight container up to one week. You could even cut these treats into pumpkin shapes or decorate with regular candy corns. Enjoy!

Recipe from Sally’s Baking Addiction

]]>
https://thefancypantskitchen.com/recipe/pumpkin-pie-rice-krispie-treats/feed/ 0
Matzah Crack https://thefancypantskitchen.com/recipe/matzah-crack/ https://thefancypantskitchen.com/recipe/matzah-crack/#respond Thu, 11 Apr 2024 15:57:59 +0000 https://thefancypantskitchen.com/?post_type=ranna_recipe&p=24380

For the most addictive Passover dessert, try Matzah Crack!  I promise you’ll be hooked! 

Layers of matzah, toffee, chocolate and pecans make this easy confection a winner.  It’s got to be on the dessert rotation during Passover!

Begin by lining a sheet pan with foil and then covering the foil with large pieces of matzah.  Cut and piece it together to ensure complete coverage.

Make the toffee by cooking butter and brown sugar in a saucepan until it comes to a boil, whisking constantly.  Continue cooking for another 3 minutes and then carefully pour the hot toffee over the matzah.  Use an offset spatula to spread into an even layer.

Pop the sheet pan into a preheated oven and bake until the toffee is bubbling all over.  That will take 8-10 minutes.  Remove it from the oven and scatter chocolate chips all over it.  Wait a few minutes and then use an offset spatula to spread the chocolate evenly.  Sprinkle with the pecans and sea salt. 

Refrigerate for 45 minutes, but not any longer as it will be too hard to cut through the toffee in clean pieces.

Remove sheet pan from the fridge and melt the white chocolate.  Place it in a pastry bag fitted with a small tip or a baggy with a small corner cut off.  Drizzle the white chocolate over the top of the crack.  Refrigerate for another 10 minutes to harden the white chocolate.

Lift the crack to a cutting board and use a sharp large knife to cut into 2-inch squares.  

You can refrigerate it and serve it cold right from the fridge or at room temperature.

Share Your Thoughts...

Lastly, if you make Matzah Crack, be sure to leave a review down below at the bottom of this page (stars are also appreciated)! Above all, I love to hear from you and always do my best to respond to each and every review. And of course, if you do make this recipe, don’t forget to tag me on Instagram! Looking through the photos of recipes you all have made is one of my favorite things to do!

Matzah Crack

Makes: 35 2-inch pieces

Prep Time: 15 minutes

Cook Time: 16 minutes

Total Time: 30 minutes plus chill time 55 minutes 

Ingredients

  • 4-5 lightly salted matzah (preferably the Streit’s brand – see note below)
  • 2 sticks (1 cup) unsalted butter
  • 1 cup firmly packed dark brown sugar
  • 1 (12-ounce) bag semi-sweet chocolate chips
  • 1/2 heaping cup chopped pecans, toasted
  • 1/2 tsp sea salt flakes or kosher salt
  • 1/2 cup white chocolate chips

Instructions

Preheat the oven to 350°F. Line a rimmed baking sheet with heavy duty aluminum foil, making sure the foil goes up and over the edges, and top with a sheet of parchment paper.

Cover the baking sheet with the matzos, cutting and piecing them together as necessary to fill the entire pan.

To make the toffee, combine butter and brown sugar in a medium saucepan. Cook over medium heat, stirring constantly with a whisk, until the mixture comes to a boil. (If it looks like it’s separating, just keep stirring; it will come together.) Once the mixture comes to a boil, continue cooking and stirring for another 3 minutes until foamy and thickened. (Be extra careful…the toffee will be very hot!) Immediately pour the toffee over the matzos and, using a spatula, spread into an even layer.

Put the pan into the oven and bake for 8 to 10 minutes, or until the toffee topping is crackled and bubbling all over. Remove the pan from the oven and place on wire cooling rack on the counter. Immediately scatter the chocolate chips evenly over top. Wait 3 to 5 minutes for the chips to soften, then use an offset spatula to spread the chocolate into an even layer. Sprinkle with the pecans and sea salt.

Refrigerate until the chocolate is firm, about 45 minutes. Don’t leave it in the fridge too much longer, otherwise it will be hard to cut.

Melt the white chocolate chips in a small bowl in the microwave and pour into a small pastry bag with a small round tip in it (or use a ziplock baggy with a small corner cut off). Drizzle white chocolate over the top of the bark. Refrigerate for another 10 minutes to harden the white chocolate drizzle.

Lift the foil overhang to transfer the matzah crack onto a large cutting board. Using a large sharp knife, cut into 2-inch squares. Store in an airtight container in the fridge and serve cold.

Chef’s Notes:

I love Streit’s lightly salted matzos for this recipe but any brand will work. If you can only find regular salted matzos, cut back or omit the sea salt at the end. If you can’t find matzos, substitute Saltine crackers (not kosher for Passover, however) and omit the salt. You’ll need enough to cover the entire sheet pan.

Freezer-Friendly Instructions: The toffee can be frozen for up to 3 months: Place the toffee in an airtight container. It can be eaten directly from the freezer or, if you’d like, remove the bark from the container and let it come to room temperature.

Recipe by Once Upon a Chef

]]>
https://thefancypantskitchen.com/recipe/matzah-crack/feed/ 0
Salty Churro Toffee Snack Mix https://thefancypantskitchen.com/recipe/salty-churro-toffee-snack-mix/ https://thefancypantskitchen.com/recipe/salty-churro-toffee-snack-mix/#comments Wed, 11 Oct 2023 14:37:19 +0000 https://thefancypantskitchen.com/?post_type=ranna_recipe&p=22922

Salty Churro Toffee Snack Mix is the most deliciously addicting treat I’ve had lately!  Tiny oyster crackers (yes, that’s what we’re using and you thought they were just for clam chowdah!) are coated in a salty sweet churro toffee and then topped off with cinnamon sugar.  Seriously??  Yeah, just try stopping at one mouthful!

It takes just a few minutes to make these and just a few ingredients so chop chop…get to work!

Begin by combining butter and brown sugar in a saucepan and bring to a boil. Stir in cinnamon and vanilla extract and then pour over oyster crackers.

Stir well until all of the oyster crackers are covered and then spread out on a foil-lined baking sheet.  Bake for about 10 minutes or until bubbly all over.

While the crackers are baking, combine the granulated sugar, cinnamon and salt in a small bowl.

When the crackers are done baking, remove the pan from the oven and sprinkle the cinnamon sugar all over.  

Let the crackers cool completely and then break into pieces.  

Enjoy them immediately or store airtight for up to a week (I doubt they’ll last that long)!

Share Your Thoughts...

Lastly, if you make Salty Churro Toffee Snack Mix, be sure to leave a review down below at the bottom of this page (stars are also appreciated)! Above all, I love to hear from you and always do my best to respond to each and every review. And of course, if you do make this recipe, don’t forget to tag me on Instagram! Looking through the photos of recipes you all have made is one of my favorite things to do!

Salty Churro Toffee Snack Mix

Makes: 6 servings

Prep Time: 15 minutes

Bake Time: 10 minutes

Total Time: 25 minutes

Ingredients

  • 5 cups Oyster Crackers
  • 1 cup butter
  • 1 cup light brown sugar
  • 1 & 1/2 tsp cinnamon
  • 1 tsp vanilla extract
  • 2 tbsp granulated sugar
  • 1 tsp cinnamon
  • 1 tsp kosher salt

Instructions

Preheat the oven to 350°F. Line a baking sheet with foil. Set aside.

Pour the oyster crackers in a large bowl and set aside.

In a medium saucepan combine the butter and brown sugar. Stirring consistently bring the mixture to a boil and boil for 2 minutes. Remove the mixture from the heat and stir in 1 & 1/2 teaspoons of cinnamon and vanilla. Pour this immediately on top of the crackers. Use a rubber spatula, stir and coat the crackers evenly with the mixture. Spread the crackers evenly onto the prepared baking sheet.

Bake for 10 – 15 minutes until bubbly all over.

While the crackers are in the oven combine the granulated sugar, cinnamon and salt. Set this aside.

When the crackers are done remove the pan from the oven and sprinkle immediately with the salty cinnamon sugar mixture evenly. Let the crackers cool and then break into pieces. Serve immediately or store airtight for up to a week.

Recipe by Cookies and Cups

]]>
https://thefancypantskitchen.com/recipe/salty-churro-toffee-snack-mix/feed/ 2
Chocolate-Dipped Croissant Biscotti https://thefancypantskitchen.com/recipe/chocolate-dipped-croissant-biscotti/ https://thefancypantskitchen.com/recipe/chocolate-dipped-croissant-biscotti/#respond Wed, 26 Jul 2023 22:06:53 +0000 https://thefancypantskitchen.com/?post_type=ranna_recipe&p=22294

These Chocolate-Dipped Croissant Biscotti are the most delicious treat I’ve had in a long time.  They are beyond easy to make and create quite a hubbub when folks try to figure out exactly what they are!

Freeze and slice croissants, dip them in a cream-sugar mixture and bake them.  Dip them in chocolate, if you feel like it.

That’s it but they seem like so much more!  They keep in the freezer very well, so make a double batch and enjoy!!!

These crispy tasty bites begin with a croissant.  You might wonder why you would take amazing, expensive French croissants and make them into something else.  Fair question, but I would suggest NOT using the $7 a piece croissants from the French bakery and instead pick up a package from your local grocery store or big box store.  You can spend $7 for a package of 8!  

If the croissants are fresh, let them sit overnight so that they dry out a little.  I have found that if they are too fresh, they will fall apart when you dunk them in the liquid.

Be sure to freeze them so they are firm.  Otherwise, you won’t be able to cut clean slices.  The slices should be about 1/4-inch thick.

Make a cream for dipping by combining heavy cream, sugar and flaky sea salt in a small saucepan and heating until the sugar and salt dissolve.  This should only take a few minutes.

Once dissolved, transfer the cream to a shallow bowl.  You are now going to dip the croissant slices as if you were making French toast.  Let a bit of the cream drip off and then place the slice on a parchment-lined baking sheet.

Bake the croissant slices for about 45 minutes, checking every 5 minutes after 30 minutes.

Let them cool on a wire rack.

Melt the chocolate and vegetable oil in the microwave until it’s nice and smooth.  Dip one half of each biscotti in the chocolate and let the excess chocolate drip off.  Set them on a baking sheet to harden (you can also pop them into the fridge to speed up this process).

I love them plain, as well.  You don’t have to dip them but the chocolate makes them a touch more elegant.

They freeze beautifully (once hardened just transfer the biscotti to a resealable bag or a tupperware).

Dunk them in java, enjoy with a glass of milk or just eat them while binge-watching some incredible show!

Share Your Thoughts...

Lastly, if you make Chocolate-Dipped Croissant Biscotti, be sure to leave a review down below at the bottom of this page (stars are also appreciated)! Above all, I love to hear from you and always do my best to respond to each and every review. And of course, if you do make this recipe, don’t forget to tag me on Instagram! Looking through the photos of recipes you all have made is one of my favorite things to do!

Chocolate-Dipped Croissant Biscotti

Makes: 48 pieces approximately

Prep Time: 25 minutes

Bake Time: 45 minutes

Total Time: 1 hour & 10 minutes

Ingredients

For the Croissant ‘Biscotti’:

  • 6 day-old croissants, frozen
  • 2 cups heavy cream
  • 1 & 1/2 cups sugar
  • 4 teaspoons flaky sea salt
  • Coarse sugar for sprinkling

For the Chocolate:

  • 12 ounces dark chocolate (70% cocoa solids), not chocolate chips, finely chopped
  • 1 tsp vegetable oil

Instructions

Heat oven to 300°F and line 2 baking trays with baking paper.

Remove one croissant at a time from the freezer to keep the pastry as frozen and solid as possible. Slice a croissant widthwise across each croissant into very thin slices, about 1/4-inch thick, using a serrated knife. You need to work very quickly to slice the croissants, as they don’t take long to thaw out, and keeping them as solid as possible is the key to cutting even, thin slices.

Place the cream, sugar and salt in a saucepan and warm over a low heat, whisking to dissolve the sugar and salt. Transfer to a shallow bowl.

Working one slice at a time, carefully pick up the croissant thins and coat them in the warmed cream, drain off any excess and arrange the slices in one layer on the lined baking tray.

Sprinkle the cream-coated slices with a little coarse sugar and place in the oven to bake until they have reached a medium to dark golden brown color, approximately 30 minutes. Check them at the 30-minute mark to see if they have reached a deep brown color. Leave in for another 5 minutes and check again. They may need a little longer to become really lovely and caramelized. You can rotate the pans for more even baking. Remove from the oven and let sit for 10 minutes on the sheet pan and then transfer to a wire rack to cool completely. Once cooled, melt the chocolate.

To melt the chocolate, place chocolate and vegetable oil in a microwave-safe bowl and heat at full power for one minute. Stir the chocolate, and repeat, until the chocolate is completely melted.

Line two sheet pans with parchment paper. Dip each biscotti halfway in the melted chocolate, let the excess drip off and set on a sheet pan to harden. Enjoy!

Chef’s Note:

These “biscotti” are wonderful without being dipped in chocolate, so feel free to skip that step if you prefer them that way!

Recipe by Food52

]]>
https://thefancypantskitchen.com/recipe/chocolate-dipped-croissant-biscotti/feed/ 0
Lemon Tahini Cookies https://thefancypantskitchen.com/recipe/lemon-tahini-cookies/ https://thefancypantskitchen.com/recipe/lemon-tahini-cookies/#comments Sat, 04 Mar 2023 21:29:32 +0000 https://thefancypantskitchen.com/?post_type=ranna_recipe&p=20769

Inspired from a wonderful halvah from Tel Aviv, these Lemon Tahini Cookies will give you a new appreciation for what this middle eastern sesame paste can be used for.  Not only can you make a killer hummus with tahini, you can also bake it into these incredible lemony bites.

I love that these aren’t too sweet.  My amazing daughter, Haley, is always asking if I would decrease the amount of sugar in my desserts (heresy, I say!) but I get her point…sometimes the sweets are just too sweet.  Not with the lemon tahini cookies.  They are just the right amount of sweet.  Which makes them very addicting!

I’m sure Haley would approve!

To make these cookies, beat the butter, sugar and tahini until light and fluffy.  Add the egg, lemon zest & juice and vanilla and continue to beat until combined.  Gradually add the flour and beat until the dough just comes together.

Divide the dough in half and roll each piece into a log that is 1-inch in diameter.  Wrap in plastic and refrigerate for a minimum 1 & 1/2 hours.

Combine the white and black sesame seeds on a flat plate and roll each log in the seeds, pressing the seeds to adhere to the dough.  Slice the logs into 1/4-inch rounds.

Bake the cookies for 8-10 minutes per sheet, or until the edges are golden.  Let them cool completely.

The dough can be made ahead and frozen for up to 3 weeks ahead.  Just let it thaw for 30 minutes prior to rolling in sesame seeds.

You are going to love these unique cookies!

Share Your Thoughts...

Lastly, if you make Lemon Tahini Cookies, be sure to leave a review down below at the bottom of this page (stars are also appreciated)! Above all, I love to hear from you and always do my best to respond to each and every review. And of course, if you do make this recipe, don’t forget to tag me on Instagram! Looking through the photos of recipes you all have made is one of my favorite things to do!

Lemon Tahini Cookies

Makes: 30 cookies

Prep Time: 20 minutes

Bake Time: 10 minutes/sheet

Total Time: 50 minutes plus chill time 90 minutes

Ingredients

  • 3/4 cup unsalted butter (6 ounces), softened
  • 3/4 cup granulated sugar
  • 1/2 cup well-stirred smooth tahini
  • 1 large egg
  • 3 tbsp lemon zest plus 2 tsp fresh lemon juice
  • 1 tsp vanilla extract
  • 2 cups all-purpose flour (about 8 & 1/2 ounces)
  • 1 tsp kosher salt
  • 1/3 cup black sesame seeds
  • 1/3 cup white sesame seeds

Instructions

Line 2 baking sheets with parchment paper. Beat butter, sugar, and tahini in a medium bowl with a hand mixer on medium-high speed until light and fluffy, 3 to 5 minutes. Add egg, lemon zest and juice, and vanilla; beat until combined, about 1 minute, scraping down sides of bowl as needed. With mixer running on low speed, gradually add flour and salt; beat until dough comes together.

Divide dough in half; place each half on a large piece of plastic wrap. Fold plastic wrap over to cover dough, and, using your hands, roll each into a smooth log 1-inch in diameter. Refrigerate until firm, at least 1 hour & 30 minutes or up to 8 hours.

Preheat oven to 350°F. Combine sesame seeds on a small sheet pan or flat plate. Remove dough logs from plastic wrap, and roll in sesame seeds, pressing firmly so seeds adhere evenly. Slice dough logs into 1/4-inch-thick rounds. Place 1 inch apart on prepared baking sheets.

Bake cookies in preheated oven until golden around edges, 8 to 10 minutes. Let cool on baking sheets 5 minutes; transfer to a wire rack, and let cool completely, about 15 minutes. Store in an airtight container at room temperature up to 5 days.

Make Ahead:

Dough can be made and frozen up to 3 weeks ahead. Let thaw 30 minutes before rolling in sesame seeds.

Recipe by Food & Wine

]]>
https://thefancypantskitchen.com/recipe/lemon-tahini-cookies/feed/ 2
Sparkle Sweetheart Cookies https://thefancypantskitchen.com/recipe/sparkle-sweetheart-cookies/ https://thefancypantskitchen.com/recipe/sparkle-sweetheart-cookies/#respond Sat, 04 Feb 2023 17:29:35 +0000 https://thefancypantskitchen.com/?post_type=ranna_recipe&p=20482

Sparkle Sweetheart Cookies are just the prettiest little things!  Perfect for Valentine’s Day with their chocolate hearts on top.  Easy to make and so sweet to look at!

This rolled sugar cookie will delight your loved ones, so give them a bag or plate of these treats!

This is a cream cheese drop-style sugar cookie that is very easy to make!

Cream the room-temperature butter and cream cheese together until it’s smooth.  Add the sugar, and then the egg, vanilla and almond extracts.  Add all of the dry ingredients and mix until just combined.

Cover the dough and chill for 30 minutes minimum.

Scoop the dough into 1-inch rounds and roll each ball into sanding sugar (it’s fun to vary the colors) and place on a parchment-lined baking sheet.  Press the cookies down slightly so that they spread a bit.

Bake them for about 12 minutes per sheet.

Once the cookies come out of the oven, let them cool down for 5 minutes and then press the hearts into the tops.  I used Dove chocolate hearts but Hershey’s hearts work beautifully as well!

Chill the cookies for about 15 minutes so the hearts don’t melt.

Now it’s time to eat these soft but crunchy bites!  Enjoy!

Share Your Thoughts...

Lastly, if you make Sparkle Sweetheart Cookies, be sure to leave a review down below at the bottom of this page (stars are also appreciated)! Above all, I love to hear from you and always do my best to respond to each and every review. And of course, if you do make this recipe, don’t forget to tag me on Instagram! Looking through the photos of recipes you all have made is one of my favorite things to do!

Sparkle Sweetheart Cookies

Makes: 40 cookies

Prep Time: 1 hour

Bake Time: 12 minutes per sheet

Total Time: 1 hour & 36 minutes

Ingredients

  • 3 cups all-purpose flour
  • 1 & 1/2 tsp baking powder
  • 1/2 tsp salt
  • 1 cup unsalted butter, softened to room temperature
  • 2 ounces block cream cheese, softened to room temperature
  • 1 cup granulated sugar
  • 1 large egg, at room temperature
  • 2 tsp pure vanilla extract
  • 1/2 tsp almond extract
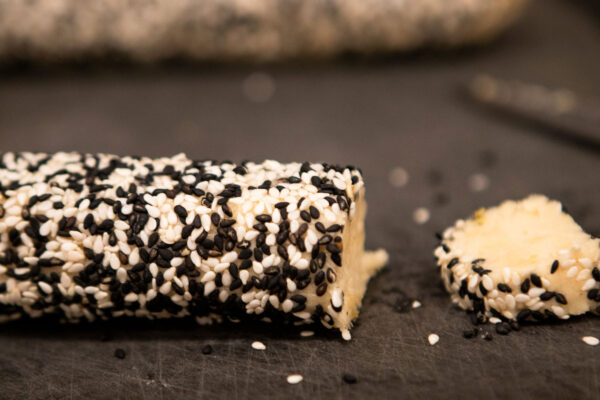
  • 3/4 cup sanding sugar, pink and red or assorted colors
  • 40 chocolate hearts, unwrapped (see Chef’s Note)

Instructions

Whisk the flour, baking powder, and salt together until combined. Set aside.

In a large bowl using a hand-held or stand mixer fitted with a paddle attachment, beat the butter and cream cheese together on high speed until relatively smooth, about 2 minutes. Add the granulated sugar and beat until combined and creamy. Add the egg, vanilla extract, and almond extract and beat on high speed until combined, about 1 minute. Scrape down the sides and bottom of the bowl as needed to combine.

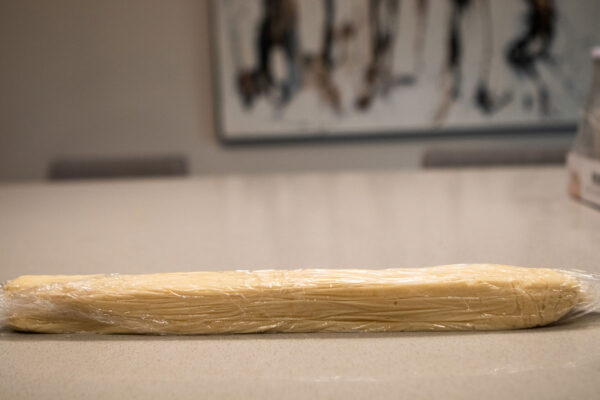
Add the dry ingredients to the wet ingredients and mix on low speed until combined. The dough will be thick. Cover dough tightly with aluminum foil or plastic wrap and chill for at least 30-60 minutes and up to 3-4 days. If chilling for longer than 2-3 hours, allow the dough to sit at room temperature for at least 30 minutes before rolling and baking because the dough will be quite hard and the cookies may not spread.

Preheat oven to 350°F. Line two large baking sheets with parchment paper or silicone baking mats. Set aside.

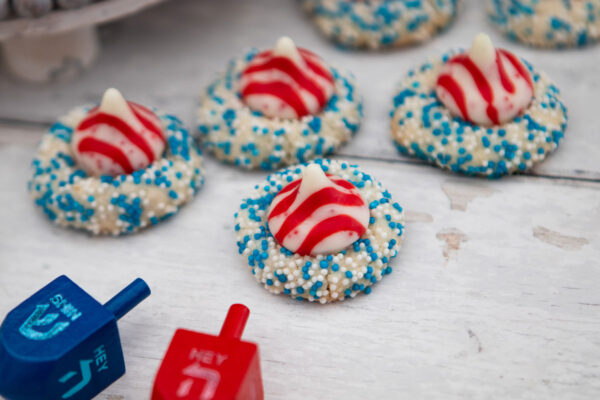
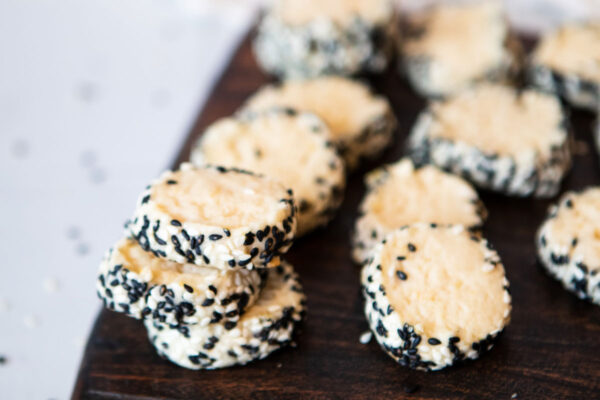
Pour sanding sugar in a bowl or, if using multiple colors, a few separate bowls.

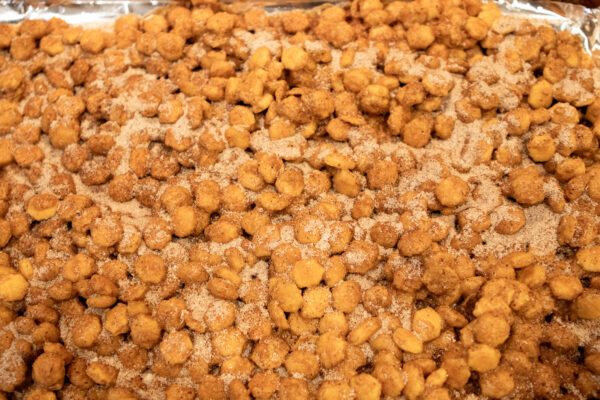
Roll balls of cookie dough, about 1 tablespoon of dough per cookie, then roll each ball in the sanding sugar to coat. Place each dough ball 2 inches apart on the baking sheets. Using the back of a measuring cup or drinking glass, gently press down on each dough ball to slightly flatten. Bake the cookies for 12-13 minutes or until very lightly browned on the edges.

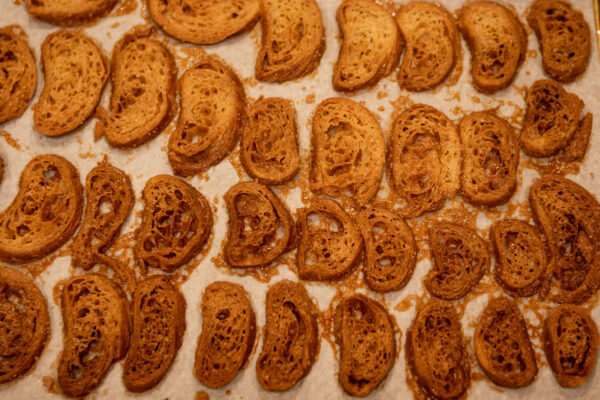
Remove from the oven and allow to cool on the baking sheets for 5 minutes. Press a chocolate heart into each cookie and quickly stick the baking sheet in the freezer or fridge so the warm cookie does not completely melt the chocolate heart. Let the chocolate set (about 15 minutes) on the cookies in the freezer/refrigerator.

Cookies will stay fresh covered at room temperature for 1 week.

Chef’s Notes:

Make Ahead Instructions: You can make the cookie dough and chill it in the refrigerator for up to 3-4 days. Baked cookies freeze well for up to 3 months. Thaw overnight in the refrigerator and bring to room temperature, if desired, before serving. Unbaked cookie dough balls (without sanding sugar coating) will freeze well for up to 3 months. Let sit at room temperature for 30 minutes, pre-heat the oven, then roll in sanding sugar. Bake as directed. 

Chocolate hearts are a seasonal item around Valentine’s Day. I like Hershey’s or Dove brands.

A standard bag has about 35 hearts in it (Dove brand). Don’t bother getting a second bag of them, if you don’t want. The cookies are delicious without the chocolate as well!

Recipe by Sally’s Baking Addiction

]]>
https://thefancypantskitchen.com/recipe/sparkle-sweetheart-cookies/feed/ 0
Epic Neiman Marcus Chocolate Chip Cookies https://thefancypantskitchen.com/recipe/epic-neiman-marcus-chocolate-chip-cookies/ https://thefancypantskitchen.com/recipe/epic-neiman-marcus-chocolate-chip-cookies/#comments Tue, 31 Jan 2023 18:39:24 +0000 https://thefancypantskitchen.com/?post_type=ranna_recipe&p=20406

For the very best chocolate chip cookies, try Epic Neiman Marcus Chocolate Chip Cookies!  I say “epic” because this is a riff on the original by (you guessed it) Neiman Marcus.  The original cookies became famous years ago (if you want to read the story of the original NM chocolate chip cookie “hoax”, check this out…it’s a fun read!).

My cousin Joanne, who is an awesome baker, introduced me to these cookies years ago and cautioned me about over-mixing them.  In fact, the recipe calls for jus 105 seconds of mixing.  I think a few seconds longer works better but let’s not split hairs!

I have changed the original recipe slightly by adding 3 different types of chocolate chips (milk, dark & semi-sweet) to the cookie batter.  The original recipe adds espresso powder and I suggest you do the same.  It’s a deal-breaker without the powder.  Just sayin’…

To make these cookies, cream the butter and sugars in a stand mixer, for about 1 minute.  Add the egg and vanilla and beat for an additional 30 seconds (if you need a bit longer to get the egg fully mixed it, a few seconds more won’t hurt).

Add the dry ingredients (flour, baking soda & powder, and salt) to the mixer and beat until just incorporated (try 30 seconds and see if that does it).

Fold in the chocolate chips and the espresso powder.

Finally, scoop mounds of dough onto a prepared cookie sheet and bake for about 22 minutes.  Let them cool completely on a wire rack and then eat as many as you can before anyone notices!!  I dare you to eat just one!

Share Your Thoughts...

Lastly, if you make Epic Neiman Marcus Chocolate Chip Cookies, be sure to leave a review down below at the bottom of this page (stars are also appreciated)! Above all, I love to hear from you and always do my best to respond to each and every review. And of course, if you do make this recipe, don’t forget to tag me on Instagram! Looking through the photos of recipes you all have made is one of my favorite things to do!

Epic Neiman Marcus Chocolate Chip Cookies

Makes: 18-24 cookies

Prep Time: 10 minutes

Bake Time: 25 minutes

Total Time: 35 minutes

Ingredients

  • 1/2 cup unsalted butter, room temperature
  • 1/2 cup granulated sugar
  • 1/2 cup light brown sugar
  • 1 large egg
  • 2 tsp vanilla extract
  • 1 & 3/4 cups all-purpose flour
  • 1/2 tsp baking powder
  • 1/2 tsp baking soda
  • 1/2 tsp kosher salt
  • 1/2 cup semi-sweet chocolate chips
  • 1/2 cup dark chocolate chunks
  • 1/2 cup milk chocolate chips
  • 1 & 1/2 tsp instant espresso coffee powder

Instructions

Preheat the oven to 300°F. In the bowl of a stand mixer fitted with the paddle attachment, add the butter and both sugars. Beat until the mixture is light and fluffy, approximately 1 minute. Add the egg and vanilla beating for an additional 30 seconds until well combined.

In a large mixing bowl, whisk together the flour, baking powder, baking soda and salt.

Slowly add the dry ingredients to the mixer while beating on low speed. Continue beating for 15 seconds or until the mixture is thoroughly combined.

Fold in the chocolate chips/chunks and espresso powder.

Place 2-tablespoon mounds of cookie dough on a baking sheet lined with parchment paper about 3 inches apart and bake for 22-24 minutes or until the cookies are browned around the edges. (You should be able to fit 9 cookies on a standard size sheet.)

Transfer to a wire rack and cool completely. Repeat with remaining dough.

Recipe adapted from Neiman Marcus

]]>
https://thefancypantskitchen.com/recipe/epic-neiman-marcus-chocolate-chip-cookies/feed/ 2