Ingredients
- 1 ciabatta bread, approximately 12″ long
- 3 tbsp unsalted butter
- 3 medium red peppers
- 3 cups arugula, rinsed and patted dry
- 2 cups fresh mozzarella, sliced
- 10 ounces assorted Italian deli meats, (I used Soppressata Salami, Capocollo and Napoli Salami)
- balsamic vinegar
- olive 0il
- kosher salt and freshly ground pepper, to taste
Instructions
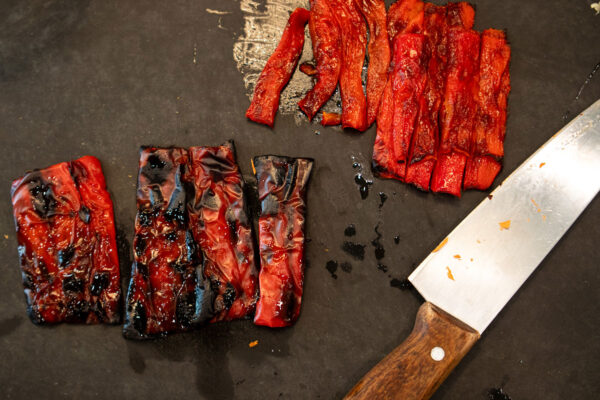
To roast the red peppers, set your oven to the broil setting. Slice the sides off the red peppers and place skin side up on a foil-lined baking sheet that’s been sprayed with oil (I like to trim the ends so they lie as flat as possible, as they will brown better than pieces that are sloped). Place under the broiler until very well charred (black on top, about 10 minutes (watch closely after 5 minutes…you’ll want them to be mostly blackened on top.) Remove from the oven and immediately place the peppers in a plastic ziploc bag. Pop in the refrigerator for 30-40 minutes. Remove peppers from bag and peel off the blackened skin with a knife. Discard the skin and slice the peppers in to strips. Place in a bowl and drizzle with a bit of olive oil and sprinkle with salt and pepper. Set aside.
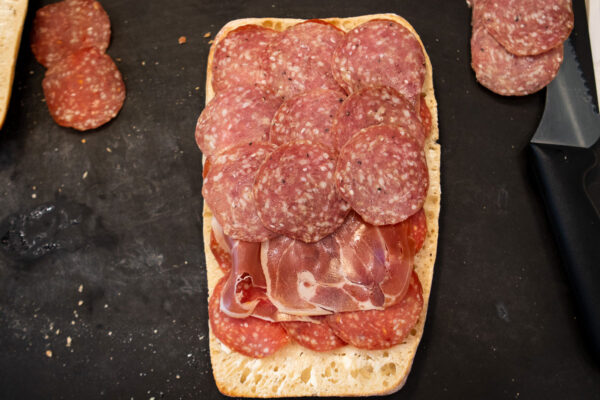
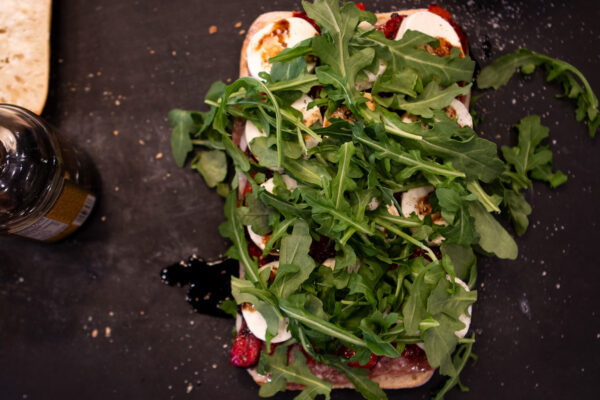
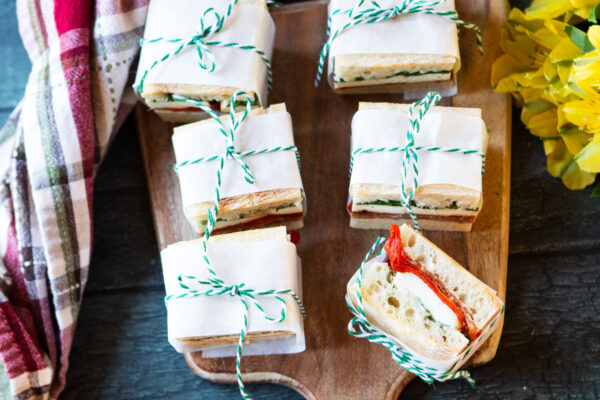
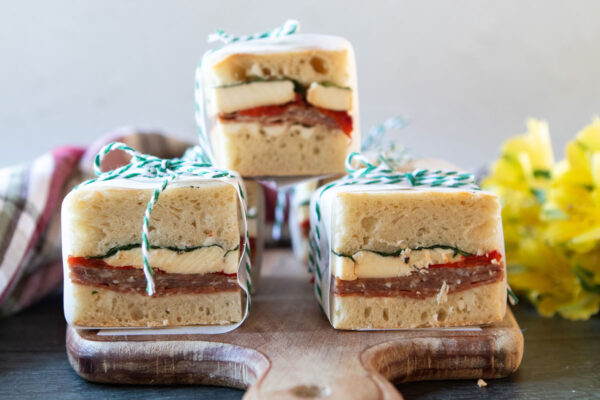
To prepare the sandwiches, cut your ciabatta in half so that you have a top and bottom and butter each piece. Place a generous layer of cold meats (4-5 over-lapping layers). Top with cooled roasted red pepper strips. Take your mozzarella slices and place on a piece of paper towel. Top with another piece of paper towel and pat to dry a bit. Top the red peppers with a layer of the mozzarella slices. Drizzle some balsamic vinegar over the mozzarella slices and sprinkle with salt and pepper. Top with a generous layer of arugula. Top with top slice of ciabatta.
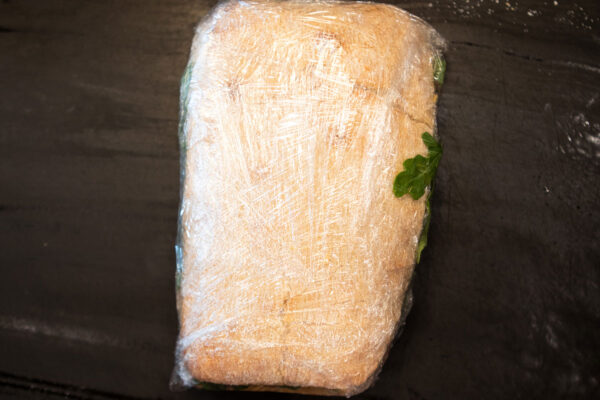
Wrap each sandwich tightly with plastic wrap and place on a platter or baking sheet. When all the sandwiches are prepared, place the platter in the refrigerator. Place a heavy skillet on top of sandwiches to apply weight (if you don’t have a heavy skillet, top with another baking sheet and place some large cans on top for the weight). Refrigerate at least 6 hours or ideally, overnight.
When ready to serve, remove from plastic wrap. If desired, you can trim the sides and ends of the sandwiches to make neat sides and to enjoy the wonderful colors of these sandwiches.
Chef’s Notes:
Pressed sandwiches are endlessly customizable. You can swap out spinach for the arugula, or sun-dried tomato for the roasted red pepper. And so on. The possibilities are endless.
You can use any size ciabatta, from small buns to larger loaves. I like to start with a ciabatta baguette that I cut in half to make two 12-inch-ish loaves.
I like to trim the edges off the sandwiches to make them neat squares and to enjoy seeing all the layers. But don’t throw away the trimmings! Chop them up and combine with some leafy greens and a drizzle of balsamic or Italian dressing for an absolutely fabulous salad.
When it comes to adding a weight to press the sandwiches in the fridge, I use my cast-iron grill pan and the cast-iron press that came with it, topped with some cans to even out the weight. Refrigerate with the weight at least 6 hours or ideally, overnight.
To keep the sandwich freshest, keep in the fridge, tightly wrapped in the plastic wrap and un-trimmed. When ready to serve or transport, simply trim the side and end crusts and if you like, wrap in a strip of parchment paper secured with some twine. You can then re-wrap in plastic wrap, if needed to keep them from drying out while they wait to be eaten.
While it’s tempting to reach for a jar of roasted red peppers, I find that those packed in oil bring a little too much moisture to the pressed sandwich, making for the possibility of soggy bread. It only takes a few minutes to make your own, so I highly recommend that.
Recipe from Seasons & Suppers