Confections & Candies – The Fancy Pants Kitchen https://thefancypantskitchen.com Quick and Easy Recipes Sun, 16 Feb 2025 16:02:28 +0000 en-US hourly 1 https://wordpress.org/?v=6.7.1 https://thefancypantskitchen.com/wp-content/uploads/2021/02/cropped-Favicon-1-32x32.jpg Confections & Candies – The Fancy Pants Kitchen https://thefancypantskitchen.com 32 32 Citrus and Beet Salad with Halloumi Croutons https://thefancypantskitchen.com/recipe/citrus-and-beet-salad-with-halloumi-croutons/ https://thefancypantskitchen.com/recipe/citrus-and-beet-salad-with-halloumi-croutons/#respond Sun, 16 Feb 2025 15:37:46 +0000 https://thefancypantskitchen.com/?post_type=ranna_recipe&p=26598

This beautiful Citrus and Beet Salad with Halloumi Croutons is loaded with mixed citrus and jewel-toned roasted beets.  It is elevated to “winner” status with the crispy halloumi croutons that top this delicious salad.  It’s accompanied by a lime honey salad dressing that compliments the peppery arugula perfectly!

To get going on this recipe, let’s roast the beets.  I separate them so that the colors don’t get muddled together. Place them on a separate sheet of aluminum foil, add a little olive oil and salt and roast them for an hour or more until they are tender but not mushy (if you pierce them with a sharp knife, the knife should slide in easily).  Let the beets cool for 30 minutes and then peel them and cut them into 1/2-inch wedges and set aside.

While the beets are roasting, trim the top and bottom 1/4-inch off of the citrus. Stand each fruit up on one flat end and, following the curve of the fruit, remove the peel and the white pith. Then slice in between each membrane to create “supremes” or cut crosswise into 1/4-inch rounds and then halve them into half moons.  Or do both, like I did!  Your choice.

Squeeze the juice from the rinds into a bowl and add the lime juice, honey, mustard, salt & pepper and finally the olive oil to make the dressing.

To make the halloumi croutons, toss the halloumi cubes in flour and salt and then fry the cubes in vegetable oil until they are crispy and browned.

Arrange the arugula, beets and citrus on a large platter.  Drizzle some of the dressing over.  Top the salad with the halloumi croutons, toasted pine nuts and pomegranate seeds.  Serve the salad with extra dressing on the side.

Share Your Thoughts...

Lastly, if you make Citrus and Beet Salad with Halloumi Croutons, be sure to leave a review down below at the bottom of this page (stars are also appreciated)! Above all, I love to hear from you and always do my best to respond to each and every review. And of course, if you do make this recipe, don’t forget to tag me on Instagram! Looking through the photos of recipes you all have made is one of my favorite things to do!

Citrus and Beet Salad with Halloumi Croutons

Makes: 8 servings

Prep Time: 20 minutes

Cook Time: 1 hour & 30 minutes

Total Time: 1 hour & 50 minutes

Ingredients

  • 1 small red beet (about 5 ounces), trimmed and scrubbed
  • 1 small golden beet (about 5 ounces), trimmed and scrubbed
  • 5 tbsp extra-virgin olive oil, divided
  • 1 & 1/4 tsp kosher salt, divided
  • 12 ounces assorted citrus fruits (such as pink grapefruit, Cara Cara oranges, navel oranges, and lemons)
  • 3 tbsp fresh lime juice
  • 1 tbsp honey
  • 1 tbsp Dijon mustard
  • 1/4 tsp black pepper
  • Vegetable oil
  • 1/4 cup all-purpose flour (about 1 & 1/8 ounces)
  • 1 (8-ounce) package halloumi cheese, cut into 3/4-inch cubes
  • 1 tbsp water
  • 1 large bunch arugula (about 7 ounces), leaves separated and stems trimmed (or 1 [5-ounces] pkg. baby arugula)
  • 1/2 cup pomegranate arils
  • 1/3 cup toasted pine nuts

Instructions

Preheat oven to 400°F. Place each beet on a separate 12-inch square of aluminum foil. Drizzle beets with 1 tablespoon olive oil; sprinkle with 1/2 teaspoon salt. Fold foil sheets around each beet, and crimp tightly to form 2 airtight packets. Place packets on a small baking sheet, and roast in preheated oven until beets are tender but not mushy, 1 hour to 1 hour and 30 minutes. Remove from oven. Let beets cool in sealed packets 30 minutes. Unwrap cooled beets and peel. Cut beets into 1/2-inch wedges. Set aside.

While beets roast, trim 1/4 inch from top and bottom of each citrus fruit. Stand each citrus fruit upright on trimmed bottom; using a sharp knife and following the curve of the fruit, cut and remove the rind and white pith. Slice citrus crosswise into 1/4-inch rounds, and halve rounds into half-moons. Alternatively, slice in between membranes to cut into supremes. Set citrus aside. Squeeze juice from rinds into a small bowl to yield 1 tablespoon juice. Add lime juice, honey, mustard, pepper, 1/2 teaspoon salt, and remaining 1/4 cup olive oil; whisk until well combined. Set aside.

Pour vegetable oil to a depth of 1 & 1/2 inches in a medium saucepan, and heat over medium-high until oil reaches 400°F. Stir together flour and remaining 1/4 teaspoon salt in a medium bowl. Toss halloumi cubes and 1 tablespoon water in a separate medium bowl; drain. Add halloumi to flour mixture, and toss well to coat; shake off excess flour mixture. Working in batches, fry halloumi, stirring occasionally, until crispy and dark golden brown, 1 minute and 30 seconds to 2 minutes and 30 seconds per batch. Using a slotted spoon, transfer halloumi to a paper towel–lined plate.

Arrange arugula, beet wedges, and citrus on a large platter; drizzle with 1/4 cup dressing. Top salad with halloumi croutons, pomegranate arils, and pine nuts. Serve with remaining dressing.

Chef’s Notes:

Beets can be roasted up to 2 days ahead and refrigerated in separate airtight containers.

Find halloumi at Middle Eastern and Mediterranean grocery stores.

Recipe from Food & Wine

]]>
https://thefancypantskitchen.com/recipe/citrus-and-beet-salad-with-halloumi-croutons/feed/ 0
Easy Oreo Truffles https://thefancypantskitchen.com/recipe/easy-oreo-truffles/ https://thefancypantskitchen.com/recipe/easy-oreo-truffles/#respond Wed, 22 Jan 2025 16:57:48 +0000 https://thefancypantskitchen.com/?post_type=ranna_recipe&p=26343

Easy Oreo Truffles were the hit of the holiday circuit!  They arrived at every holiday gathering because they are so easy to make and so delicious to eat!  Also very pleasing to look at!

And we can’t forget that they take only 4 ingredients (3 really, since most people have vanilla extract in their pantry).  We love recipes like that!

I was thinking of saving them for next Christmas (yes, I do that!) but they are so delicious that I wanted you to have then NOW!  So, the pics will show a holiday theme in the background, but feel free to substitute holiday sprinkles for pink and red (Valentine’s Day), green/yellow/pink (Easter), orange/brown/yellow (Thanksgiving)…you get the idea!

You hear me say “easy peasy” a lot, but these truly are!

Simply place Oreo cookies (not the double cream ones…that’s just too much creamy stuff) in a food processor and process until they become fine crumbs.

Then, beat cream cheese with a stand or hand mixer until it’s smooth and creamy.  Add most of the crumbs (save a couple of tablespoons for sprinkling) and the vanilla and mix into the  cream cheese.

Use a small scoop (1-tablespoon size) to make 1-inch balls from the dough and place them on a cookie sheet.  Freeze them for 15 minutes.

Meanwhile, melt the wafers in the microwave per the package directions.  Remove the Oreo balls from the freezer and place them into the chocolate, using a fork to roll them around until they are fully coated.

Try to tap off as much excess chocolate as you can and place them on a parchment-lined cookie sheet.  Garnish with Oreo crumbs or sprinkles.  Let the chocolate set on the countertop or in the refrigerator.

The Oreo truffles will keep in the fridge for weeks and freeze beautifully!

Share Your Thoughts...

Lastly, if you make Easy Oreo Truffles, be sure to leave a review down below at the bottom of this page (stars are also appreciated)! Above all, I love to hear from you and always do my best to respond to each and every review. And of course, if you do make this recipe, don’t forget to tag me on Instagram! Looking through the photos of recipes you all have made is one of my favorite things to do!

Easy Oreo Truffles

Makes: 40 truffles

Prep Time: 30 minutes

Total Time: 30 minutes plus chill & set time 1 hour & 15 minutes

Ingredients

  • 1 package (36 cookies, 530g) Oreo cookies
  • 8 ounce block of cream cheese, room temperature
  • 1/2 tsp pure vanilla extract
  • 10 ounces (284g) Ghirardelli melting wafers (dark, milk, or white chocolate)

Instructions

Place the Oreo cookies into a food processor and pulse until they become fine crumbs.

In a stand mixer fitted with the paddle attachment (a hand mixer works fine too), beat the cream cheese on medium-high until it’s smooth and creamy, about 4 minutes. Reserve 2 tablespoons of the Oreo cookie crumbs and set them aside, then add the rest of the Oreo crumbs to the cream cheese. Add the vanilla extract and mix on low speed until well combined, about 1 minute.

Line a cookie sheet with wax or parchment paper. Use a tablespoon to scoop the Oreo mixture and roll them into 1-inch balls, then place them onto the lined cookie sheet. When you’re finished forming the Oreo balls, place them into the freezer to chill for at least 15 minutes.

Place the chocolate melting wafers into a medium microwave safe bowl and melt according to the package instructions. Remove the Oreo balls from the freezer and place them into the melted chocolate a few at a time. Use a fork to roll them around until coated, then carefully lift them out with the fork and place them back onto the lined cookie sheet. Garnish with cookie crumbs or sprinkles immediately after coating, while the chocolate is still wet.

Let the chocolate coating set, then serve right away or store in an airtight container in the refrigerator for up to two weeks.

Recipe from Sugar and Sparrow

]]>
https://thefancypantskitchen.com/recipe/easy-oreo-truffles/feed/ 0
Mini Lemon Pavlovas https://thefancypantskitchen.com/recipe/mini-lemon-pavlovas/ https://thefancypantskitchen.com/recipe/mini-lemon-pavlovas/#respond Tue, 21 Jan 2025 23:17:28 +0000 https://thefancypantskitchen.com/?post_type=ranna_recipe&p=26331

When you are looking for a light, lemony dessert, try Mini Lemon Pavlovas.  Winter is the perfect time for citrus (especially in Arizona where our trees bear gorgeous citrus this time of year) and after heavy desserts all holiday season, it’s a wonderful change to serve something lighter.

I love pavlovas and meringues.  If you want to explore further, try Pavlova with Sugared Cranberries or Hazelnut & Coffee Meringues.  Both are delicious examples of this airy yet crunchy confection.

The key with making meringues or pavlova is to make them on a dry day.  Any humidity in the air with cause them to weep and get chewy as opposed to crisp on the outside and marshmallowy on the inside.  Besides that, it is really simple to make these little babies!

Making the pavlova batter is really easy.  In a large bowl, beat the egg whites with cream of tartar until soft peaks form.  Add the sugar in one tablespoon at a time and mix on high until stiff and glossy peaks form.  This should take between 8 and 10 minutes.  Add the vanilla extract, lemon juice and lemon zest.

Put the meringue into a piping bag fitted with a large star tip and pipe small nests of meringue onto a parchment-lined baking sheet.  You can also spoon it into mounds on the baking sheet, adding a little dip in the middle of each one.

Bake the meringues at a very low heat for 45 minutes or until the meringue is a very light cream color.  Turn off the oven, open the door slightly and let the meringues cool in the oven for at least one hour.

For the whipped cream, whip the heavy cream on high until soft peaks form.  Mix in the powdered sugar, vanilla and lemon zest.

To assemble the pavlovas, spoon whipped cream into the center of each one and top with assorted berries, mangos and kiwi.  Enjoy!

Share Your Thoughts...

Lastly, if you make Mini Lemon Pavlovas, be sure to leave a review down below at the bottom of this page (stars are also appreciated)! Above all, I love to hear from you and always do my best to respond to each and every review. And of course, if you do make this recipe, don’t forget to tag me on Instagram! Looking through the photos of recipes you all have made is one of my favorite things to do!

Mini Lemon Pavlovas

Makes: 12 servings

Prep Time: 15 minutes

Bake Time: 45 minutes

Total Time: 1 hour plus cooling time 2 hours

Ingredients

Pavlovas:

  • 6 large egg whites
  • 1/4 tsp cream of tartar
  • 1 & 1/2 cup granulated sugar
  • 3/4 tbsp lemon zest
  • 3 tsp lemon juice
  • 1 & 1/2 tsp vanilla extract
  • 3/4 tbsp corn starch

Zesty Lemon Whipped Cream:

  • 3/4 cup heavy cream
  • 1 1/2 tablespoon powdered sugar
  • 3/4 teaspoon vanilla extract
  • 1 1/2 teaspoon lemon zest

Toppings:

  • Berries, Mangos, Kiwi

Instructions

Preheat the oven to 300°F. Line a large baking sheet with parchment paper and set aside.

In a large bowl, beat egg whites with the cream of tartar on medium-high speed until soft peaks form. Add in sugar 1 tablespoon at a time, beating well in between each addition.

Repeat until all sugar is incorporated and mix on high until meringue forms stiff and glossy peaks, about 8-10 minutes.

Beat in vanilla extract, lemon zest, and lemon juice. Gently fold in cornstarch.

Transfer the meringue to a piping bag fitted with a large star tip, and pipe small nests of meringue onto the prepared baking sheet. Alternatively, simply spoon the meringue onto the baking sheet and create a small dip in the middle of each one.

Place the baking sheet in the oven and turn the temperature down to 250°F. Bake for about 45 minutes, or until the meringue is a very light cream color. Turn off the oven, leave the door cracked open, and allow to cool completely inside the oven, for at least 1 hour. Store in an airtight container until ready to serve.

Zesty Lemon Whipped Cream:

In a medium bowl, whip the whipping cream on high until soft peaks form. Mix in the powdered sugar, vanilla extract, and lemon zest. Store the whipped cream in the fridge in an airtight container until ready to use.

Immediately before serving, assemble the pavlovas. Spoon whipped cream onto each one, and top with assorted berries, mangos and kiwi.

]]>
https://thefancypantskitchen.com/recipe/mini-lemon-pavlovas/feed/ 0
Sweet Potato Fry Steak Salad https://thefancypantskitchen.com/recipe/sweet-potato-fry-steak-salad/ https://thefancypantskitchen.com/recipe/sweet-potato-fry-steak-salad/#respond Mon, 13 Jan 2025 20:14:26 +0000 https://thefancypantskitchen.com/?post_type=ranna_recipe&p=26249

This delicious Sweet Potato Fry Steak Salad is a wonderful combination of flavors and textures for an easy and mouthwatering weekday dinner!

Grill or pan-sear a steak,  slice it and top it over shredded romaine and spread around baked sweet potato fries, cherry tomatoes and avocado slices.  Don’t forget to melt gorgonzola butter over the top of the steak…it’s divine!

The first thing to do for this dish is to make the fries.  Slice sweet potatoes into large matchsticks and place them on a baking sheet.  Toss with olive oil, chipotle chili powder, salt & pepper.  Spread them out into a single layer (use two sheets if necessary to not crowd them).  Bake them for 15 minutes, flip, and continue baking for another 15 minutes.

While the fries are baking, make the vinaigrette by placing all of the ingredients in a jar and shaking it until combined.

Combine the softened butter, blue cheese and basil in a bowl.

Grill the steak or use a grill pan, if it’s too cold outside.  Cook it to your desired doneness. Let the steaks rest for 5-10 minutes.

Spread the butter over the steak and then slice it against the grain.

To assemble the salad, add the romaine, tomatoes, avocado and dressing to a bowl and toss to combine.  Top with steak and fries and serve immediately!  Enjoy!

Share Your Thoughts...

Lastly, if you make Sweet Potato Fry Steak Salad, be sure to leave a review down below at the bottom of this page (stars are also appreciated)! Above all, I love to hear from you and always do my best to respond to each and every review. And of course, if you do make this recipe, don’t forget to tag me on Instagram! Looking through the photos of recipes you all have made is one of my favorite things to do!

Sweet Potato Fry Steak Salad

Makes: 6 servings

Prep Time: 20 minutes

Cook Time: 40 minutes

Total Time: 1 hour

Ingredients

  • 3 small-medium sweet potatoes, cut into large matchsticks
  • 4 tbsp extra virgin olive oil
  • 1 tsp chipotle chili powder
  • kosher salt and fresh black pepper
  • 1 (8-10 ounce) ribeye steak or 1 & 1/2 pound flank steak
  • 6 cups shredded romaine lettuce
  • 2 cups cherry tomatoes, halved
  • 1 avocado, sliced
  • 4 tbsp unsalted butter, at room temperature
  • 3-4 ounces gorgonzola or blue cheese, crumbled
  • 2 tbsp chopped fresh basil

Balsamic Vinaigrette:

  • 1/4 cup extra virgin olive oil
  • 2 tbsp balsamic vinegar
  • 2 tsp honey
  • 1 tsp Dijon mustard
  • 1 small shallot, finely diced
  • 2 tbsp fresh chopped thyme
  • kosher salt, black pepper, and red pepper flakes to taste

Instructions

To make the fries, preheat the oven to 425°F. Place the sweet potatoes on a large baking sheet and toss with 3 tablespoons olive oil, the chipotle chili powder, and a large pinch each of salt and pepper. Spread the fries in an even layer (you might need two sheet pans. You don’t want to crowd the fries). Transfer to the oven and bake for 15-20 minutes, then flip and bake for 15-20 minutes more. You want the sweet potatoes to be tender, yet crisp.

To make the vinaigrette, combine all ingredients in a glass jar and shake or whisk until combined. Taste and adjust the salt, pepper, and red pepper flakes.

To make the steak, remove the steaks from the fridge 30 minutes prior to grilling. Preheat the grill or a grill pan to high heat. Rub with 1 tablespoon olive oil and season generously with salt and pepper. Sear until your desired doneness is reached, about 5-8 minutes for medium-rare, per side. Remove the steaks and allow to rest for 5-10 minutes.

Combine the butter, blue cheese, and basil in a bowl. Spread the butter over the steak, then slice against the grain.

Add the romaine, tomatoes, avocado, and dressing to a bowl. Toss to combine. Once the salad has been tossed, top with fries and steak. Serve immediately.

Chef’s Note:

Blue Cheese: if you just can’t do blue cheese, swap the blue cheese for 1/3 cup grated parmesan or make garlic butter with 1-2 cloves grated garlic. Either will be delicious.

Recipe from Half Baked Harvest

]]>
https://thefancypantskitchen.com/recipe/sweet-potato-fry-steak-salad/feed/ 0
Gingerbread Caramel Corn https://thefancypantskitchen.com/recipe/gingerbread-caramel-corn/ https://thefancypantskitchen.com/recipe/gingerbread-caramel-corn/#respond Mon, 09 Dec 2024 16:00:59 +0000 https://thefancypantskitchen.com/?post_type=ranna_recipe&p=25947

‘Tis the season for all things gingerbread and Gingerbread Caramel Corn is no exception.  This easy and delicious popcorn evokes winter memories with ginger, cinnamon, allspice and cloves flavors.

Serve up a bowl of Gingerbread Caramel Corn while watching the snow fall (or a football game…or Netflix…or…).  

Begin by making the popcorn.  You might be tempted to purchase already popped corn but I suggest you follow the easy directions for making your own.  It’s very simple and you get pure popcorn (no salt or additives).  I also like “mushroom” kernels.  They produce very large popped corn with lots of crevices to hold the caramel glaze.

Transfer the popped corn to a grocery paper bag.  I have tried to use other forms of paper bags but they aren’t strong enough, so ask your friendly grocer to give you a few bags!

To make the caramel, place the butter in a microwaveable bowl and melt on high.  Add the corn syrup and stir well to combine.

Then, add the molasses, brown sugars, and spices and stir until well combined.

Put the mixture into the microwave and heat on high for two minutes, stir, heat for another minute and stir.  Repeat this two more times and then  add the vanilla and baking soda and stir until the soda is incorporated completely. 

Pour the mixture over the popcorn that’s in the paper bag.  Fold the top edge down once and then…SHAKE SHAKE SHAKE.  This is critical!  Distribute the caramel throughout to coat all of the popcorn,  Since the top is folded down, you won’t know for sure but do your best to distribute the caramel.

Microwave on high for one minute and holding the edges of the bag with a potholder or gloves, shake shake shake again.  Repeat this 3 more times and when done, spread the popcorn out on parchment to cool.

Once completely cool, break up and transfer to a bowl to serve or an airt-tight container to store.

Enjoy this flavorful popcorn through the holidays or any time you get a hankering for some gingerbread!

For more delicious popcorn recipes, try Caramel Apple Popcorn and Buffalo Caramel Popcorn.

Share Your Thoughts...

Lastly, if you make Gingerbread Caramel Corn, be sure to leave a review down below at the bottom of this page (stars are also appreciated)! Above all, I love to hear from you and always do my best to respond to each and every review. And of course, if you do make this recipe, don’t forget to tag me on Instagram! Looking through the photos of recipes you all have made is one of my favorite things to do!

Gingerbread Caramel Corn

Makes: 16 servings

Prep Time: 30 minutes

Cook Time: 15 minutes

Total Time: 45 minutes

Ingredients

  • 16 cups popped popcorn (see Chef’s Notes)
  • 3/4 cup unsalted butter
  • 1/2 cup corn syrup (not high fructose corn syrup – I use Karo)
  • 1 tbsp molasses
  • 1 cup light brown sugar
  • 1/2 cup dark brown sugar (if you don’t have dark brown sugar you can omit it and just use 1 & 1/2 cups total of light brown sugar.)
  • 2 tsp ground cinnamon
  • 1 tsp ground ginger
  • 1/4 tsp allspice
  • 1/4 tsp ground cloves
  • 1/2 tsp kosher salt
  • 2 tsp vanilla extract
  • 1 tsp baking soda

Instructions

Prepare a work surface (kitchen counter) by laying out a 4-feet long piece of parchment paper.

After popping the popcorn, transfer it to a bowl. Lift the popcorn with your hands and shake the bowl lightly so the unpopped kernels fall to the bottom. Lift the 4 quarts of popcorn out of the bowl and transfer to a large brown paper grocery bag.

Place the butter in a large (2 quart) microwave safe bowl and microwave on high power for two minutes or until the butter is melted. Add the corn syrup and stir well to combine. Add the molasses, brown sugars, cinnamon, ginger, allspice, cloves and salt. Stir until everything is well incorporated.

Place in the microwave and heat on high power for 2 minutes. Stir then return to the microwave for 1 minute. The mixture should be bubbling up furiously by this point. Remove bowl and stir then return to the microwave for another minute. Repeat this cooking for one minute and stirring two more times.

Remove the bowl from the microwave and stir in the vanilla and baking soda. Stir until all of the baking soda is well incorporated.

Pour the hot mixture over the popcorn in the bag. Fold the top of the bag down once and shake, shake, shake to distribute syrup through the corn. Microwave on high power for 1 minute. Remove the bag and hold it at the folded down top and one of the bottom corners. You may need to use a pot holder as the bag will be hot. Shake well the return to the microwave for another minute.

Repeat cooking and shaking two more times for a total of 4 minutes. Turn the popcorn out onto the prepared parchment paper. Allow to cool completely.

Store in an airtight container. The caramel corn will keep well for 1-2 weeks.

Chef’s Notes:

I like to use “mushroom” popcorn kernels as they produce big popped corn with lots of nooks and crannies to capture the caramel. This is the popcorn that I like but feel free to use whichever you prefer.

I use an old-fashioned whirly pop to pop my popcorn. I’ve used it for years and always get excellent popcorn but you can also pop it in a large pot on the stovetop.

I use 3/4 cup kernels and 3 tablespoons of canola oil to make 16 cups of popped corn.

Recipe adapted from The Cafe Sucre Farine

]]>
https://thefancypantskitchen.com/recipe/gingerbread-caramel-corn/feed/ 0
Boo Bark https://thefancypantskitchen.com/recipe/boo-bark/ https://thefancypantskitchen.com/recipe/boo-bark/#comments Sat, 19 Oct 2024 17:26:50 +0000 https://thefancypantskitchen.com/?post_type=ranna_recipe&p=25600

Boo Bark is a scary delicious was to celebrate Halloween!  It’s easy to make (the kiddos will enjoy helping with this one) and very tasty!

Simply swirl white and dark chocolate together and top with Halloween candy.  Need I say more??

Melt the chocolates in a double boiler or the microwave.  The technique for melting chocolate in the microwave is in the recipe.  Either way, once melted and smooth, spread the dark chocolate on a parchment-lined sheet pan.  Then drizzle the white chocolate over the top of the dark chocolate.

Use a knife or a toothpick to swirl the two chocolates together.

Now the fun begins:  sprinkle your favorite Halloween candy decorations over the top.  Make sure you include googly eyes to give it this fun look!

Allow the chocolate to harden at room temperature or in the fridge (I have no patience, so the fridge is the only option for me!) and then break into pieces prior to serving.

Boo!

Share Your Thoughts...

Lastly, if you make Boo Bark, be sure to leave a review down below at the bottom of this page (stars are also appreciated)! Above all, I love to hear from you and always do my best to respond to each and every review. And of course, if you do make this recipe, don’t forget to tag me on Instagram! Looking through the photos of recipes you all have made is one of my favorite things to do!

Boo Bark

Makes: 12 servings

Prep Time: 10 minutes

Cook Time: 10 minutes

Total Time: 20 minutes plus fridge time 15 minutes

Ingredients

  • two 4-ounce semi-sweet chocolate bars, coarsely chopped (see Chef’s Notes)
  • two 4-ounce white chocolate bars, coarsely chopped
  • festive Halloween candy such as eyeball sprinkles, Halloween sprinkles, and Halloween M&Ms

Instructions

Line a large baking sheet with parchment paper or a silicone baking mat. Set aside.

Melt the semi-sweet chocolate in a double boiler or the microwave. If using the microwave, place the chopped chocolate in a medium heat-proof bowl. Melt in 20 second increments in the microwave, stopping and stirring after each increment until completely melted and smooth.

Melt the white chocolate following the same melting process above.

Pour the melted semi-sweet chocolate onto the prepared baking sheet and spread out into a large rectangle (anywhere around 8×12 inches is great). Drizzle the white chocolate mixture on top. Use a knife or a toothpick to swirl the layers together. Decorate the top of the bark with candies.

Allow the chocolate to completely set uncovered at room temperature or in the refrigerator, about 45 minutes. Once hardened, break into pieces as large or small as you want.

Store bark in an airtight container at room temperature in a cool, dry place for up to 1 week or in the refrigerator for up to 2 weeks.

Chef’s Notes:

Chocolate:

Do not use chocolate chips or morsels because they do not melt properly. Pure chocolate is best for easy melting and best taste. I like Ghirardelli, Baker’s, Lindt, or Trader Joe’s pound plus bars found in the baking aisle next to the chocolate chips. They are typically sold as 4 ounce bars.

]]>
https://thefancypantskitchen.com/recipe/boo-bark/feed/ 2
Caramel Apple Popcorn https://thefancypantskitchen.com/recipe/caramel-apple-popcorn/ https://thefancypantskitchen.com/recipe/caramel-apple-popcorn/#respond Sun, 13 Oct 2024 23:58:39 +0000 https://thefancypantskitchen.com/?post_type=ranna_recipe&p=25508

Caramel Apple Popcorn is the quintessential Autumn treat!  It’s caramel corn flavored with apple cider, cinnamon, nutmeg and dark brown sugar.  It’s a very easy recipe as most of it’s done in the microwave.  For a yummy fall confection, try this caramel apple popcorn!

This recipe begins in two ways.  One is by having brown paper grocery bags on hand.  They are tricky to find these days but if you know a grocery store that carries them, you could ask if they will give/sell you some bags (or you could be like a certain friend of mine that chose to steal the bags right from behind the register!  Not naming names, KN, but you know who you are!!!).  It’s important to have these bags and not the kind you might get at a restaurant as a to-go bag.  I tried that but they are too flimsy. Trader Joe’s bags work great or, if you are in Arizona, AJ’s bags are perfect.

The other important point is to have homemade popcorn. I like to use “mushroom” popcorn kernels as they produce big popped corn with lots of nooks and crannies to capture the caramel. This is the popcorn that I like but feel free to use whichever you prefer.

I use an old-fashioned whirly pop to pop my popcorn. I’ve used it for years and always get excellent popcorn but you can also pop it in a large pot on the stovetop.

Once the kernels are popped, transfer the popcorn to a bowl and shake it up so that any unpopped kernels are on the bottom and then use your hands to lift out the popped kernels, leaving behind the unpopped ones.  Place the popped corn in the grocery bag.

Make the caramel sauce by bringing the apple cider to a boil and continue until it reduces to 1/4 cup, about 8-10 minutes.  Place the apple cider in a microwave-safe bowl.  Add the corn syrup and stir well.

Add the butter, brown sugars, and spices and stir.  Place the bowl in the microwave and cook on high for 3 minutes and then stir.

Return to the microwave for 1 minute and then stir.  Repeat 2 more times so that it’s been in the microwave for a total of 3 additional minutes.

Remove the bowl from the microwave and stir in the vanilla and baking soda and stir well.  Pour the hot mixture over the popcorn and fold down the top of the bag.  Shake well to distribute the caramel then place in the microwave for 1 minute.  Remove from the microwave and shake, shake, shake again.  You are trying to distribute the caramel thoughout the popcorn.  

Repeat this for a total of 5 minutes in the microwave.

Turn out the popcorn onto parchment paper and spread it out so that it’s in a single layer.  Allow to cool completely.

Serve or store in an air-tight container.

Share Your Thoughts...

Lastly, if you make Caramel Apple Popcorn, be sure to leave a review down below at the bottom of this page (stars are also appreciated)! Above all, I love to hear from you and always do my best to respond to each and every review. And of course, if you do make this recipe, don’t forget to tag me on Instagram! Looking through the photos of recipes you all have made is one of my favorite things to do!

Caramel Apple Popcorn

Makes: 16 servings

Prep Time: 25 minutes

Cook Time: 20 minutes

Total Time: 45 minutes

Ingredients

  • 16 cups popped popcorn (see Chef’s Notes)
  • 1 & 1/2 cups apple cider (you could also use 100% apple juice)
  • 3 tbsp corn syrup
  • 3/4 cup unsalted butter
  • 1 cup light brown sugar
  • 1/2 cup dark brown sugar (if you don’t have dark brown sugar you can omit it and just use 1 & 1/2 cups total of light brown sugar)
  • 1 tsp cinnamon
  • 1/4 tsp nutmeg
  • 1/2 tsp kosher salt
  • 2 tsp vanilla extract
  • 1 tsp baking soda

Instructions

Prepare a work surface (kitchen counter) by laying out a 4-feet long piece of parchment paper.

After popping the popcorn, transfer it to a bowl. Lift the popcorn with your hands and shake the bowl lightly so the unpopped kernels fall to the bottom. Lift the 4 quarts of popcorn out of the bowl and transfer to a large brown paper grocery bag.

In a medium-size non-stick sauté pan, bring the apple cider to a boil over medium high heat. Boil vigorously, stirring occasionally, for 8-10 minutes or until the cider is reduced to 1/4 cup. Transfer the cider to a large microwave-safe bowl.

Add the corn syrup to the cider syrup and stir well to combine. Add the butter, brown sugars, cinnamon, nutmeg and salt and stir until everything is well incorporated. Place in the microwave and heat on high power for 3 minutes. Stir.

After stirring, return to the microwave for 1 minute. The mixture should be bubbling up furiously by this point. Remove bowl and stir well then return to the microwave for another minute. Repeat this cooking and stirring for a total of 3 minutes.

Remove the bowl from the microwave and stir in the vanilla and baking soda. Stir until all of the baking soda is well incorporated. Pour the hot mixture over the popcorn in the bag. Fold the top of the bag down once and shake, shake, shake to distribute syrup through the corn.

Microwave on high power for 1 minute. Remove the bag and hold it at the folded-down top and one of the bottom corners. Shake well the return to the microwave for another minute. Repeat cooking and shaking two more times for a total of 5 minutes. Turn the popcorn out onto the prepared parchment paper. Allow to cool completely.

Store in an airtight container. The caramel corn will keep well for 1-2 weeks.

Chef’s Notes:

I like to use “mushroom” popcorn kernels as they produce big popped corn with lots of nooks and crannies to capture the caramel. This is the popcorn that I like but feel free to use whichever you prefer.

I use an old-fashioned whirly pop to pop my popcorn. I’ve used it for years and always get excellent popcorn but you can also pop it in a large pot on the stovetop.

I use 3/4 cup kernels and 3 tablespoons of canola oil to make 16 cups of popped corn.

Recipe adapted from The Cafe Sucre Farine

]]>
https://thefancypantskitchen.com/recipe/caramel-apple-popcorn/feed/ 0
Matzah Crack https://thefancypantskitchen.com/recipe/matzah-crack/ https://thefancypantskitchen.com/recipe/matzah-crack/#respond Thu, 11 Apr 2024 15:57:59 +0000 https://thefancypantskitchen.com/?post_type=ranna_recipe&p=24380

For the most addictive Passover dessert, try Matzah Crack!  I promise you’ll be hooked! 

Layers of matzah, toffee, chocolate and pecans make this easy confection a winner.  It’s got to be on the dessert rotation during Passover!

Begin by lining a sheet pan with foil and then covering the foil with large pieces of matzah.  Cut and piece it together to ensure complete coverage.

Make the toffee by cooking butter and brown sugar in a saucepan until it comes to a boil, whisking constantly.  Continue cooking for another 3 minutes and then carefully pour the hot toffee over the matzah.  Use an offset spatula to spread into an even layer.

Pop the sheet pan into a preheated oven and bake until the toffee is bubbling all over.  That will take 8-10 minutes.  Remove it from the oven and scatter chocolate chips all over it.  Wait a few minutes and then use an offset spatula to spread the chocolate evenly.  Sprinkle with the pecans and sea salt. 

Refrigerate for 45 minutes, but not any longer as it will be too hard to cut through the toffee in clean pieces.

Remove sheet pan from the fridge and melt the white chocolate.  Place it in a pastry bag fitted with a small tip or a baggy with a small corner cut off.  Drizzle the white chocolate over the top of the crack.  Refrigerate for another 10 minutes to harden the white chocolate.

Lift the crack to a cutting board and use a sharp large knife to cut into 2-inch squares.  

You can refrigerate it and serve it cold right from the fridge or at room temperature.

Share Your Thoughts...

Lastly, if you make Matzah Crack, be sure to leave a review down below at the bottom of this page (stars are also appreciated)! Above all, I love to hear from you and always do my best to respond to each and every review. And of course, if you do make this recipe, don’t forget to tag me on Instagram! Looking through the photos of recipes you all have made is one of my favorite things to do!

Matzah Crack

Makes: 35 2-inch pieces

Prep Time: 15 minutes

Cook Time: 16 minutes

Total Time: 30 minutes plus chill time 55 minutes 

Ingredients

  • 4-5 lightly salted matzah (preferably the Streit’s brand – see note below)
  • 2 sticks (1 cup) unsalted butter
  • 1 cup firmly packed dark brown sugar
  • 1 (12-ounce) bag semi-sweet chocolate chips
  • 1/2 heaping cup chopped pecans, toasted
  • 1/2 tsp sea salt flakes or kosher salt
  • 1/2 cup white chocolate chips

Instructions

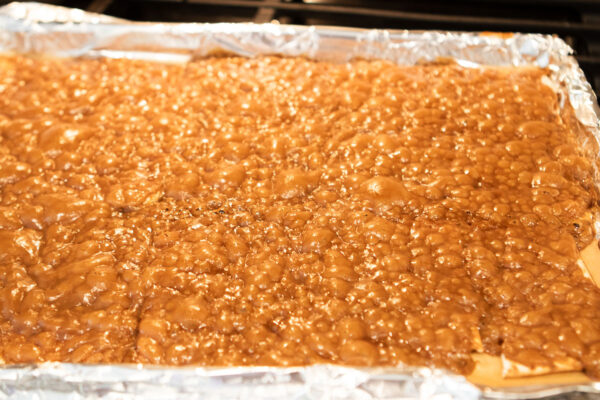
Preheat the oven to 350°F. Line a rimmed baking sheet with heavy duty aluminum foil, making sure the foil goes up and over the edges, and top with a sheet of parchment paper.

Cover the baking sheet with the matzos, cutting and piecing them together as necessary to fill the entire pan.

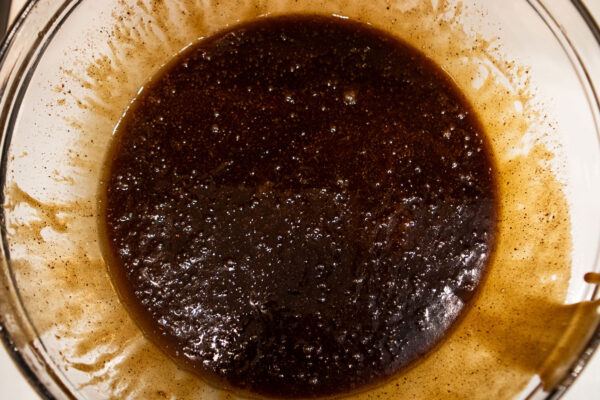
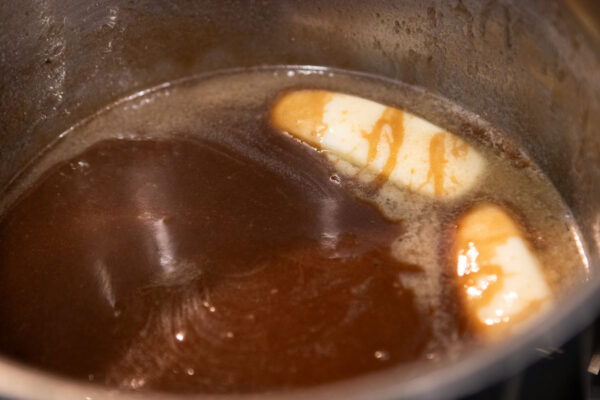
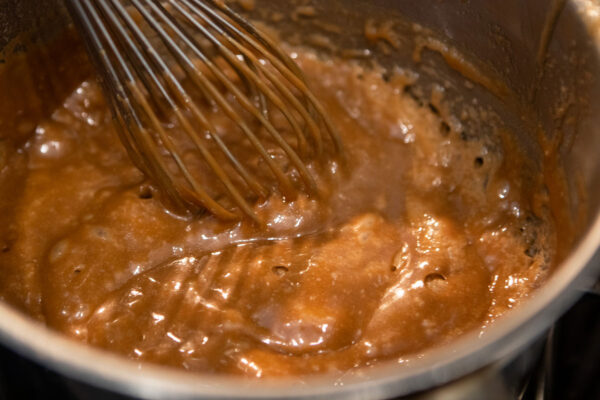
To make the toffee, combine butter and brown sugar in a medium saucepan. Cook over medium heat, stirring constantly with a whisk, until the mixture comes to a boil. (If it looks like it’s separating, just keep stirring; it will come together.) Once the mixture comes to a boil, continue cooking and stirring for another 3 minutes until foamy and thickened. (Be extra careful…the toffee will be very hot!) Immediately pour the toffee over the matzos and, using a spatula, spread into an even layer.

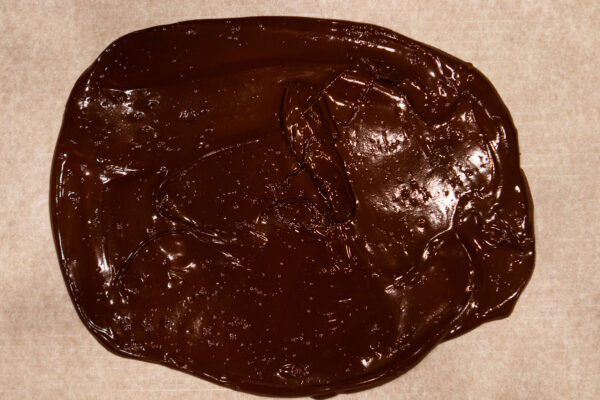
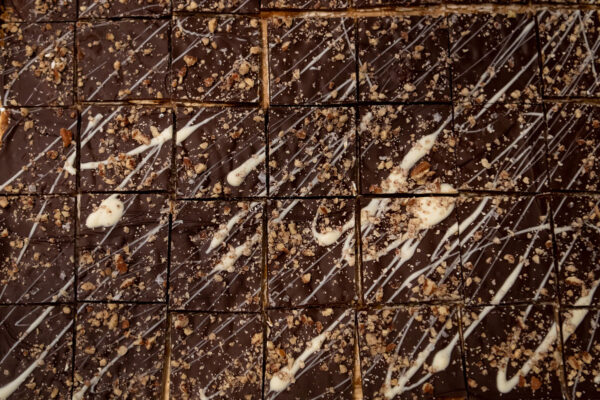
Put the pan into the oven and bake for 8 to 10 minutes, or until the toffee topping is crackled and bubbling all over. Remove the pan from the oven and place on wire cooling rack on the counter. Immediately scatter the chocolate chips evenly over top. Wait 3 to 5 minutes for the chips to soften, then use an offset spatula to spread the chocolate into an even layer. Sprinkle with the pecans and sea salt.

Refrigerate until the chocolate is firm, about 45 minutes. Don’t leave it in the fridge too much longer, otherwise it will be hard to cut.

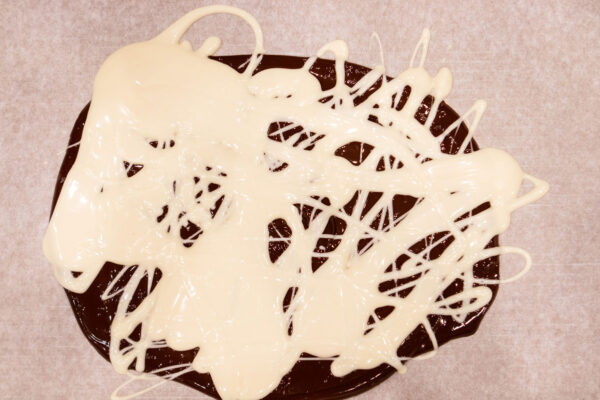
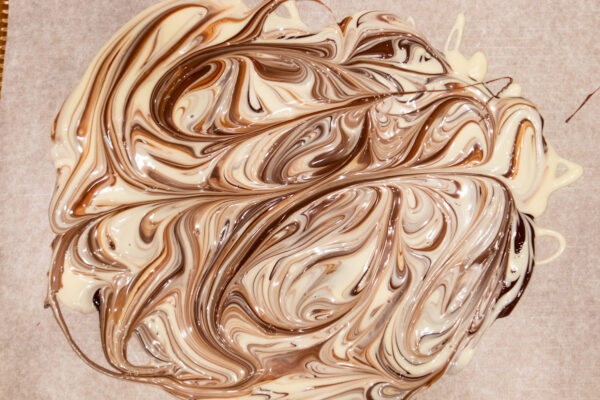
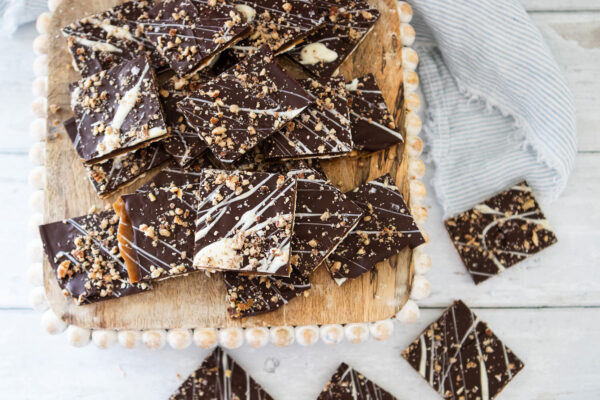
Melt the white chocolate chips in a small bowl in the microwave and pour into a small pastry bag with a small round tip in it (or use a ziplock baggy with a small corner cut off). Drizzle white chocolate over the top of the bark. Refrigerate for another 10 minutes to harden the white chocolate drizzle.

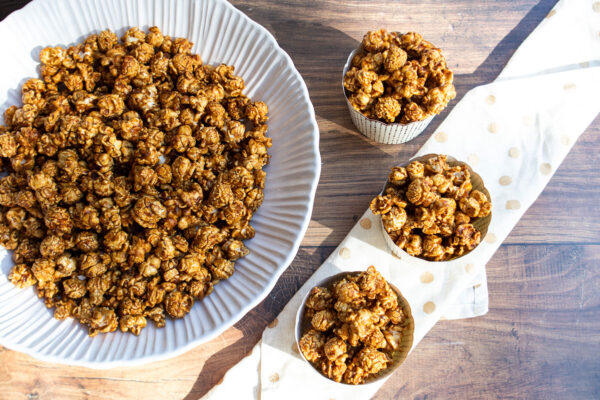
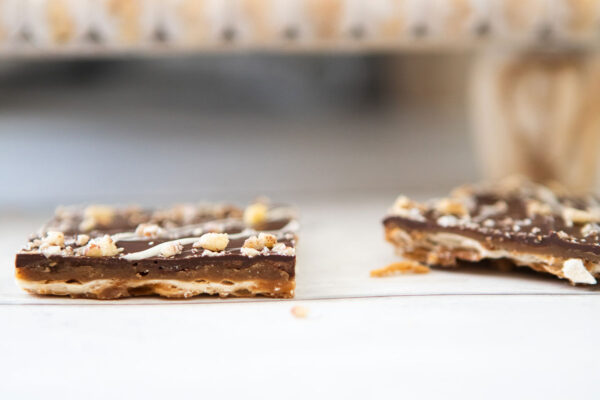
Lift the foil overhang to transfer the matzah crack onto a large cutting board. Using a large sharp knife, cut into 2-inch squares. Store in an airtight container in the fridge and serve cold.

Chef’s Notes:

I love Streit’s lightly salted matzos for this recipe but any brand will work. If you can only find regular salted matzos, cut back or omit the sea salt at the end. If you can’t find matzos, substitute Saltine crackers (not kosher for Passover, however) and omit the salt. You’ll need enough to cover the entire sheet pan.

Freezer-Friendly Instructions: The toffee can be frozen for up to 3 months: Place the toffee in an airtight container. It can be eaten directly from the freezer or, if you’d like, remove the bark from the container and let it come to room temperature.

Recipe by Once Upon a Chef

]]>
https://thefancypantskitchen.com/recipe/matzah-crack/feed/ 0
Peppermint Marshmallows https://thefancypantskitchen.com/recipe/peppermint-marshmallows/ https://thefancypantskitchen.com/recipe/peppermint-marshmallows/#respond Wed, 20 Dec 2023 20:33:09 +0000 https://thefancypantskitchen.com/?post_type=ranna_recipe&p=23536

Peppermint Marshmallows on top of a mug of hot chocolate or a chocolate layer cake is my idea of decadence. It’s a sweet and pretty way to say hello to the season.  The cooling peppermint flavor combined with a soft homemade marshmallow is too inviting to pass up!

And, this is another recipe where people think that it’s just too hard to make.  Just stop!  If you can use a mixer, you can make marshmallows!

Begin by sprinkling unflavored gelatin over water and giving it a few minutes to soak.  Meanwhile, bring water, corn syrup and sugar to a boil in a saucepan.

Then carefully pour the hot sugar mixture over the gelatin mixture and beat on high for 12 minutes.  The mixture will become fluffy and stiff peaks will form.

Add vanilla, peppermint extract and crushed candy canes and then pour the mixture into a baking dish.

Squeeze drops of food coloring over the top and use an oiled knife to swirl the coloring into the marshmallows.  Let the marshmallow candy rest for at least 4 hours.

Mix corn starch and confectioners’ sugar together in a small bowl.

Use an oiled knife to cut the slab into small cubes.  Dip each marshmallow in the corn starch-sugar mixture.  This will keep the marshmallows from sticking together when you store them.

The marshmallows are amazing atop hot chocolate, on a chocolate layer cake or on their own.  So, enjoy, indulge and have a delicious holiday season!

Share Your Thoughts...

Lastly, if you make Peppermint Marshmallows, be sure to leave a review down below at the bottom of this page (stars are also appreciated)! Above all, I love to hear from you and always do my best to respond to each and every review. And of course, if you do make this recipe, don’t forget to tag me on Instagram! Looking through the photos of recipes you all have made is one of my favorite things to do!

Peppermint Marshmallows

Makes: 36 marshmallows

Prep Time: 20 minutes

Total Time: 20 minutes plus rest time 4 hours

Ingredients

  • 3/4 cup water, divided
  • 3 envelopes unflavored gelatin (.25 ounces each)
  • 2/3 cup light corn syrup
  • 2 cups granulated sugar
  • 1 tbsp pure vanilla extract
  • 1/2 tsp peppermint extract
  • 1/2 cup finely crushed candy canes (optional)
  • Red gel food coloring
  • 1/4 cup corn starch
  • 1/4 cup confectioners’ sugar

Instructions

Line a 9×9 inch baking dish with plastic wrap and spray with non-stick cooking spray. Spray another piece of plastic wrap to cover the top, and set aside.

Place 1/2 cup of water in the bowl of a stand mixer fitted with the whisk attachment, and sprinkle gelatin on top of water to soak.

While gelatin is soaking, combine 1/4 cup of water, corn syrup, and sugar in a saucepan. Bring the mixture to a boil over medium heat. Boil the mixture hard for 1 minute.

Carefully pour the hot sugar mixture into the gelatin mixture and beat on high for 12 minutes with the stand mixer, until the mixture is fluffy and forms stiff peaks. Add in vanilla extract and peppermint extract and beat until just combined. Mix in crushed candy canes, if using.

Pour the marshmallow mixture into the prepared baking dish, using a greased spatula to smooth the top. Squeeze 9-12 drops of food coloring across the top of the marshmallow, then use an oiled butter knife or chopstick to swirl the coloring into the marshmallows. Cover the candy with the piece of prepared plastic wrap, pressing it down lightly to seal the covering to the top of the candy.

Allow the marshmallow candy to rest for 4 hours or overnight.

Mix together cornstarch and confectioners’ sugar in a shallow dish. Using oiled scissors or an oiled kitchen knife, cut the marshmallow candy into strips, then into 1-inch squares. Dredge the marshmallows lightly in the cornstarch mixture and store in an airtight container.

Chef’s Notes:

Look for unflavored gelatin in the baking aisle. It will be by the flavored gelatins (Jello, etc), but comes in a smaller box that contains several envelope packets. Knox is the most common brand of unflavored gelatin.

Light corn syrup is extremely common in candy recipes. It helps prevent sugars from crystalizing – consider it a form of insurance when making homemade candy. If you are opposed to using corn syrup, I have had many readers successfully make my marshmallow recipes with honey instead. Just keep in mind that honey may add some flavor to the recipe, unlike corn syrup which has a neutral sweetness.

Make sure you purchase peppermint extract, not mint extract. Peppermint and mint are actually different flavors, and we want peppermint for this recipe.

Recipe from My Baking Addiction

]]>
https://thefancypantskitchen.com/recipe/peppermint-marshmallows/feed/ 0
Oh Henry’s https://thefancypantskitchen.com/recipe/oh-henrys/ https://thefancypantskitchen.com/recipe/oh-henrys/#comments Tue, 28 Nov 2023 00:00:46 +0000 https://thefancypantskitchen.com/?post_type=ranna_recipe&p=23242

Oh Henry’s are a treat that are very reminiscent of growing up in Toronto, Canada.  These delicious treats are named after a favorite chocolate bar, Oh Henry! which has a combination of chocolate, salted peanuts and caramel in it.

This treat uses butterscotch instead of caramel and gives texture by adding chow mein noodles. With only 4 ingredients and taking less that 15 minutes to make, it’s hard to find a more mouthwatering and simple confection!

My friend, Tammy, served these straight from her freezer up at her cottage on the lake in Collingwood, Ontario and I never forgot how good they were.  Thanks for sharing this recipe, Tam!

Melt chocolate and butterscotch chips together in a large saucepan, in a double boiler, or in the microwave (my choice…just melt for a minute at a time, stir, and add more time if necessary).

Stir in the chow mein noodles and salted cocktail peanuts.

Drop little mounds from a teaspoon on to a lightly greased baking sheet.

Either refrigerate or freeze the treats until they are firm.  You can keep them in the freezer and just remove however many you want to serve.

Enjoy!

Share Your Thoughts...

Lastly, if you make Oh Henry’s, be sure to leave a review down below at the bottom of this page (stars are also appreciated)! Above all, I love to hear from you and always do my best to respond to each and every review. And of course, if you do make this recipe, don’t forget to tag me on Instagram! Looking through the photos of recipes you all have made is one of my favorite things to do!

Oh Henry’s

Makes: 3 & 1/2 dozen cookies

Prep Time: 10 minutes

Cook Time: 2 minutes

Total Time: 12 minutes

Ingredients

  • 1 cup salted cocktail peanuts, walnuts or Brazil nuts
  • 6 ounces chocolate chips
  • 6 ounces butterscotch chips
  • 3 ounces chow mein noodles

Instructions

Melt chocolate and butterscotch chips in large saucepan over very low heat, in double boiler or in microwave. Stir in noodles and nuts. Drop from a teaspoon onto a lightly greased, parchment-lined baking sheet. Refrigerate or freeze.

Recipe by Tammy Seigel

]]>
https://thefancypantskitchen.com/recipe/oh-henrys/feed/ 2