Ingredients
Dressing:
- 1 small shallot, minced
- 3 tablespoons apple cider vinegar
- 1/2 tsp smooth dijon mustard
- 1 tsp honey
- 1 tbsp mayonnaise or Greek-style plain yogurt
- 6 tbsp olive oil
- Salt and freshly ground black pepper
Crispy Stuff:
- 1 cup (4 ounces) sharp cheddar, coarsely grated
- 1 cup sliced almonds
- 2 tbsp powdered sugar
- 1/4 tsp kosher salt
- 1/4 tsp ground cayenne
Assembly:
- 5 ounces kale leaves, any variety, cut into thin ribbons (8-10 ounce bunch will yield 5 ounces when ribs are cut out)
- 1 large crisp apple, halved, cored, and cut thin
Instructions
Heat oven to 400°F. In a medium bowl, combine shallot and apple cider vinegar and set aside while you make the crispy stuff.
To make cheddar crisps and sugared almonds, line a large (half-sheet size) rimmed baking sheet with parchment paper. Scatter cheddar evenly over half the parchment, in about a 8×12-inch, 1/4-inch thick rectangle. Sprinkle with a little cayenne or black pepper, if you wish.
In a colander, rinse almonds under cold water (yes, really!) and shake off excess liquid. In a bowl, toss wet almonds with powdered sugar, salt, and 1/4 teaspoon cayenne until evenly coated. Spread on second half of parchment-covered baking sheet in a thin, even layer, leaving an inch around it bare so it can spread.
Bake almonds and cheddar together for 4 to 9 minutes, until the cheese is melted into a lacy, evenly deep golden brown crisp and the almonds are dark at the edges and lightly golden throughout. Please hear me on this: Watch it closely. Both the cheddar and the almonds will go from not-yet-golden to perfectly bronzed to burnt in what feels like a one-minute period. Check it at 4 minutes, then every minute or two thereafter until the pan is just right. Remove and let cool while you finish the salad.
Finish the dressing:
To the shallots and vinegar in the bowl, whisk in dijon, honey, mayo or yogurt, then drizzle in olive oil, whisking the whole time. Season dressing with salt and lots of freshly ground black pepper.
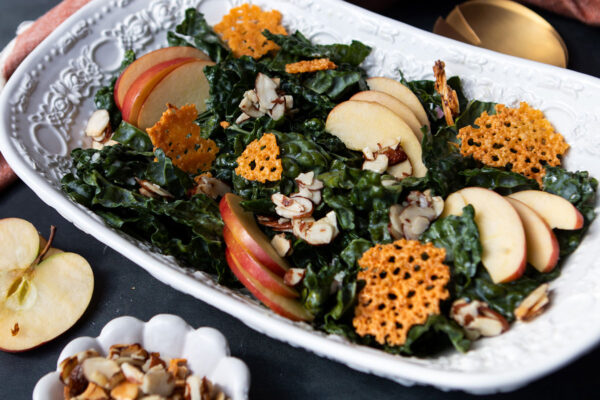
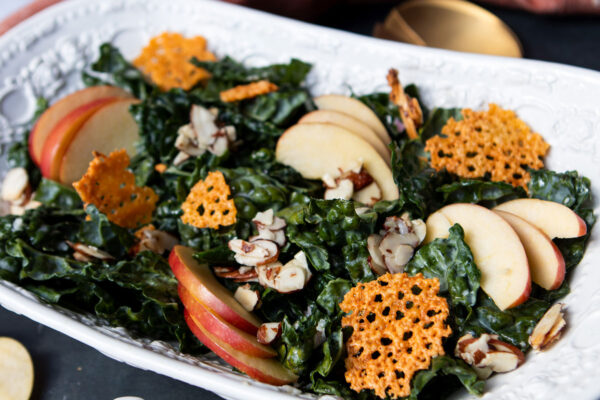
Assemble:
In a large wide bowl or salad plate, toss greens with 2/3 the dressing to start, then tasting and adding the rest if you wish. Arrange the apple over the greens, fanning out slices. Break off clusters of almonds from the baking sheet and scatter them over the salad. If the cheddar crisp seems very oily, you can blot it with a paper towel, before tearing or cutting it into large bite-size pieces and scattering them over the salad. Season the salad with additional salt and pepper and serve right away.
Do Ahead:
The nuts can be stored in an airtight container at room temperature for a week. The cheese crisps are best kept the fridge, lightly covered. The dressing will keep for several days in the fridge. Washed and blotted dry kale keeps in a large zipped bag in the fridge for several days, provided you keep it out of the spots that are prone to freezing produce (or maybe this is just my terrible fridge).
Recipe from Smitten Kitchen