Marbleized Iced Sugar Cookies
- December 15, 2019
- 0 / 5
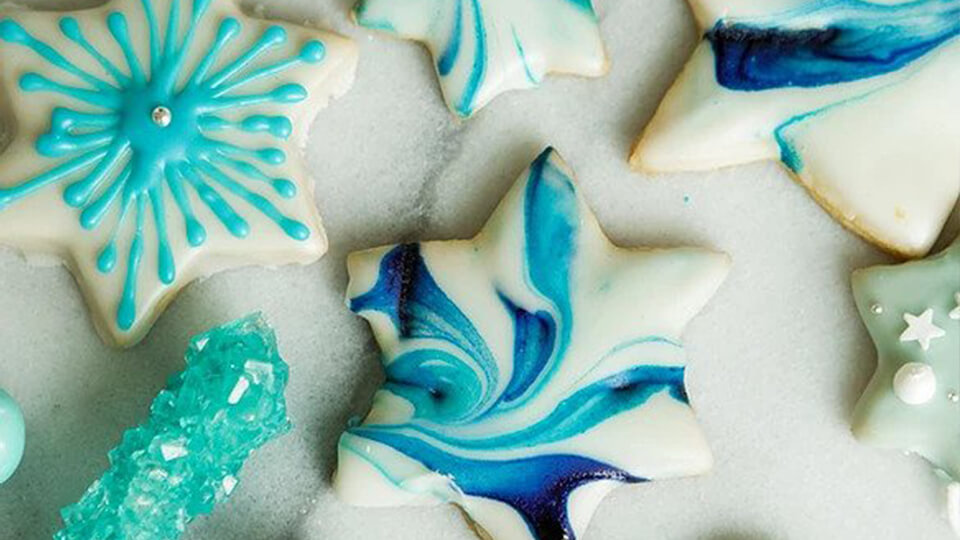
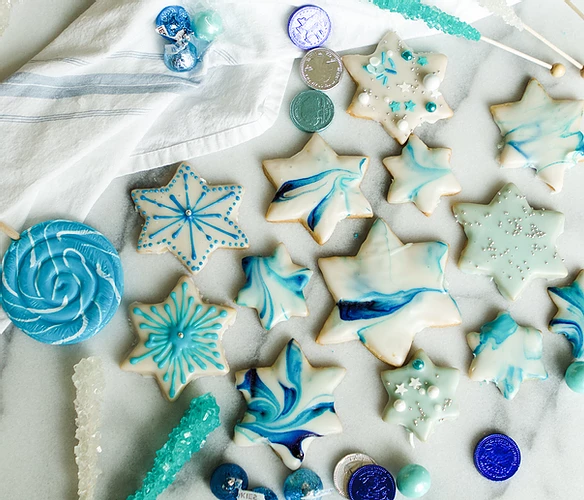
I have fallen in love with this new technique for making Marbleized Iced Sugar Cookies. The technique that I followed came from The Cafe Sucré Farine and it makes pretty spectacular cookies!!
I have used this technique for Chanukkah cookies, but I also tried it on Christmas trees and it’s totally cute for the trees!!
I like to start with my favorite sugar cookie recipe that is perfect for the holidays as it’s got a hint of nutmeg in the batter. The cookies can be made ahead, so if you know you have a lot going on, it’s fine to bake them and freeze them. You can also make the dough and freeze that so it’s on hand whenever you want sugar cookies.
You can also substitute the Shortbread cookie recipe used for the Christmas Tree Shortbread Cookies (click this link).
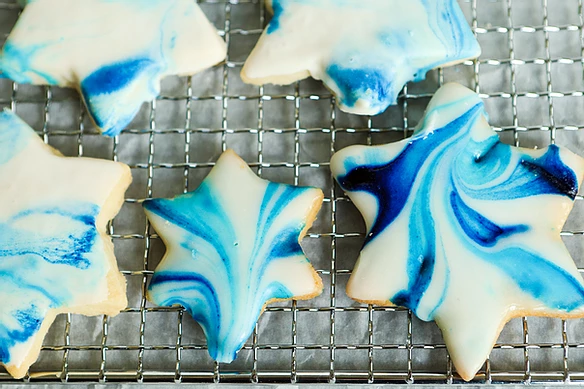
I am going to give you some tips, along with photos so that you see how to make these. You might think it’s difficult, but if you look at those decorated cookies in the top photo, they took me three times as long to make as the marbleized ones! And, there are really no mistakes with these!
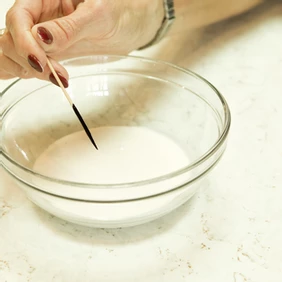
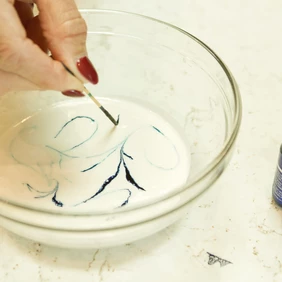
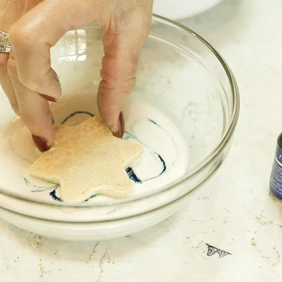
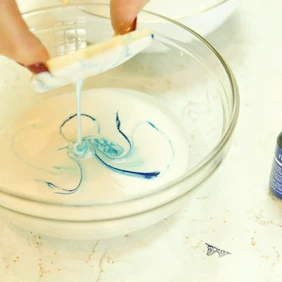
Tips: I prefer rolling the dough to 3/8″ so that you have something to hold onto when you dip the cookies (too thin and they can break). I love this rolling pin as you determine the thickness you want, make an adjustment to the pin, and you get a uniform thickness throughout.
You want the consistency of the royal icing to be thick enough to hold the color swirls you run through with the toothpick, but thin enough that when you pull up the cookie, some excess icing drips off. I have found that if I start with the measurements in the recipe and just add a teaspoon or two of half-and-half at a time, I get to the right consistency.
I used Chefmaster royal blue and sky blue gel past food coloring. There are other brands, but this brand tends to give very vibrant colors that match the labels.
After you dip the cookie in the icing, tilt it so that the excess drips off but try to do it over another bowl so that you don’t get too much muddling of the colors in the original bowl.
Share Your Thoughts...
Marbleized Iced Sugar Cookies
Makes: 36 cookies
Prep Time: 45 minutes
Bake Time: 11 minutes
Total Time: 4 hours & 30 minutes includes cooling time of 3 hours
Ingredients
Cookies:
- 1 cup unsalted butter, room temperature
- 1 cup (packed) golden brown sugar
- 1 large egg
- 1 tsp vanilla extract
- 2 & 2/3 cups all purpose flour
- 1 tsp baking powder
- 1/2 tsp salt
- 1/2 tsp ground nutmeg
Glaze:
- 2 cups powdered sugar
- 4-5 tbsp half and half (or whole milk)
- 1/2 tsp vanilla
- 2 colors of blue gel paste food coloring (I used Chefmaster Sky Blue and Royal Blue)
Instructions
Using electric mixer, beat butter and sugar in large bowl until fluffy. Beat in egg and vanilla. Sift flour, baking powder, salt and nutmeg over; stir to blend well. Turn dough out onto lightly floured surface and knead gently 1 minute. Shape dough into 1/2-inch-thick rectangle. Cut into 4 equal pieces; wrap in plastic and refrigerate at least 3 hours and up to 1 day. Let dough soften slightly at room temperature before rolling out.
Position rack in center of oven and preheat to 350°F. Line 2 baking sheets with parchment or Sil-pat silicone mats.
Working with 1 dough piece at a time, roll out dough on lightly floured surface to 3/8-inch thickness, lifting and turning dough often and dusting surface very lightly with flour to prevent sticking. Using floured 3- to 4-inch cutters, cut out cookies. Pull away excess dough from around cookies. Transfer cookies to prepared baking sheet, spacing 1 inch apart (cookies will not spread).
If using cookies as hanging ornaments, push 1 end of drinking straw through dough near top of each cookie; lift straw, then remove small dough round from straw.
Gently re-roll dough scraps; cut out more cookies. Transfer to same sheet.
Bake cookies for 5 minutes, then exchange pan on top rack for bottom pan, rotating from front to back at the same time. Bake another 6 minutes until lightly browned. Let cool 5 minutes on sheet. Transfer cookies to rack; cool.
Repeat with remaining dough pieces, baking 1 sheet of cookies at a time. Cool baking sheet completely between batches.
To Glaze Cookies:
Combine powdered sugar, 4 tablespoons half and half (or milk), and vanilla in a medium-size bowl. Mix until smooth. The glaze should be fairly thick, but pourable. Add a little more half and half if too thick.
Transfer the glaze to a small shallow bowl (a little bigger than your cookies).
With a toothpick, swirl a small amount of two blue gel food colorings through the icing in the bowl. Don’t swirl too much or the icing will become a solid color. Use a light hand with the gel food coloring. A little goes a long way!
To glaze the cookies, hold onto the edge of a cookie and dip the top surface into the glaze, being sure all of the surface touches the glaze. Pull cookie straight up and out of the glaze. Allow excess glaze to drip into another bowl or plate (this will keep the glaze from getting murky) for about 30 seconds. When glaze stops dripping, quickly flip the cookie to the right side up and give it a gentle jiggle to allow the glaze to flow evenly over the surface. Repeat with remaining cookies.
Place cookies on a cooling rack and allow glaze to dry completely.
The cookies can be stored at room temperature in an airtight container or in the fridge for one week.
Recipe from Cafe Sucré Farine



 This No-Bake Blueberry Pie is the ideal c

 Appetizers should be easy and delicious

 My honey says this Watermelon & Peach Sa

 This recipe for Sticky Balsamic Ribs
 Perfect Chocolate Chip Cookies are, well


Leave a Review