EASY PEASY FROZEN TREATS – The Fancy Pants Kitchen
https://thefancypantskitchen.com
Quick and Easy RecipesThu, 20 Mar 2025 19:37:24 +0000en-US
hourly
1 https://wordpress.org/?v=6.8.1https://thefancypantskitchen.com/wp-content/uploads/2021/02/cropped-Favicon-1-32x32.jpgEASY PEASY FROZEN TREATS – The Fancy Pants Kitchen
https://thefancypantskitchen.com
3232Coffee-Oreo No-Churn Ice Cream
https://thefancypantskitchen.com/recipe/coffee-oreo-no-churn-ice-cream/
https://thefancypantskitchen.com/recipe/coffee-oreo-no-churn-ice-cream/#respondThu, 20 Mar 2025 18:11:21 +0000https://thefancypantskitchen.com/?post_type=ranna_recipe&p=26806
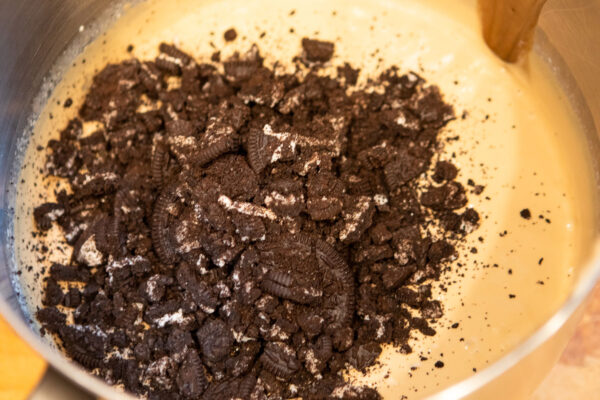
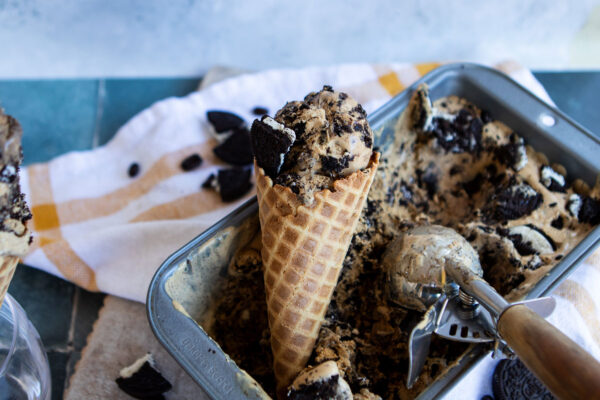
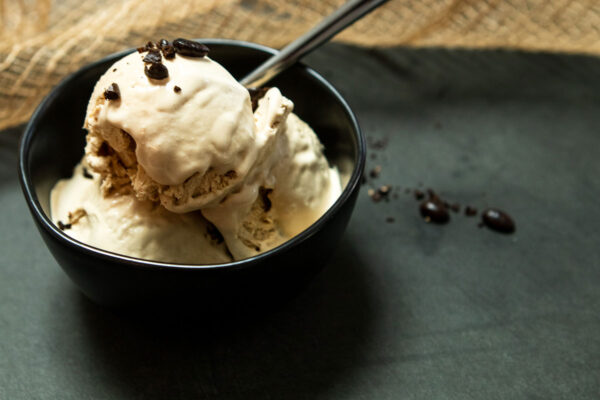
If you are craving ice cream right now, which I always am, Coffee-Oreo No-Churn Ice Cream is the one to make! The rich coffee ice cream loaded up with crunchy oreo cookie bits gives me that satisfying taste I’m looking for. I am not a “smooth” ice cream girl…I want crunchy bits (nuts, heath bits, peppermint chunks, etc) in my ice cream, so this one makes me very happy!
And, wait for it…it’s “no churn”, which means that those of us who don’t own an ice cream maker can easily make this! Whip it all up and freeze it in a loaf pan. That’s it!
There are a couple of ways to make no-churn ice cream. Most of them call for whipping the cream until it holds firm peaks. I don’t really like that as the frozen texture doesn’t feel like ice cream. It’s too airy. But, if you whip the cream along with the sweetened condensed milk, espresso powder and espresso liqueur until it just starts to hold together, the finished texture is exactly like ice cream!
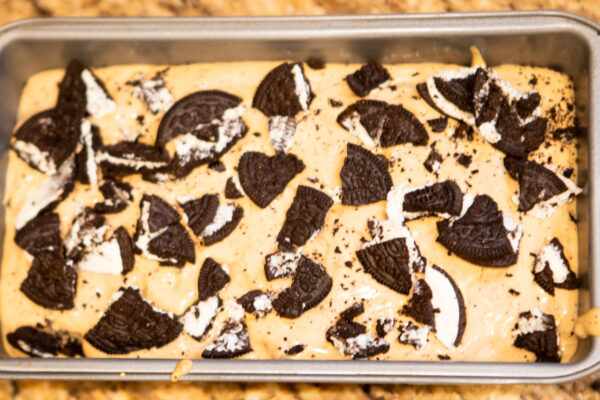
Place one half of the the ice cream mixture into a loaf pan and add half of the Oreo chunks. Repeat and sprinkle the remaining Oreo chunks on top.
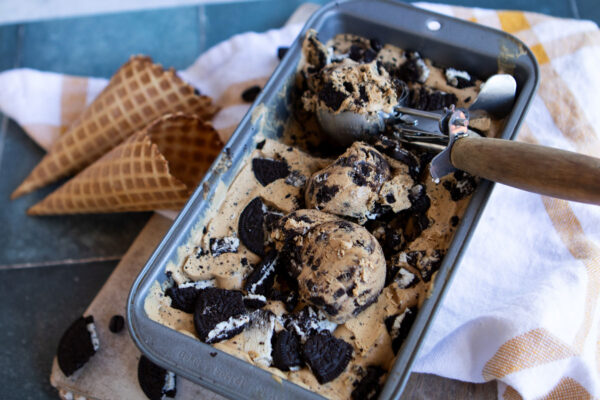
Freeze for at least six hours and serve. You are going to love this!
Share Your Thoughts...
Lastly, if you make Coffee-Oreo No-Churn Ice Cream, be sure to leave a review down below at the bottom of this page (stars are also appreciated)! Above all, I love to hear from you and always do my best to respond to each and every review. And of course, if you do make this recipe, don’t forget to tag me on Instagram! Looking through the photos of recipes you all have made is one of my favorite things to do!
Coffee-Oreo No-Churn Ice Cream
Makes: 2 pints
Prep Time: 5 minutes
Total Time: 5 minutes plus freeze time 6 hours
Ingredients
1 & 3/4 cup + 2 tbsp heavy cream, well-chilled
1 (14-ounce) can sweetened condensed milk
3 tbsp instant espresso powder
3 tbsp espresso liqueur such as Kahluá
15 Oreo cookies, roughly chopped
Instructions
Whisk heavy cream, condensed milk, espresso powder and espresso liqueur together just until the whisk leaves trails of soft peaks in the bowl, about 2 minutes, and you have a gorgeous, caffe-latte-colored airy mixture.
Layer two 1-pint airtight containers or a loaf pan with cream mixture followed by cookies and repeat. Freeze for 6 hours or overnight. Serve straight from the freezer.
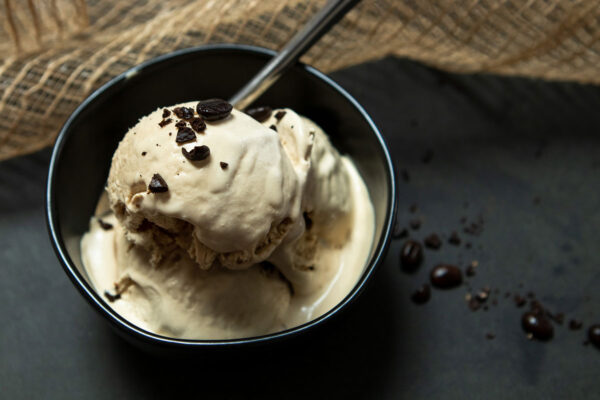
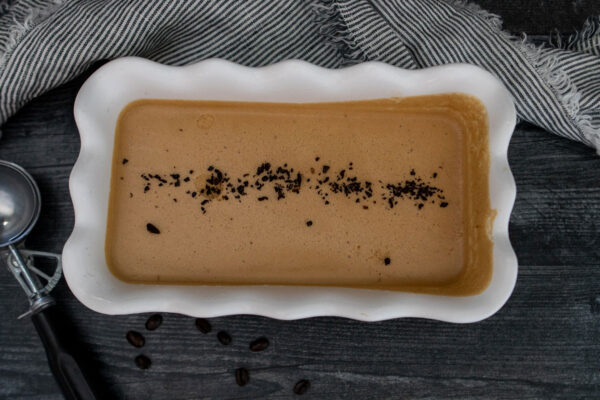
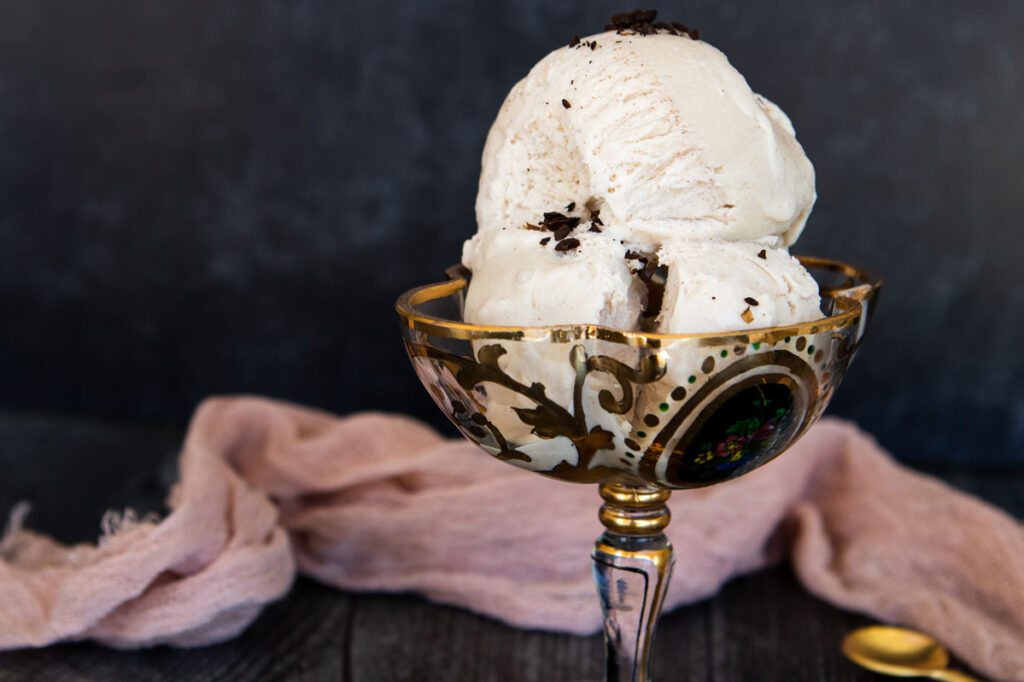
Vietnamese Espresso Ice Cream is a no-churn frozen treat that is hard to beat! Rich espresso flavor is mixed into vanilla-infused heavy cream and sweetened condensed milk.
Vietnamese espresso is simply espresso dripped over condensed milk, so this is a frozen version of this awesome beverage!
And, considering that there is no ice cream machine involved, there is no excuse to not make this!
Whisk together the espresso powder, vanilla, salt and warm water until the espresso powder has dissolved. Stir it into heavy cream and whip until soft peaks form.
Pour in the sweetened condensed milk and continue to beat until soft peaks form again.
Transfer to an airtight container and freeze for at least 8 hours.
Serve and enjoy topped with crushed espresso beans, if desired.
Share Your Thoughts...
Lastly, if you make Vietnamese Espresso Ice Cream, be sure to leave a review down below at the bottom of this page (stars are also appreciated)! Above all, I love to hear from you and always do my best to respond to each and every review. And of course, if you do make this recipe, don’t forget to tag me on Instagram! Looking through the photos of recipes you all have made is one of my favorite things to do!
Vietnamese Espresso Ice Cream
Makes: 2 quarts
Prep Time: 5 minutes
Freeze Time: 8 hours
Total Time: 8 hours & 5 minutes
Ingredients
2 tbsp instant espresso powder
1 tbsp plus 1 tsp pure vanilla extract
1/2 tsp Kosher salt
2 & 1/2 cups heavy cream
One 14-ounce can sweetened condensed milk
Instructions
In a small bowl, whisk together the espresso powder, vanilla, salt and 2 tablespoons warm water until the espresso powder is dissolved.Stir the espresso mixture into the cream in a large bowl and whip by hand with a whisk or with a handheld electric mixer, or in a stand mixer fitted with a whisk attachment, until it thicken to soft peaks (ie it holds a soft peak when you lift a spoon out of the mixture).
Pour in the sweetened condensed milk and whip until the ice cream base is thoroughly combined and again at soft peak stage.
Gently transfer the base to an airtight container and freeze until solid, at least 8 hours.
The ice cream can be stored in an airtight container in the freezer for up to 1 month.
]]>https://thefancypantskitchen.com/recipe/vietnamese-espresso-ice-cream/feed/05-Minute Chocolate Sauce
https://thefancypantskitchen.com/recipe/5-minute-chocolate-sauce/
https://thefancypantskitchen.com/recipe/5-minute-chocolate-sauce/#respondThu, 16 Mar 2023 17:45:17 +0000https://thefancypantskitchen.com/?post_type=ranna_recipe&p=20950
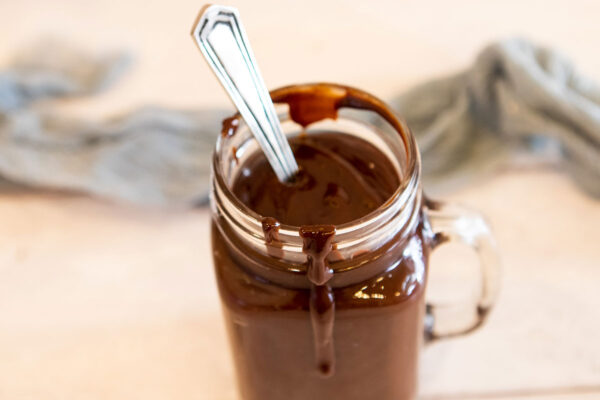
This silky smooth 5-Minute Chocolate Sauce is the perfect topping for a bowl of ice cream. Or draped over pound cake. Or smothering brownies. Or…you get the drift. And taking only 5 minutes, it’s worth the time to have this homemade sauce whenever you get a hankering!
I love it ribboned through my No-Churn Rocky Road Ice Cream.
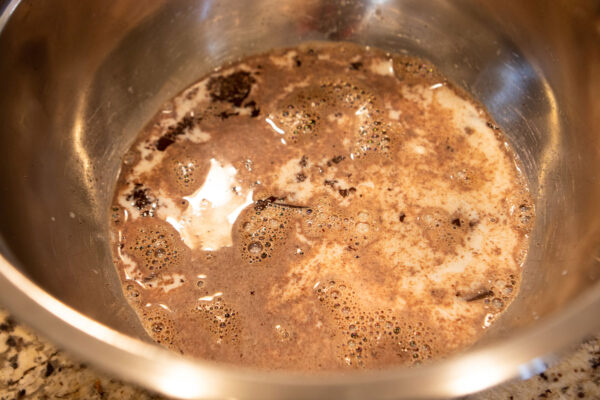
Simply combine heavy cream, butter and corn syrup in a saucepan and heat until the butter is melted (you can also do this in a microwave). Add the chocolate and give it a swirl so that the chocolate is covered. Now let it stand for three minutes.
Whisk it well until the chocolate is melted and the sauce is completely smooth.
That’s it, folks!
Share Your Thoughts...
Lastly, if you make 5-Minute Chocolate Sauce, be sure to leave a review down below at the bottom of this page (stars are also appreciated)! Above all, I love to hear from you and always do my best to respond to each and every review. And of course, if you do make this recipe, don’t forget to tag me on Instagram! Looking through the photos of recipes you all have made is one of my favorite things to do!
5-Minute Chocolate Sauce
Makes: 1 & 1/2 cups
Prep Time: 3 minutes
Cook Time: 2 minutes
Total Time: 5 minutes
Ingredients
1 cup heavy cream
1 tbsp unsalted butter
8 ounces semi-sweet chocolate, chopped
2 tablespoons corn syrup, optional (see Chef’s Note)
1/2 tsp vanilla extract, optional
1/2 tsp kosher salt
Instructions
Add heavy cream, butter and corn syrup (if using) to a medium saucepan and heat until butter is melted and the mixture just begins to simmer, stirring occasionally OR add heavy cream, butter and corn syrup to a microwave safe bowl and microwave for 2 minutes or just until simmering and butter is melted.
Add chocolate and give it a swirl so the chocolate is covered. Let stand 3 minutes.
After 3 minutes, vigorously whisk in circular motions until chocolate is melted and completely smooth. Whisk in vanilla if using.
Let ganache cool for 10 minutes before using as a dip or sauce or allow to cool to room temperature for frosting, filling, etc., stirring often. Reheat at 50 % power in the microwave with 1 teaspoon vegetable oil if ganache thickens too much as you work or becomes grainy.
Chef’s Notes:
It’s optional to use corn syrup, but it will make the sauce extra smooth, it will keep it shiny even after being refrigerated and will keep it flexible when it sets.
The point is that no-churn ice cream is the bomb! I love how easily it comes together, especially without an ice cream maker. I don’t own one and I see no need after I discovered how easy no-churn ice creams are!
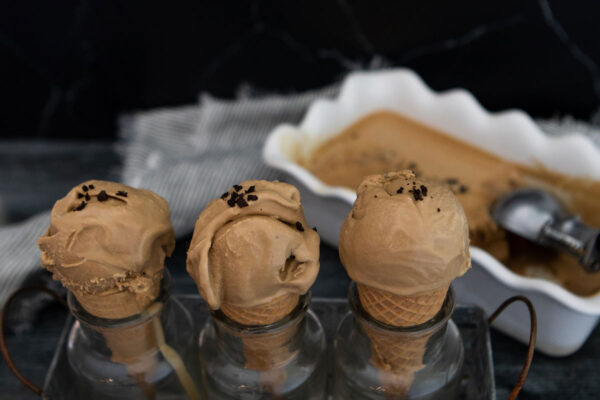
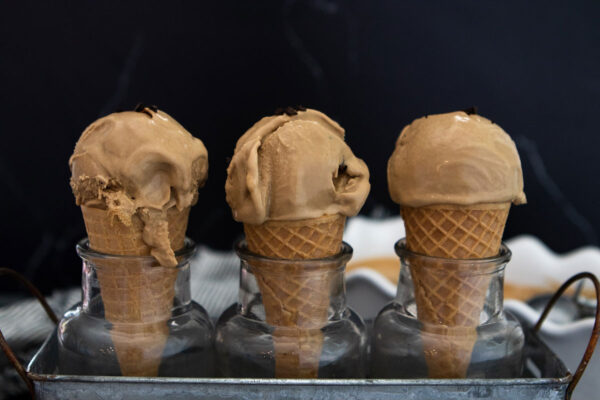
This ice cream has a deep flavor of espresso. That’s thanks to the instant espresso powder and the generous shot of Kahlúa. It’s a rich, creamy frozen treat which reminds me of Haagen Dazs’ Coffee Ice Cream.
Combine the heavy cream, sweetened condensed milk, espresso powder and Kahlúa together in a bowl and whisk it until it begins to thicken and you have a beautiful caffe-latte color.
Did you notice that there are only 4 ingredients! Woo hoo! Love that!
After whisking, pour the mixture into a loaf pan or two pint containers and freeze until firm, usually overnight will do it.
I confess that I love my ice cream soft. I have been known to microwave my ice cream, just for a few seconds, to get it to the consistency I love. If this comes out of the freezer a little firmer than you like, try my trick or leave it on the counter for a few minutes to soften up.
Sprinkle some crushed coffee beans over the top and enjoy the heck out of this!
Share Your Thoughts...
Lastly, if you make No-Churn Coffee Ice Cream, be sure to leave a comment and/or give this recipe a rating! Above all, I love to hear from you and always do my best to respond to each and every comment. And of course, if you do make this recipe, don’t forget to tag me on Instagram! Looking through the photos of recipes you all have made is one of my favorite things to do!
No-Churn Coffee Ice Cream
Makes: 2 pints
Prep Time: 5 minutes
Total Time: 6 hours
Ingredients
1 & 3/4 cup + 2 tbsp heavy cream, well-chilled
1 14-oz can sweetened condensed milk
3 tbsp instant espresso powder
3 tbsp espresso liqueur such as Kahluá
Instructions
Whisk all the ingredients together just until the whisk leaves trails of soft peaks in the bowl, about 2 minutes, and you have a gorgeous, caffe-latte-colored airy mixture.
Fill two 1-pint airtight containers or a loaf pan with cream mixture, and freeze for 6 hours or overnight. Serve straight from the freezer.
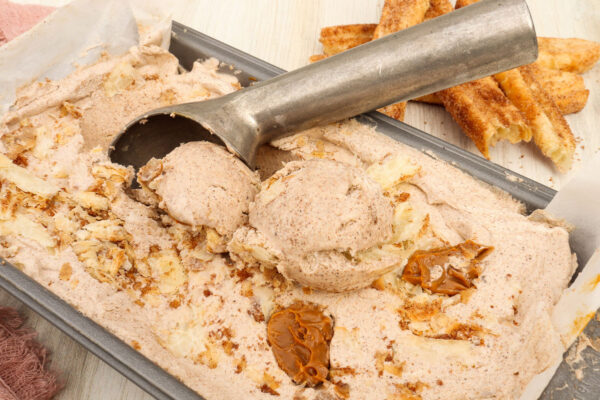
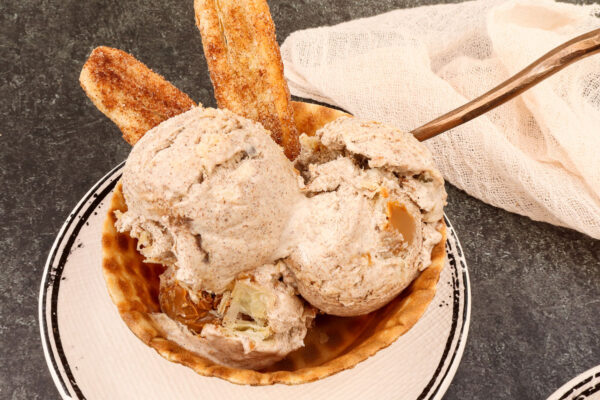
For an amazingly easy Cinco de Mayo dessert, try No-Churn Churro Ice Cream. It’s my idea of heaven! Puff pastry churros get swirled into a rich cinnamon ice cream base along with dulce de leche. Are you feeling me? This is outstanding!
If you’ve been along with me for a while, you know that I love ice cream, and that I don’t own an ice cream maker. Instead, I choose to perfect no-churn ice cream.
There are a few different ways to make it. Most call for whipping heavy cream until soft peaks form and then adding your condensed milk and other flavorings into the whipped cream. I never really liked this method, as the frozen texture doesn’t really feel like ice cream. It’s more like a frozen mousse.
But, if you follow my technique, you’ll get that soft, creamy gelato-type ice cream. You won’t be able to resist!
In this recipe, we are baking our own churros, but we’re keeping it simple. This isn’t traditional, but it’s equally as delish: Cut 1/2-inch wide puff pastry strips, bake them and then brush melted putter on and roll them in cinnamon sugar. Again, it’s not a true churro, but it will save a ton of time and give you the kind of result you want. Basically, you want something textural that complements the cinnamon ice cream.
For the ice cream, mix together the heavy cream, sweetened condensed milk, vanilla and cinnamon. Whisk the mixture until it starts to thicken. This usually takes about three minutes.
In a 9 x 5-inch loaf pan, pour some of the ice cream in and then add dollops of dulce de leche along with bite-size pieces of churro. Continue to layer until you run out of ice cream.
Freeze the concoction for at least six hours. Freezing overnight is ideal. I like to soften it just a bit before eating, but you do you!
Share Your Thoughts...
Lastly, if you make No-Churn Churro Ice Cream, be sure to leave a comment and/or give this recipe a rating! Above all, I love to hear from you and always do my best to respond to each and every comment. And of course, if you do make this recipe, don’t forget to tag me on Instagram! Looking through the photos of recipes you all have made is one of my favorite things to do!
No-Churn Churro Ice Cream
Makes: 6 servings
Prep Time: 30 minutes
Bake Time: 12 minutes
Total Time: 6 hours
Ingredients
Baked Churros:
1/2 package of store bought puff pastry (1 sheet)
1/4 cup unsalted butter, melted
1/2 cup granulated sugar
2 tbsp ground cinnamon
Cinnamon Ice Cream:
2 cups heavy whipping cream, cold
1 (14-ounce) can sweetened condensed milk
1 tbsp vanilla extract
3 tbsp cinnamon
1/4 cup dulce de leche
Instructions
Baked Churros:
Thaw the puff pastry following the package instructions and preheat your oven to 450F.
Line a large baking sheet with parchment paper. Once thawed, lightly roll the puff pastry on a floured surface just to smooth the top out. Cut in half length-wise then into about 1/2 inch wide strips. You should end up with about 10-12 strips. Bake for 10-12 minutes or until golden brown.
Once the puff pastry is out of the oven and cooled enough to pick up and handle, melt the butter in the microwave and mix the sugar and cinnamon on a plate. Brush all sides of the pastry with butter and roll in the cinnamon sugar mixture to coat. Place back on the sheet to cool completely.
Cinnamon Ice Cream:
While the churros are cooling, start on the ice cream.
Mix together the heavy cream, sweetened condensed milk, vanilla, and cinnamon in a small bowl.Whisk until mixture starts to thicken, about 3 minutes.
In a 9×5 loaf pan, spread a layer of the ice cream at the bottom of the pan. Crumble two of the churros on top (breaking up into tiny bite-sized pieces) and dollop about 5 teaspoons of dulce de leche. Continue building these layers until you run out of ice cream. If all of the ingredients sink to the bottom, remix the ice cream after it’s been frozen for a few hours.
Tightly wrap the pan in plastic wrap and then foil and place it in the freezer to set overnight. Before eating, let it sit out for about 20-30 minutes so it’s easy to scoop. Enjoy!
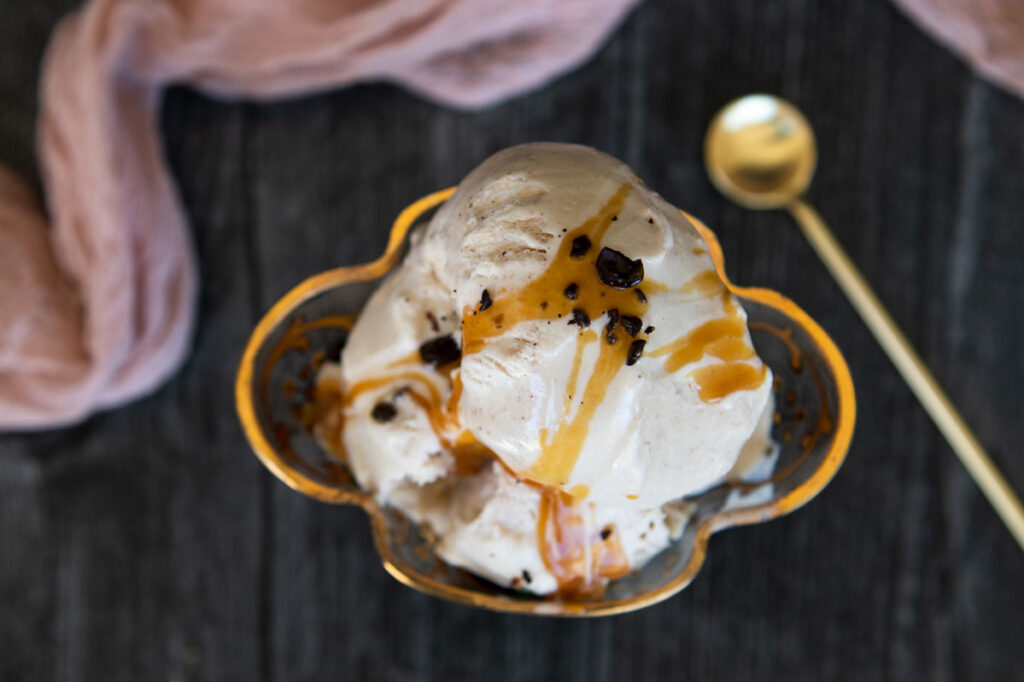
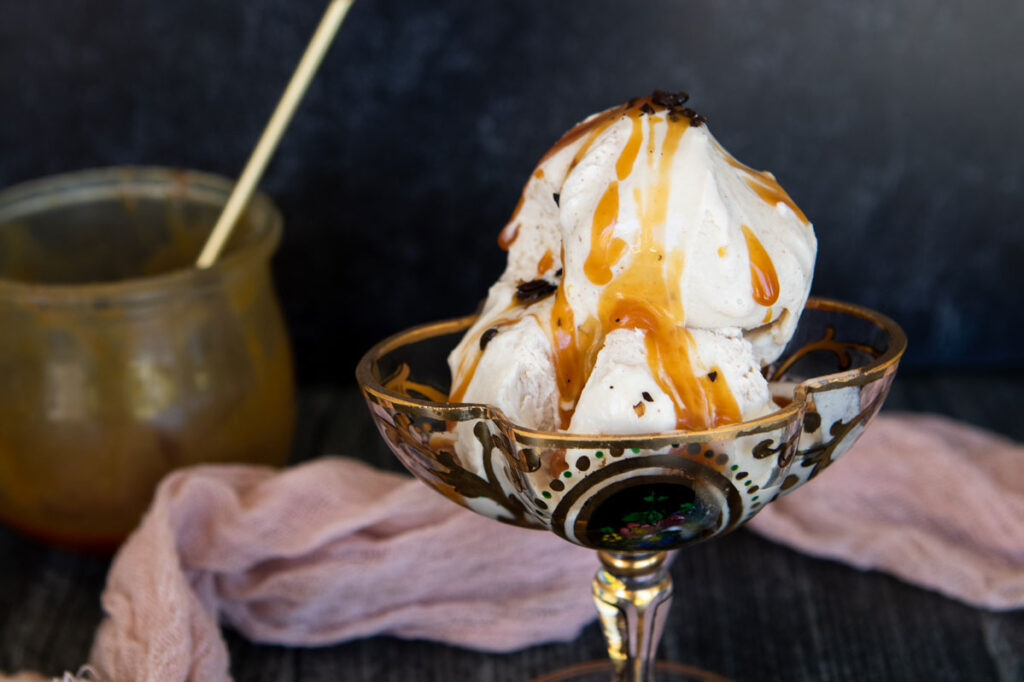
It may be winter but every season is the right season for No Churn Coffee–Cinnamon Ice Cream!
If you’re one of those people (like me) that loves a bite (or scoop) of ice cream after dinner, then it really doesn’t matter what time of the year it is, you still need it. So for that special category of people, this one’s for you.
It’s super easy to make this ice cream: Just combine heavy cream, coffee and cinnamon in a bowl. Add the sweetened condensed milk and whisk it until it starts to thicken, about 3 minutes.
Pour it into a loaf pan and freeze it. That’s is all it takes to create this amazing frozen treat!
Share Your Thoughts...
Lastly, if you make No-Churn Coffee-Cinnamon Ice Cream, be sure to leave a comment and/or give this recipe a rating! Above all, I love to hear from you and always do my best to respond to each and every comment. And of course, if you do make this recipe, don’t forget to tag me on Instagram! Looking through the photos of recipes you all have made is one of my favorite things to do!
No-Churn Coffee-Cinnamon Ice Cream
Makes: 6 servings
Prep Time: 5 minutes
Total Time: 3 hours
Ingredients
1 & 3/4 cups heavy cream
6 tbsp strong, brewed coffee, cooled
3/4 tsp ground cinnamon
one 14-ounce can sweetened condensed milk
Toppings:caramel sauce, crushed coffee beans
Instructions
Pour the heavy cream, coffee, and cinnamon into a bowl. Add the sweetened condensed milk and whisk this mixture together until slightly thickened, approximately 3 minutes.
Pour into a loaf pan or medium bowl and freeze for at least 3 hours, until set.
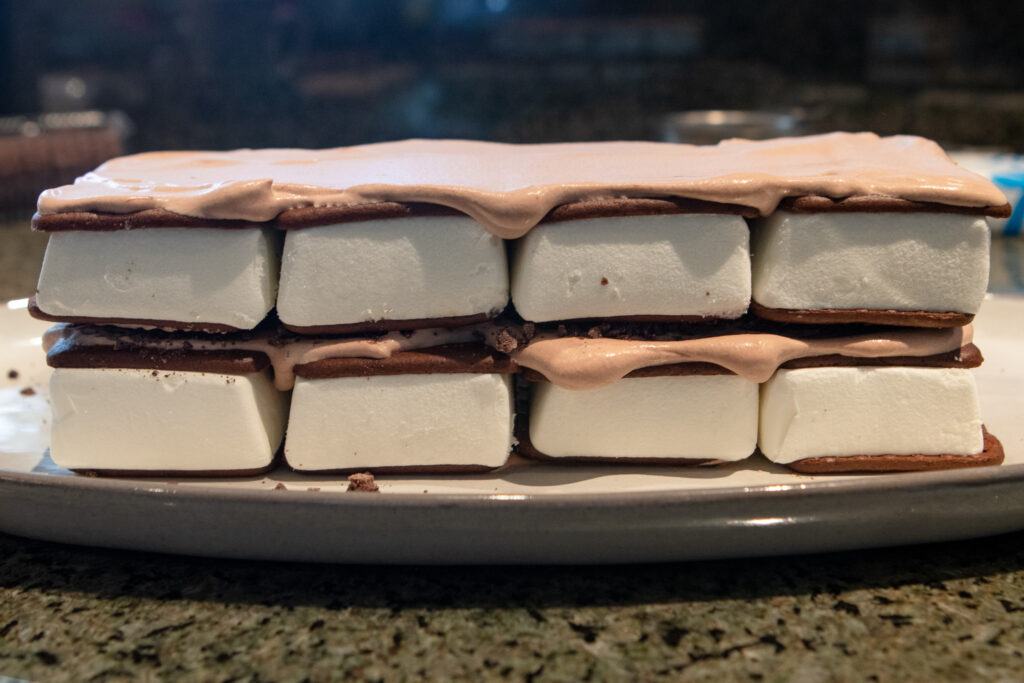
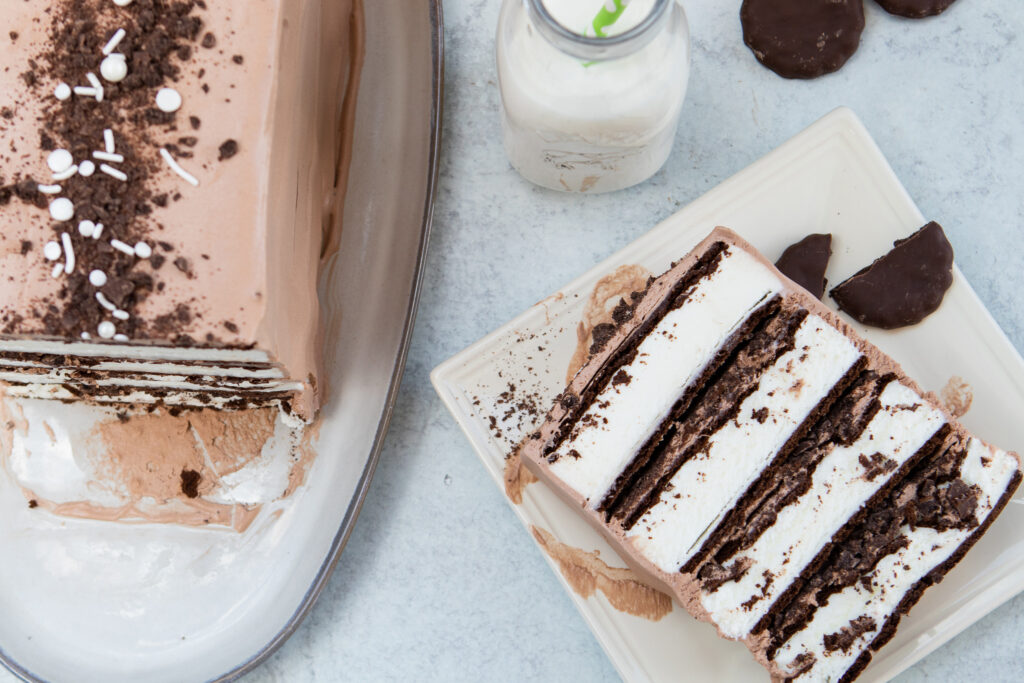
With Father’s Day right around the corner, you need to channel Dad’s inner child and make this mint-chocolate ice cream cake. This is a throwback to dad’s childhood, when he ate ice cream sandwiches while sitting on the porch on a hot summer’s day. Okay, maybe he still does that!! But, this complicated-looking cake is simply stacked ice cream sandwiches layered with mint-chocolate whipped cream and mint-chocolate cookies. So easy. So pretty. So retro!
What I love about this recipe, besides how delicious it tastes, is the ease with which such a showstopper can be made. Now, some purists may say that it’s all store-bought ingredients, to which I reply “And the problem is”? Look, we all want delicious beautiful desserts, but who really wants to work their tails off to produce it, especially in the summer? I want simple and easy, but tasty and pretty! So, forget what a purist might say (btw, I don’t know any!) and try this one out!
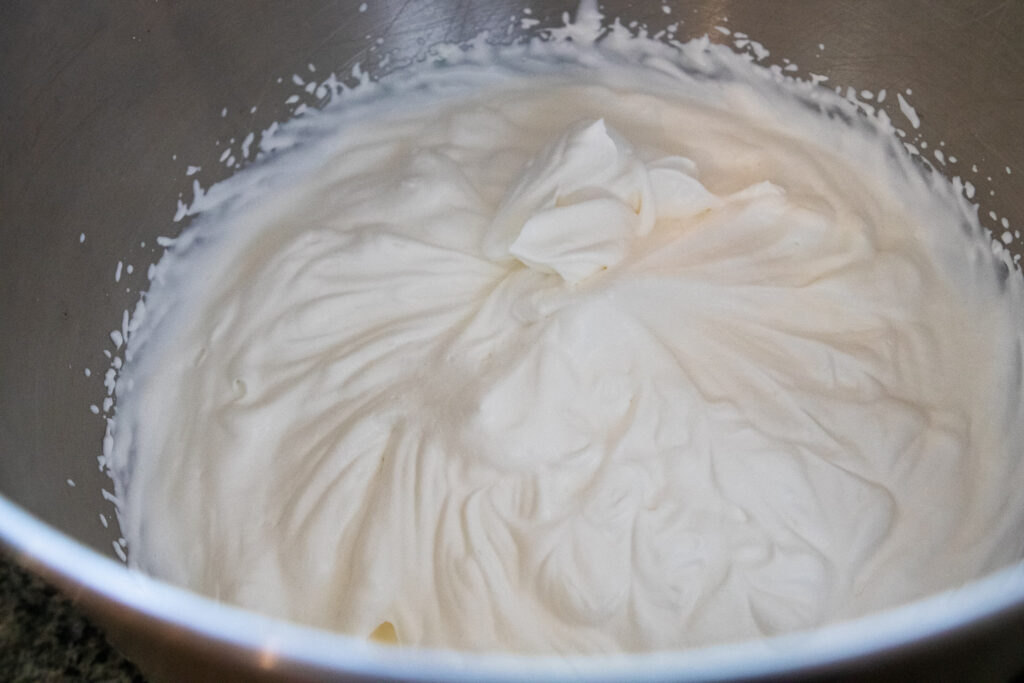
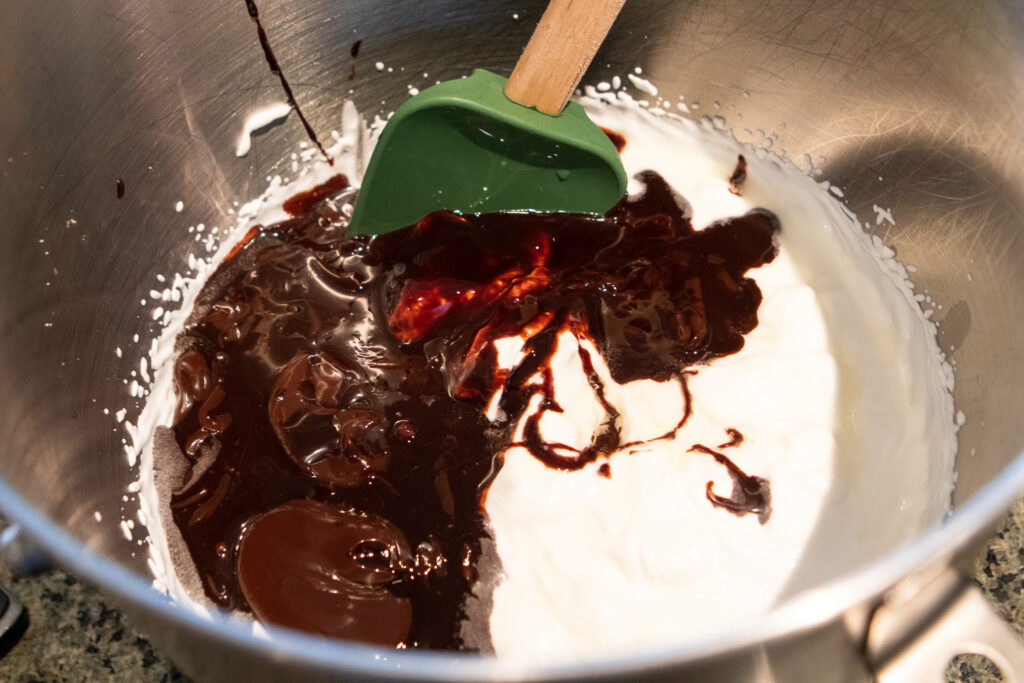
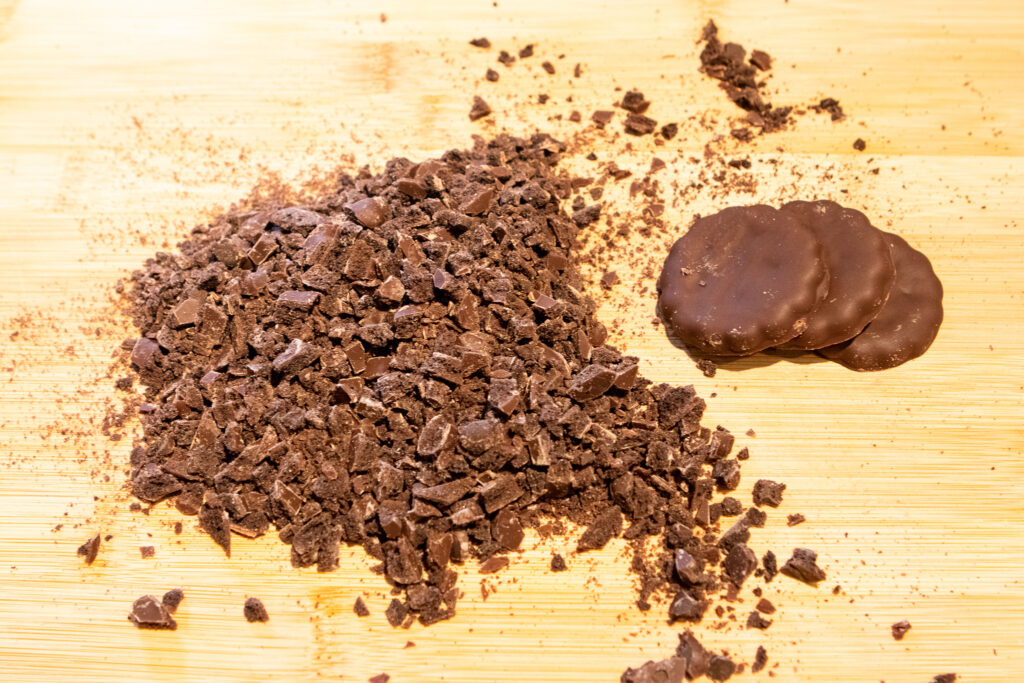
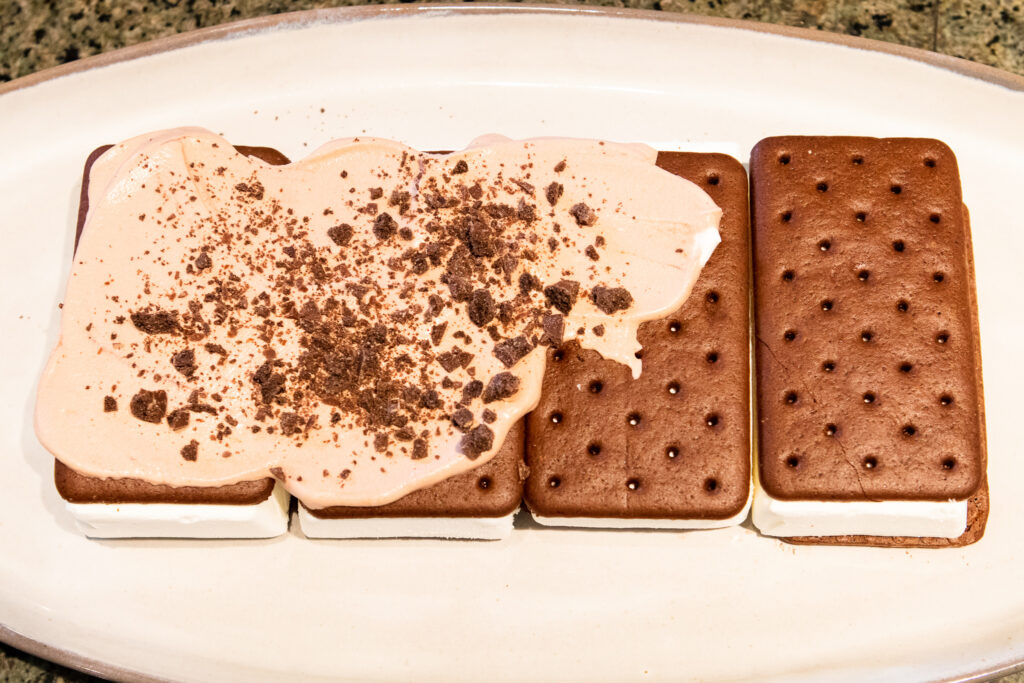
It starts with whipping some heavy cream that you add chocolate syrup and peppermint extract to. Then, crush up some mint-and-fudge cookies, such as Keebler Grasshopper cookies. The next step is to layer ice cream sandwiches, mint-chocolate whipping cream and crushed cookies. Continue that until you have 4 layers for a tall, stacked beauty of a dessert.
Finally, coat the entire dessert in another layer of whipping cream. Sprinkle some chopped up cookies on top and ta-da!!! A dessert worthy of any occasion!
Share Your Thoughts...
Lastly, if you make Mint-Chocolate Ice Cream Cake, be sure to leave a comment and/or give this recipe a rating! Above all, I love to hear from you and always do my best to respond to each and every comment. And of course, if you do make this recipe, don’t forget to tag me on Instagram! Looking through the photos of recipes you all have made is one of my favorite things to do!
Mint-Chocolate Ice Cream Cake
Makes: 8-12 servings
Prep Time: 30 minutes
Total Time: 1 hour & 50 minutes
Ingredients
2 cups heavy cream
2/3 cup prepared chocolate syrup
1 tsp peppermint extract
16 (4-ounce) ice cream sandwiches, divided
1 cup finely chopped mint-and-fudge cookies, such as Keebler Grasshopper cookies (about 10 cookies), divided
Instructions
Using an electric mixer on medium-low speed, beat cream in a large bowl until medium-stiff peaks form. Gently fold in chocolate syrup and peppermint extract. Transfer half of the cream mixture to a medium bowl; cover and chill until ready to use.
Spread a thin layer of remaining cream mixture on bottom of a platter. Top with 4 ice cream sandwiches, placing 3 side by side and 1 along bottom of row for a square-shaped base, or 4 side by side for a rectangular-shaped base. Top with a thin layer of cream mixture and sprinkle with 1/4 cup cookies. Continue layering sandwiches, cream, and cookies, ending with a layer of cream, until all sandwiches are used (you should have 4 layers; reserve remaining 1/4 cup cookies). Wipe any excess cream off platter, then freeze until set, at least 1 hour or up to overnight.
Using a spatula, frost top and sides of cake with reserved cream mixture. Sprinkle reserved 1/4 cup cookies over cake. Freeze again 30 minutes, then slice and serve.
Fully assembled cake can be made 1 day ahead; keep frozen.
Any time of the year is perfect for No-Churn Lemon Ice Cream, especially if the weather is heating up! In Arizona, we’ve already experienced the high 90’s (thankfully only for a few days) but we know what’s coming! So, best be prepared by having some of this light & bright lemon ice cream in the freezer!
I love no-churn ice creams. That’s probably because I don’t own an ice cream maker. But they are just so simple to make! Mix a few ingredients (and I mean a few), pour it into a pan, and pop it in the freezer. Once frozen, you have a wonderful treat that you can definitely call your own!
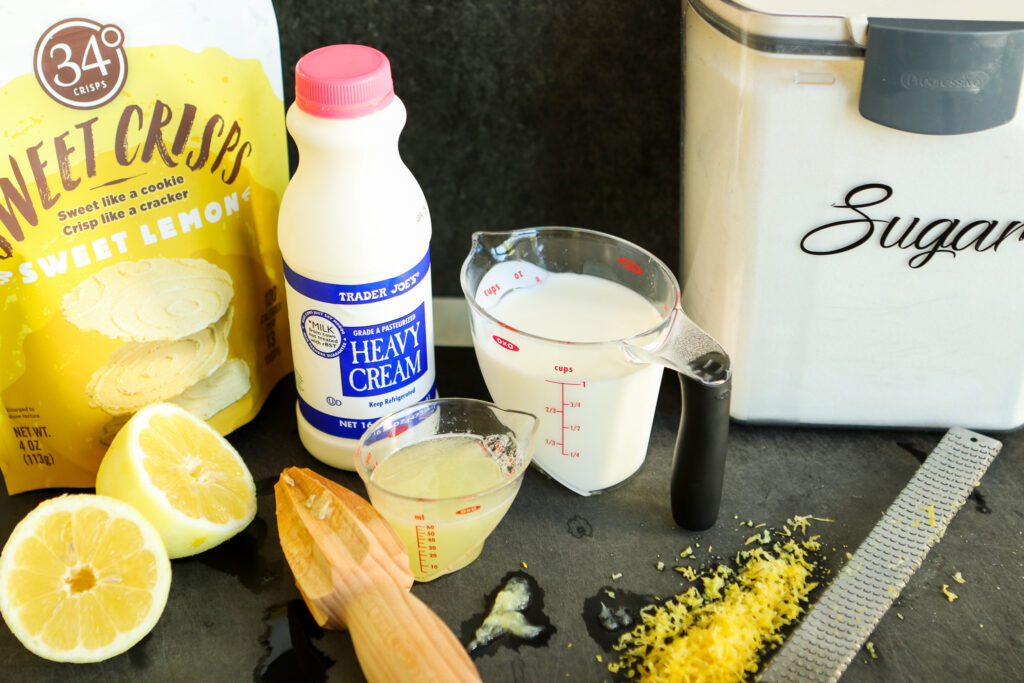
This recipe is all about the lemons: get the freshest lemons you can and get zesting and squeezing. We need both the juice and the zest to create this sweet/sour experience! To the lemon, add sugar and salt, then heavy cream and whole milk. Once the sugar is dissolved into the milk/cream, you are ready to pop this into the freezer.
There are recipes for no-churn ice creams that call for whipping the cream to a stiff peak first but I really don’t care for the texture. It’s almost like a frozen mousse instead of a creamy, melty ice cream. If you check out my other No-Churn ice cream recipes (No-Churn Peppermint Ice Cream, No-Churn Oreo Cookie Ice Cream, and No-Churn Mixed Berry Soft Serve), you will see that none of them whip the cream to a medium or stiff peak. Feel free to try those other versions out to see which one suits you best. Or just trust me!! Haha!
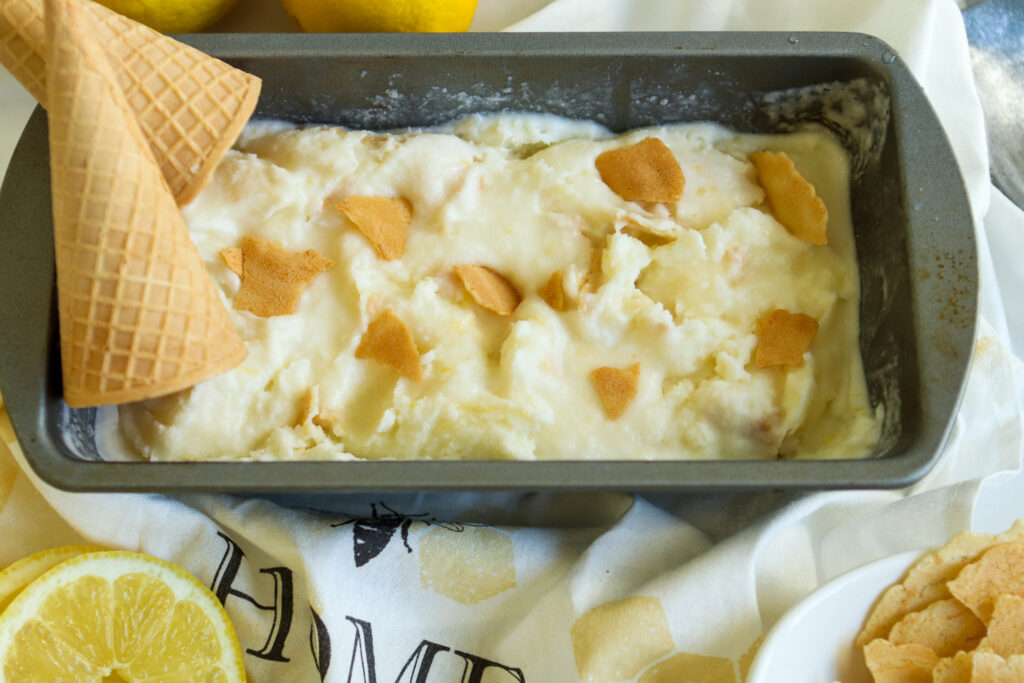
As an added bonus, I folded in some lemon wafer cookies after a couple of hours of freezer time, thinking I would get a little extra texture. If that’s your thing, add some or try Estela’s Candied Sesame Seeds!
Share Your Thoughts...
Lastly, if you make No-Churn Lemon Ice Cream, be sure to leave a comment and/or give this recipe a rating! Above all, I love to hear from you and always do my best to respond to each and every comment. And of course, if you do make this recipe, don’t forget to tag me on Instagram! Looking through the photos of recipes you all have made is one of my favorite things to do!
No-Churn Lemon Ice Cream
Makes: 3 cups
Prep Time: 10 minutes
Total Time: 3 hours
Ingredients
1 tbsp finely grated lemon zest
1/4 cup freshly squeezed lemon juice (from about 2 lemons)
1 cup sugar
1/8 tsp fine sea salt
1 cup heavy cream
1 cup whole milk
Thin lemon cookies, optional
Instructions
Whisk together the lemon zest and juice, the sugar, and salt in a large bowl.
Whisk together the cream and milk in a measuring cup and gradually pour into the lemon and sugar mixture, whisking constantly. Continue to whisk until the sugar dissolves—you won’t hear or feel it scraping against the bottom of the bowl anymore, about 2 minutes.
Pour the mixture into an 8-inch square metal baking pan or a metal loaf pan. Cover tightly with aluminum foil and freeze until the mixture is solid around the edges and mushy in the middle, 2 to 3 hours. Stir well, cover again with foil, and continue to freeze until completely firm, about an hour more. Once firm, scoop into chilled bowls to serve.
Chef’s Note:
I added lemon wafer cookies to my mixture after the mixture was in the freezer for 2 hours.I crumbled the cookies up and then stirred them into the ice cream.
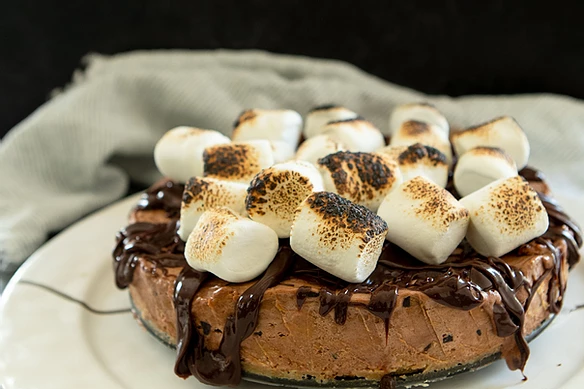
I know that Peanut Butter S’more Ice Cream Cake is an unusual dessert for this time of the year. Most people think of anything to do with S’mores as a summer campfire thing. But I think of anything with marshmallows, especially toasted ones, as a warming winter treat. Okay, I get that ice cream and warming don’t typically go together, but don’t tell me you don’t eat ice cream in the winter!! I refuse to believe it!
This ice cream cake is easy as pie (haha) to make. This is a no-bake dessert so it’s quick to pull together (be aware that it will need 4-6 hours in the fridge to firm up).
The crust is a graham-cracker base. The ice cream gets swirled with creamy peanut butter and spooned on top of the crust. After some freezer time, a fudgy chocolate sauce gets drizzled over the top.
Finish this delicious dessert with marshmallows that get torched, and there you have it! It’s almost like a cup of frozen peanut butter hot chocolate!
Share Your Thoughts...
Lastly, if you make Peanut Butter S’more Ice Cream Cake, be sure to leave a comment and/or give this recipe a rating! Above all, I love to hear from you and always do my best to respond to each and every comment. And of course, if you do make this recipe, don’t forget to tag me on Instagram! Looking through the photos of recipes you all have made is one of my favorite things to do!
Peanut Butter S’more Ice Cream Cake
Makes: 8 servings
Prep Time: 20 minutes
Total Time: 20 minutes plus freezer time 4 hours
Ingredients
9 graham cracker sheets, crushed into fine crumbs
1 stick unsalted butter, melted
1 quart mixed chocolate/vanilla ice cream, softened (or favorite flavor that will combine well with peanut butter)
1 cup creamy peanut butter
1/2 cup sweetened condensed milk
3/4 cup semi-sweet chocolate chips
1 cup marshmallows or meringue
flakey sea salt, for topping (optional)
Instructions
Lightly grease an 8-9 inch springform pan.
In a small bowl, combine the graham cracker crumbs and butter and mix until combined. Dump the mixture out into the prepared pan and use your hands to press the crumbs into the bottom of the pan until you have a smooth, even crust.
Add the ice cream and peanut butter to a large mixing bowl. Using a spatula, mix the ice cream and peanut together until the peanut butter is swirled throughout the ice cream. Spoon the ice cream right on top of the crust and smooth it out into an even layer. Cover the cake with plastic wrap, pressing the wrap against the ice cream to help prevent ice from forming. Freeze for 4-6 hours or overnight.
To make the fudge sauce, in a microwave safe bowl, microwave the sweetened condensed milk until warm to touch, stirring every 30 seconds. Stir un the chocolate chips until melted and smooth. Remove the plastic wrap and drizzle the fudge sauce over the ice cream cake. Return to the freeze for another 30 minutes.
When ready to serve, top the cake with marshmallows or dollop with meringue. Using a blow torch, toast the marshmallow. Slice and serve immediately.
Chef’s Note:
Allow 4-6 hours for freezing time
Ice cream choice is up to you. The original recipe called for Coolhaus Campfire S’more Ice Cream but I couldn’t find it anywhere. I opted for a chocolate/white chocolate combo ice cream. It worked beautifully with the peanut butter. Coffee would be wonderful, too!
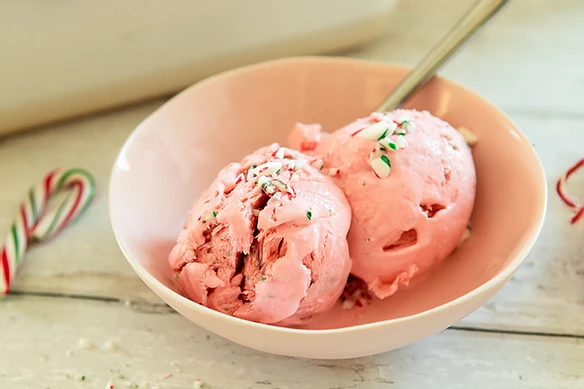
It may be winter, but some of us still have to enjoy our daily bite of ice cream. And, if you are one of those (yes, that would be me), there is no better fix than this No-Churn Peppermint Ice Cream. It has that fresh peppermint flavor with little bits of crushed candy canes in every bite.
It’s also easy-peasy to make! It doesn’t require an ice cream machine; it’s just a simple process of combining whipping cream and sweetened condensed milk along with some mint extract and food coloring (if you desire) and whipping it until it thickens. Add in your crushed candy canes, pour it in a loaf pan and set it in the freezer. A few hours later, you’re ready to enjoy!
Share Your Thoughts...
Lastly, if you make No-Churn Peppermint Ice Cream, be sure to leave a review down below at the bottom of this page (stars are also appreciated)! Above all, I love to hear from you and always do my best to respond to each and every review. And of course, if you do make this recipe, don’t forget to tag me on Instagram! Looking through the photos of recipes you all have made is one of my favorite things to do!
No-Churn Peppermint Ice Cream
Makes: 6 servings
Prep Time: 10 minutes
Total Time: 10 minutes plus freeze tie 4-6 hours
Ingredients
2 & 1/2 cups heavy whipping cream
1 (14-ounce) can sweetened condensed milk
Pink food coloring, optional
3/4 tsp mint extract
1/2 cup crushed peppermint candy canes (see Chef’s Notes)
Instructions
Add heavy cream and sweetened condensed milk to a large bowl. Whisk on a medium-low speed until the ingredients are smooth and even. Turn the whisk up a bit higher and whisk until the mixture is starting to thicken and is smooth (it doesn’t need to be extremely thick), approximately 3 minutes on medium speed.
Add in pink food coloring, if using, and mix until desired color is achieved.Add crushed candy canes and mix until distributed throughout.Pour into 9 x 5-inch loaf pan.
Put the loaf pan in the freezer until ice cream is frozen and firm.
Chef’s Notes:
To crush the candy canes, put candy canes into a zip-lock bag and pound with a rolling pin.
You may need to let the ice cream sit for 5-10 minutes before scooping.
Ice cream will last 30 days in the freezer, if it isn’t eaten first!