There is no excuse to not make this DIY Heart-Shaped Cake. Don’t tell me you don’t have a pan because I’m going to show you how to turn two round cakes into a 2-layer heart-shaped cake, just in time for Valentine’s Day!
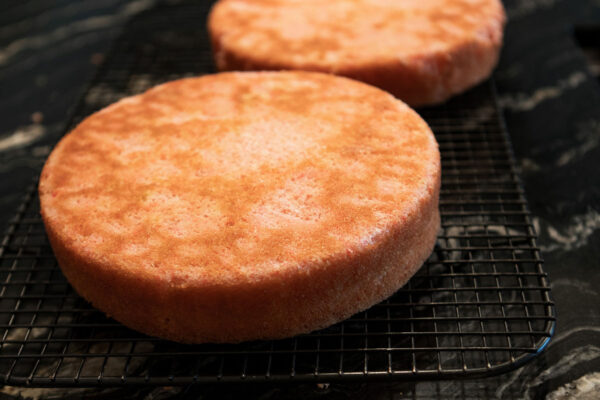
Let’s begin by making 2 9-inch cakes (8-inch will work as well, if that’s the only size that you have). I love this vanilla cake but if you have your own recipe or want to use a boxed vanilla cake recipe, that’s fine too!
Just follow this easy recipe and bake and cool the cakes.
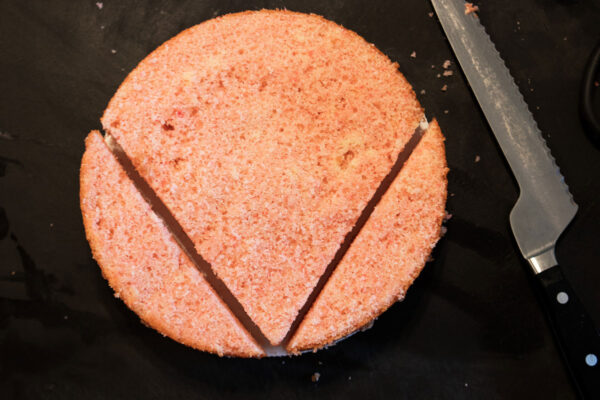
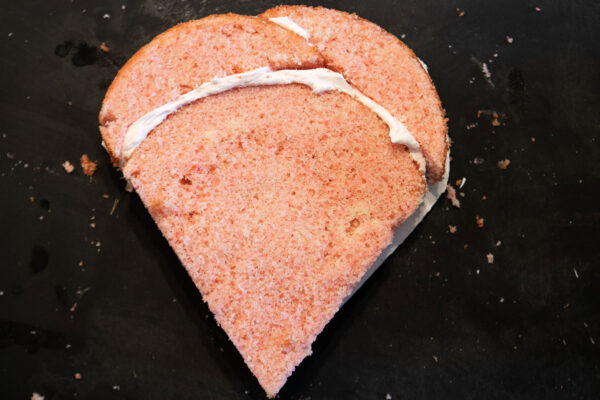
Level the cakes using a serrated knife so that they are both the same height. Then, cut the straight edges of the heart. I just eyeballed this. Be sure to save those pieces that you cut as they become the top of the heart.
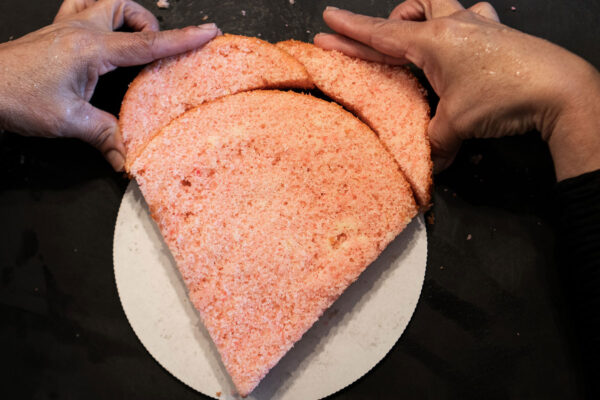
Position the cut pieces on top of the circular edge of the cakes. You might have to overlap them or cut them a bit to fit. I chose to overlap them. You will also want to cut and tape the cake board so that it’s easy to move the cake to a serving platter.
Smear some frosting on the round edge of the cake and attach the two cut pieces. You might have to hold them for a minute to get them to stick to the buttercream.
Then add frosting to the top of the first layer, spread it around and add the second layer to the top. Repeat the directions to attach the cut pieces so that the cake is now a 2-layer heart cake.
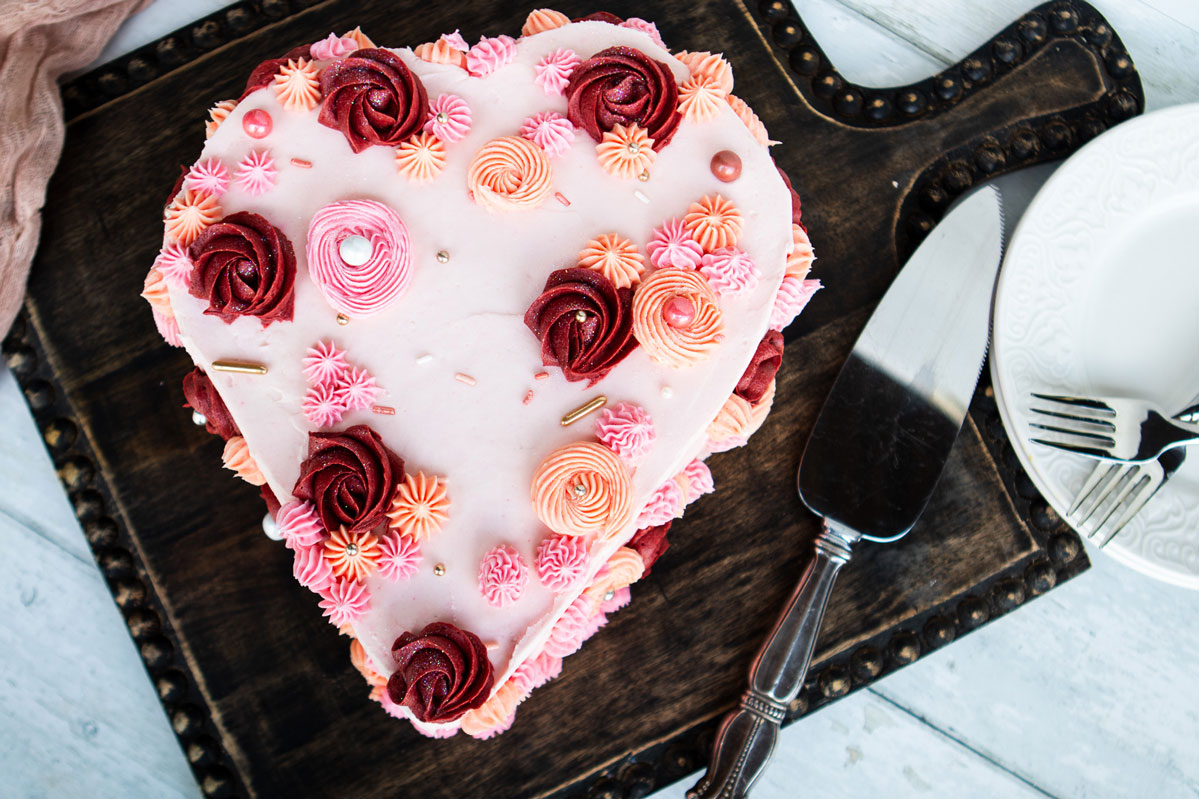
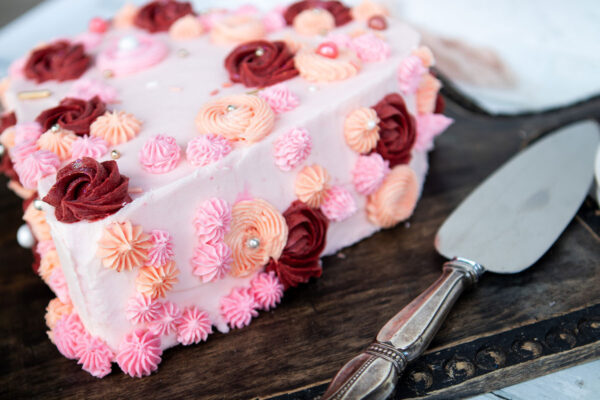
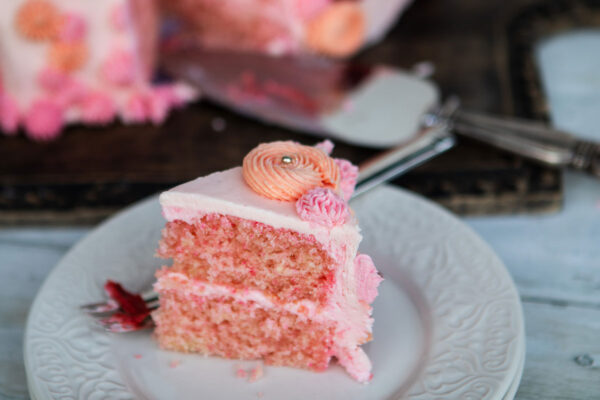
Crumb coat the cake and refrigerate about 20 minutes. Then coat the entire cake in frosting, spread it smooth, and use various piping tips and colored buttercream to pipe rosettes, stars and swirls. Add some sprinkles, and voila! A do-it-yourself heart-shaped cake!
Share Your Thoughts...
Lastly, if you make DIY Heart-Shaped Cake, be sure to leave a review down below at the bottom of this page (stars are also appreciated)! Above all, I love to hear from you and always do my best to respond to each and every review. And of course, if you do make this recipe, don’t forget to tag me on Instagram! Looking through the photos of recipes you all have made is one of my favorite things to do!
DIY Heart-Shaped Cake
Makes: 10 servings
Prep Time: 30 minutes
Bake Time: 30 minutes
Total Time: 1 hour plus chill time and decorations 45 minutes
Ingredients
Vanilla Layer Cake:
2 & 3/4 cups (290g) sifted cake flour
2 tsp baking powder
1/2 tsp baking soda
1 tsp salt
3/4 cup unsalted butter, room temperature
1 & 1/2 cups granulated white sugar
2 large eggs + 2 egg whites, room temperature
1/2 cup sour cream, room temperature
1 tbsp pure vanilla extract
1 cup whole milk, room temperature
Gel food coloring, if desired
Vanilla Buttercream:
1 cup unsalted butter, room temperature
3 & 1/2 cups powdered sugar, sifted
2 tsp vanilla extract
2 tbsp whole milk or heavy whipping cream, room temperature
1/4 tsp salt, or to taste
Instructions
Preheat the oven to 350°F. Prepare three 6-inch or two 9-inch cake pans by spraying the sides with a cooking spray and fitting a parchment paper circle to the bottom of the pan.
Sift the cake flour and then measure by spooning and leveling it in your measuring cup. Add the cake flour, baking powder, baking soda, and salt into a bowl and whisk to combine. Set aside.
In the bowl of your stand mixer (a handheld mixer works fine too!), beat the butter on high for two minutes until it’s light and creamy. Add in the sugar and continue to mix on medium-high for another two minutes. Turn the mixer to low and add the eggs and egg whites, one at a time, mixing until just combined and scraping down the bowl and paddle as needed. Add the vanilla and sour cream, turn the mixer to high, and beat for one full minute. It will look curdled at this point, but don’t worry – it will become smooth cake batter at the end.
Add in the dry ingredients all at once and turn the mixer to low speed. Mix until just combined, then slowly pour in the milk. Continue to mix on low speed until just combined, about 30 seconds. Scrape down the sides and bottom of the bowl and give it a few stirs with a whisk to make sure there are no lumps. The batter will be slightly thick.
Pour the batter evenly into the prepared cake pans and bake for 30-35 minutes. They’re done when they spring back to the touch and a toothpick inserted into the middle comes out clean. Let the cakes cool in the pan for five minutes before turning them out onto a wire rack for an additional few hours of cooling. Make sure they’re entirely room temperature before applying any frosting.
Buttercream:
With a hand mixer or paddle attachment on your stand mixer, cream the butter on medium-high until it’s creamy and light (almost white) in color. About 7 minutes.
With the mixer on low, add the sifted powdered sugar one cup at a time, scraping down after each addition and making sure each cup is fully incorporated before adding the next one.
Add vanilla, milk, and salt and mix on low for another minute until fully incorporated.
Assembly:
Trim the tops of the two layers so that you have an even surface on both.Then, cut two slices to form the straight edges of the heart.I just eyeball this.Repeat it with the second layer, using the first layer as a template.I also cut and tape my cardboard base to match the template so that it’s easier to move the cake.
Add a little buttercream to the rounded part of the cake and position the two curved pieces over the buttercream.They overlap just a bit.You could also trim it to fit more tightly.Press onto the buttercream until they adhere.
Add frosting to the top of the first layer and position the second layer over it.Crumb coat the entire cake, refrigerate for 15 minutes and then apply a final coating of buttercream.Decorate however you prefer.
I used pink gel food coloring to color my base frosting and then used red, and different shades of pink to make the rosettes and stars.I used piping tips 1M, 32 and 4B.


Leave a Review