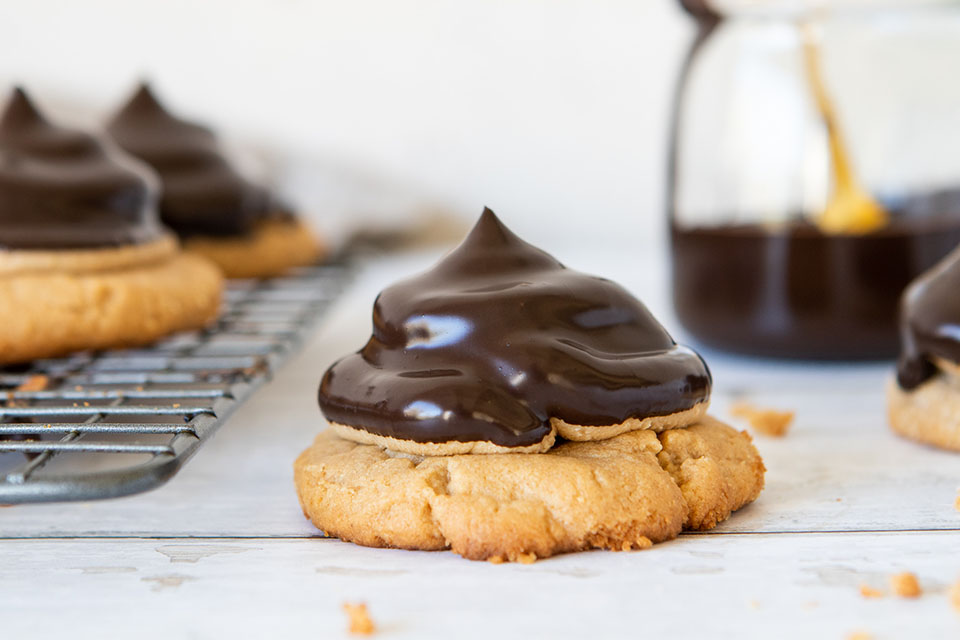
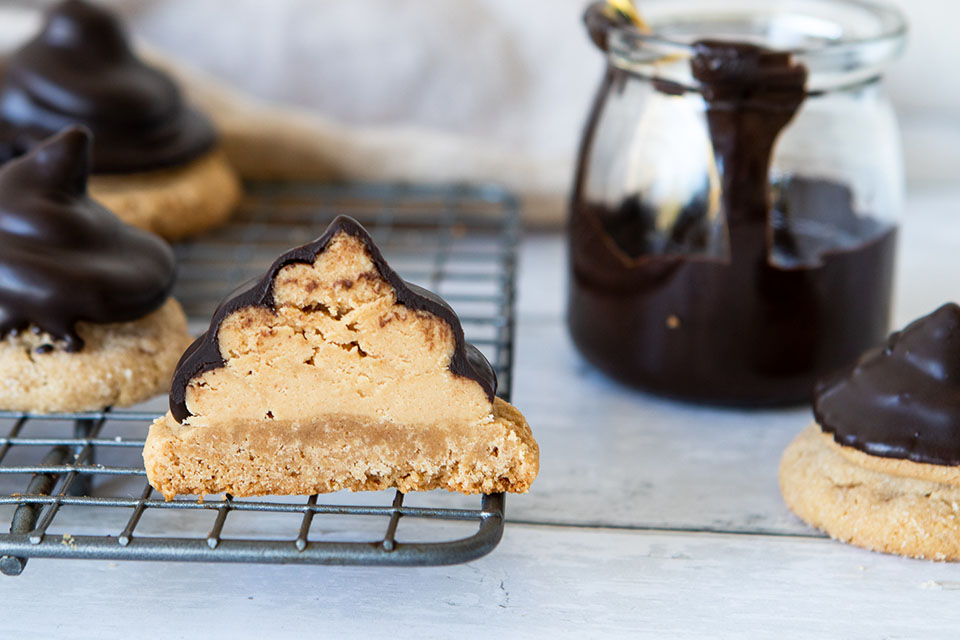
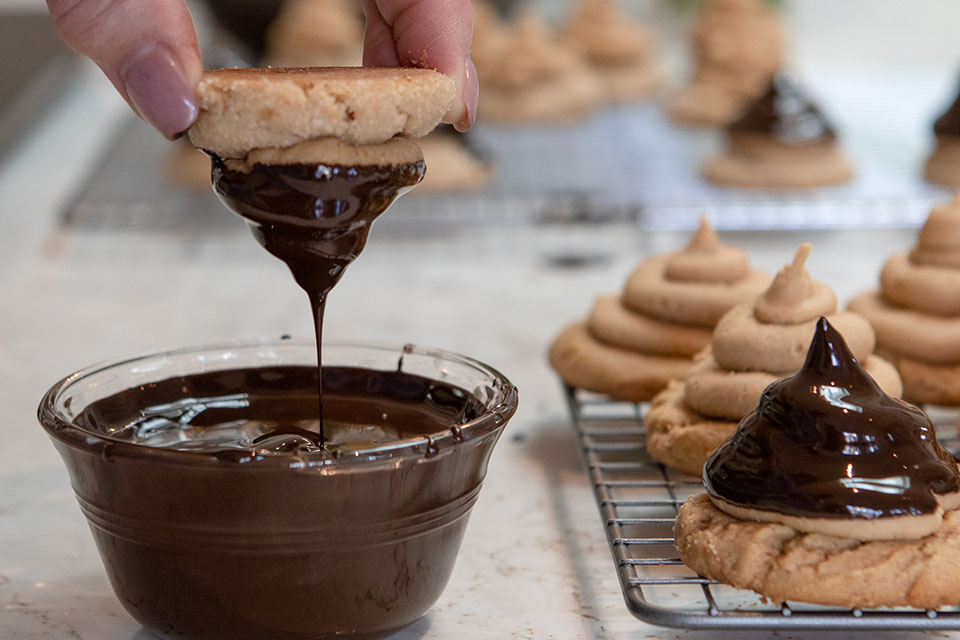
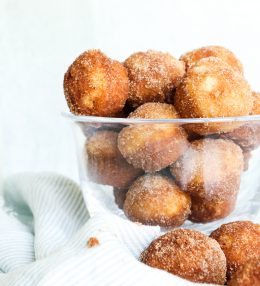
I love a soft, chewy peanut butter cookie, especially these Peanut Butter Hi-Hat Cookies. This cookie starts with a traditional peanut butter cookies that gets a swirl of peanut butter frosting on the top to resemble a tall hat. It then gets dipped in melted chocolate, like a certain soft-serve ice cream cone that we know and love! Think Reese’s peanut butter cup in the shape of a cookie. This is divine!
I have always loved the peanut butter cookies with the cross-hatch fork marks in them…I don’t believe for a minute that the marks enhance the taste, but they absolutely enhance the memory. So much of the enjoyment of food, for me, is finding new foods that are uniquely familiar. Those cross-hatches remind me of cookies my mom made. That’s all it takes for me to get this warm, fuzzy feeling any time I see these cookies.
Begin these lovely beauties by making those nostalgic peanut butter cookies. The batter uses creamy peanut butter. Don’t use the oil-based natural peanut butters. You really want a commercial brand like Jif or Skippy. You can certainly use crunchy peanut butter. Either will work beautifully!
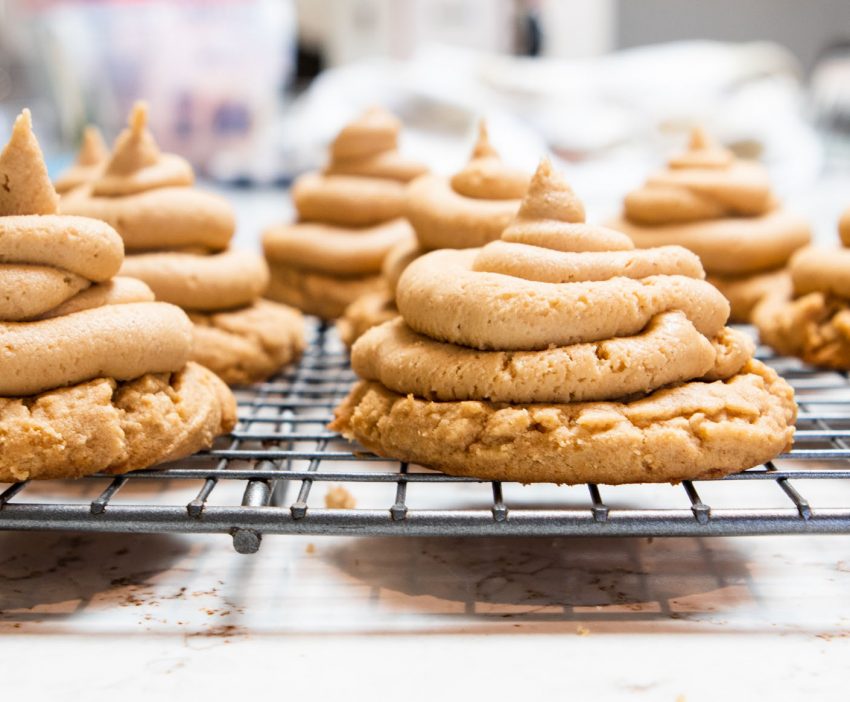
Once baked and cooled, make the peanut butter frosting and fill a piping bag with it. I like to use an open tip, but if you don’t have a tip, you can always just cut an opening about 1/2-inch in diameter in your piping bag. And, if you don’t have a piping bag, a sturdy zip-lock baggie will work. Pipe swirls of frosting on the top of each cookie, to resemble a high hat.
Finally, after the cookies have chilled for a while, melt the chocolate and start dipping! I tried a number of different “vessels” to hold the chocolate so that I could get my fingers that are holding the cookie into the opening of the vessel and deep enough that I didn’t smash the top of the frosting against the bottom of the bowl. I ended up with this bowl below, but feel free to try a drinking class or anything else. It’s a bit of a trial-and-error thing!
Lastly, if you make Peanut Butter Hi-Hat Cookies, be sure to leave a comment and/or give this recipe a rating! Above all, I love to hear from you and always do my best to respond to each and every comment. And of course, if you do make this recipe, don’t forget to tag me on Instagram! Looking through the photos of recipes you all have made is one of my favorite things to do!
Peanut Butter Hi-Hat Cookies
Makes: 36 cookies
Prep Time: 1 hour & 30 minutes
Bake Time: 12 minutes
Total Time: 1 hour & 45 minutes
Ingredients
Cookies:
2 & 1/2 cups all-purpose flour (spooned and leveled)
1 tsp baking powder
1 tsp baking soda
1/2 tsp kosher salt
1 cup unsalted butter, softened to room temperature
Whisk the flour, baking powder, baking soda, and salt together in a medium bowl. Set aside.
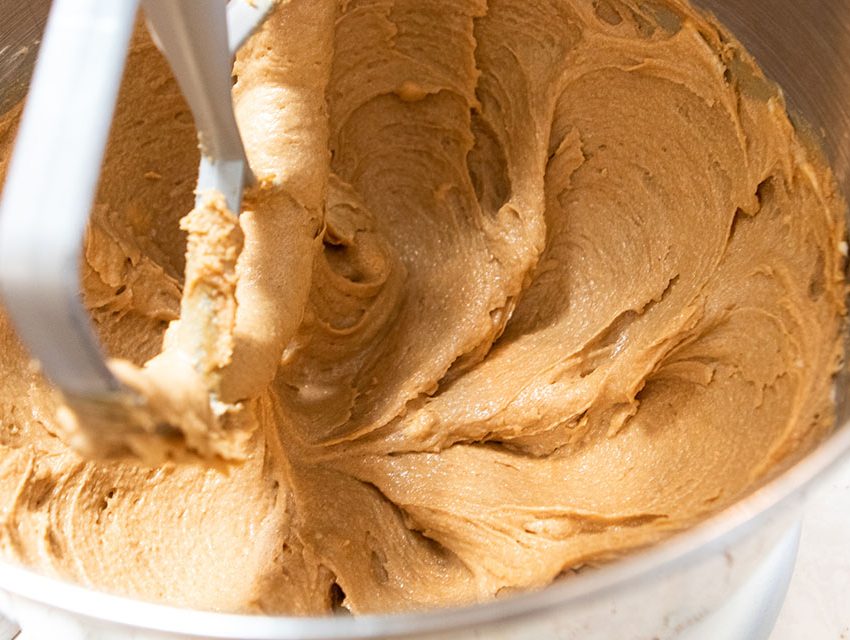
Using a hand mixer or a stand mixer fitted with a paddle attachment, cream the butter and bothsugars together on medium speed until smooth, about 1-2 minutes. Add the eggs and beat on high until combined, about 1 minute. Scrape down the sides and bottom of the bowl as needed. Add the peanut butter and vanilla, then beat on high speed until combined.
Add the dry ingredients to the wet ingredients, then mix on low until combined. With the mixer running on low speed, add the peanuts, if using. Dough will be thick and soft.
Cover and chill the dough for 1 hour in the refrigerator (and up to 2-3 days). If chilling for longer than a few hours, allow to sit at room temperature for at least 30 minutes before rolling and baking because the dough will be quite hard.
Preheat oven to 350°F . Line 2-3 large baking sheets with parchment paper or silicone baking mats. (Always recommended for cookies.) Set aside.Roll cookie dough into balls, about 1 1/2 tablespoons of dough per cookie, and then roll the balls in granulated sugar. Use a fork to make a crisscross indent on top of each. Bake each batch for 10-12 minutes until very lightly browned on the sides. The centers will look very soft. Remove from the oven. Cool cookies on the baking sheets for 5 minutes before transferring to a wire rack to cool completely. Cookies stay fresh covered at room temperature for up to 1 week.
Frosting:
In a large bowl, use a hand mixer on low speed to beat the confectioners’ sugar, butter, peanut butter, heavy cream, vanilla, and salt. Increase the speed to high and beat until light and fluffy. Place frosting in piping bag fitted with 1/2-inch open tip.
On top of each cooled cookie, pipe frosting in a tall swirl, getting as much height as possible. Place frosted cookies in the refrigerator while making chocolate coating, about 15 minutes.
Chocolate Coating:
In a small microwavable bowl, microwave chocolate chips and oil uncovered, on high, for 30 seconds, then 10 to 15 seconds, stirring after each interval, until mixture is smooth.
Dip the cone-shaped frosted cookies into the chocolate coating to coat most of the frosting, letting excess chocolate drip off. Let the chocolate set in fridge (about 15 minutes) before serving.
Chef’s Notes:
Always used processed peanut butter like Jif or Skippy when baking. Don’t use natural, oily peanut butter in this recipe. You can use smooth or chunky or a combo. In this recipe, I prefer smooth


Leave a Review