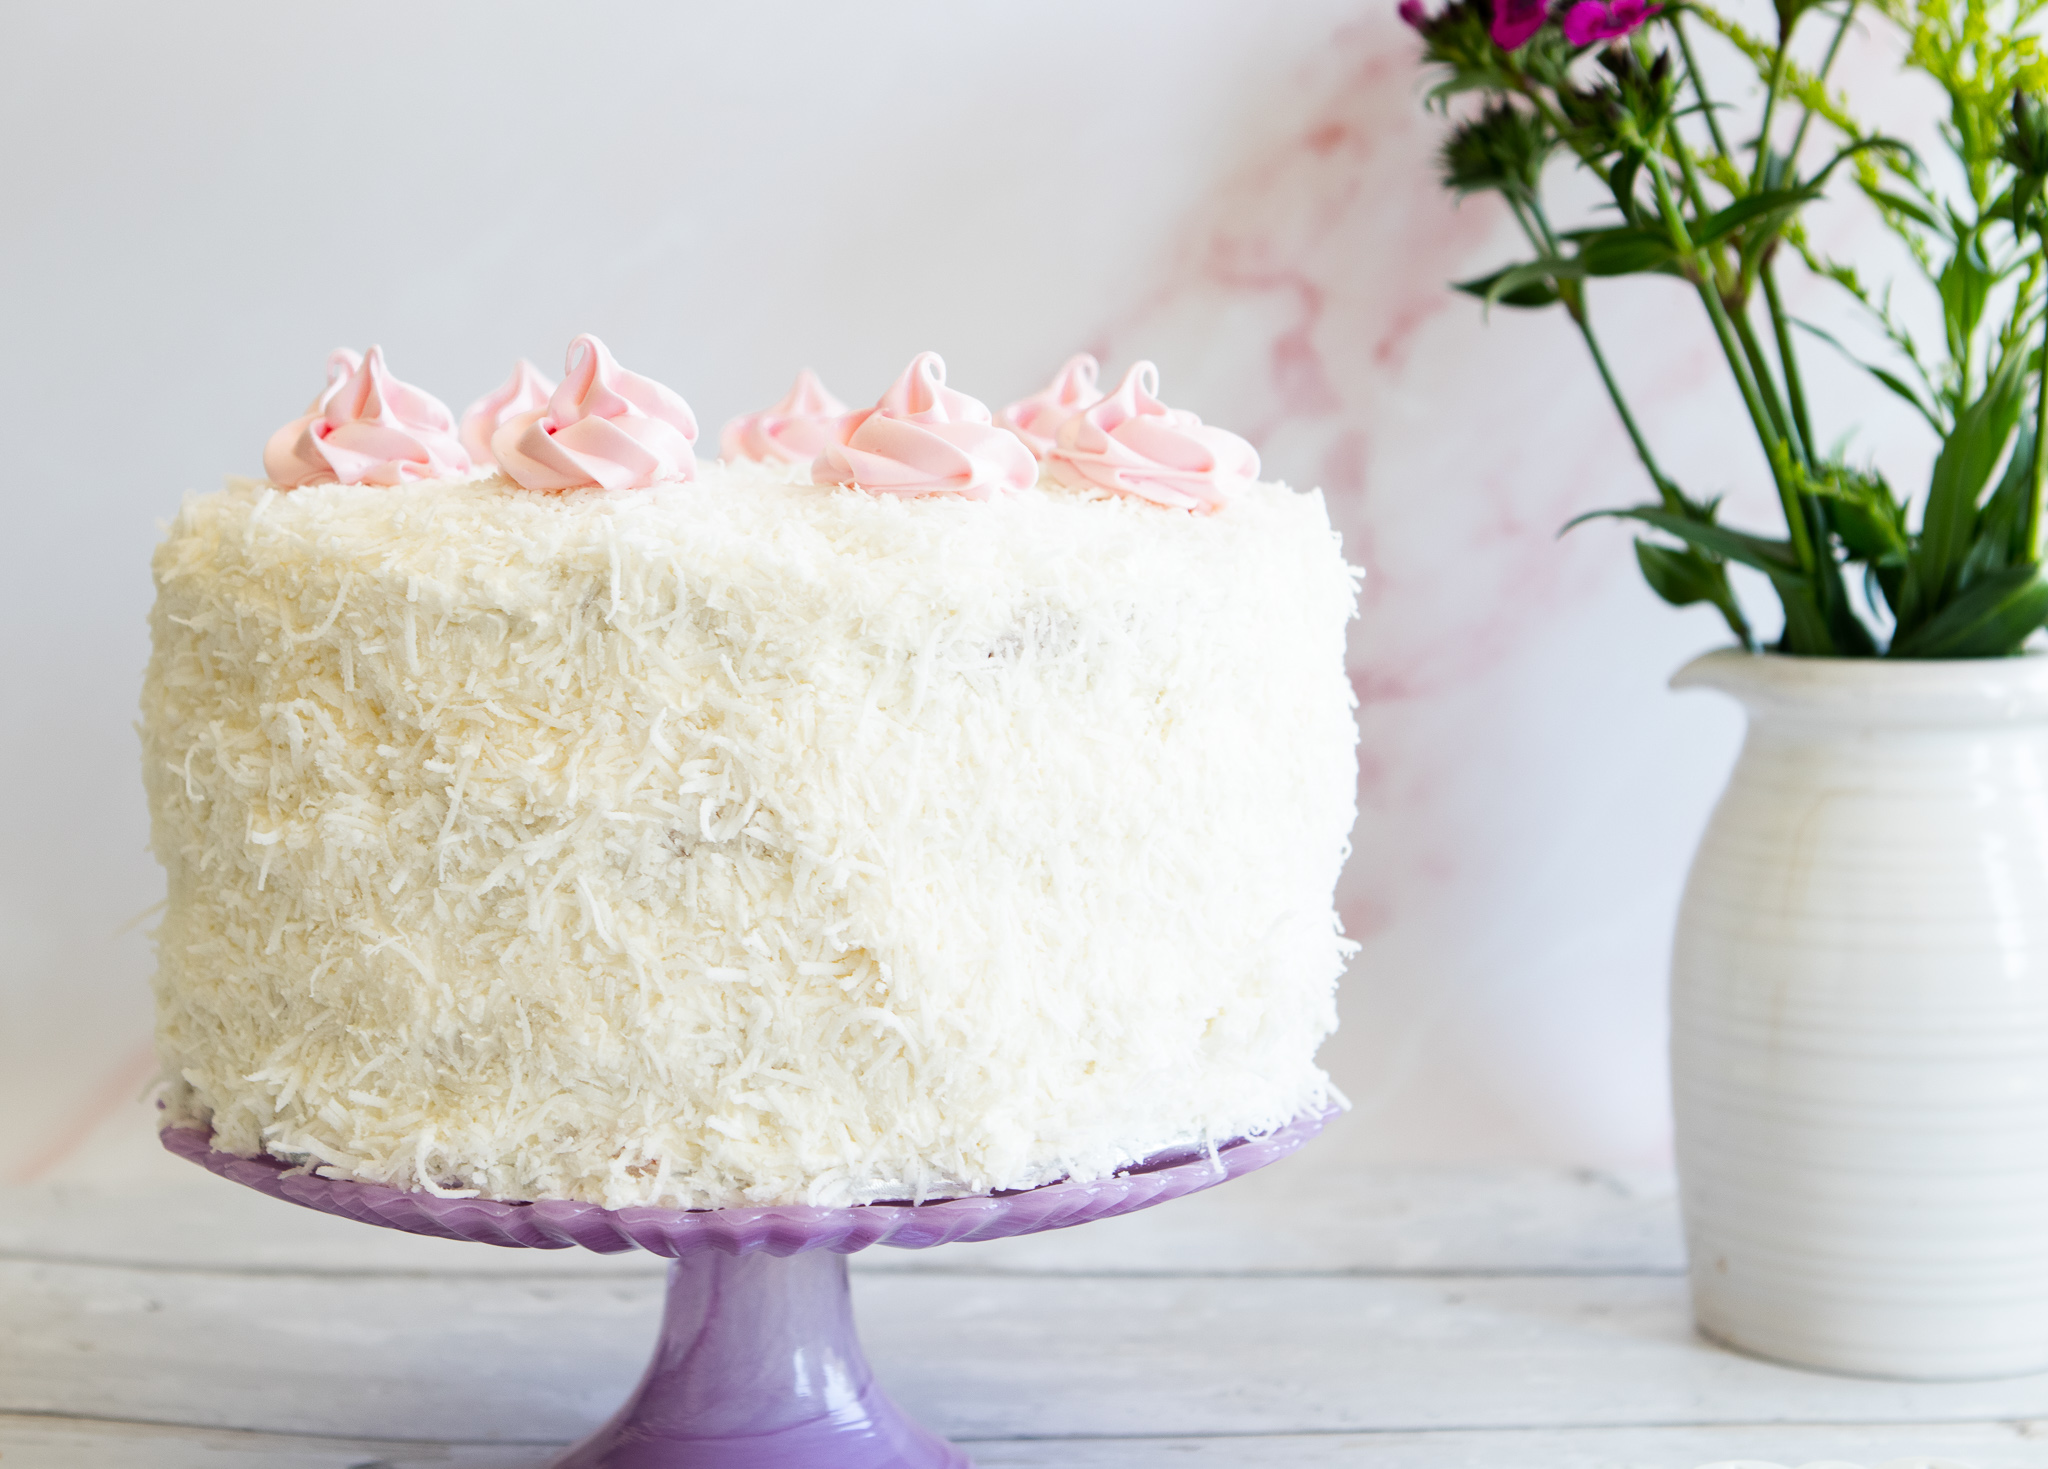
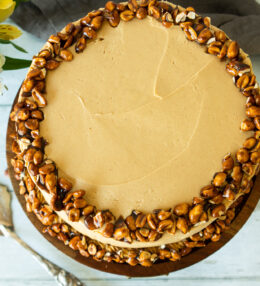
I’ve been searching for an amazing coconut cake, and I finally found it: moist, coconut 3 different ways, creamy frosting, and absolutely beautiful to look at!
I was meeting my girlie girls for happy hour and I figured I’d taste-test this beauty on them. They all got their to-go boxes with a fat slice of cake in it. Within 20 minutes, which was about the time it took for each of them to drive home, the texts started.
Jody: Oh my god. The cake! It’s the best thing I’ve ever tasted!! Thank you!!
Daron: We are loving your coconut cake…thank you sooo much for sharing! It is so pretty and absolutely delicious! 💞
Robyn: The cake is unbelievable. I ate the whole piece. Gene said it reminded him of Snowballs!
Fran: The cake is insanely delicious!! Thank you so much!….or not!!!!! ❤️❤️❤️
So, don’t just trust me on this one…make it, share it, and enjoy the same accolades!
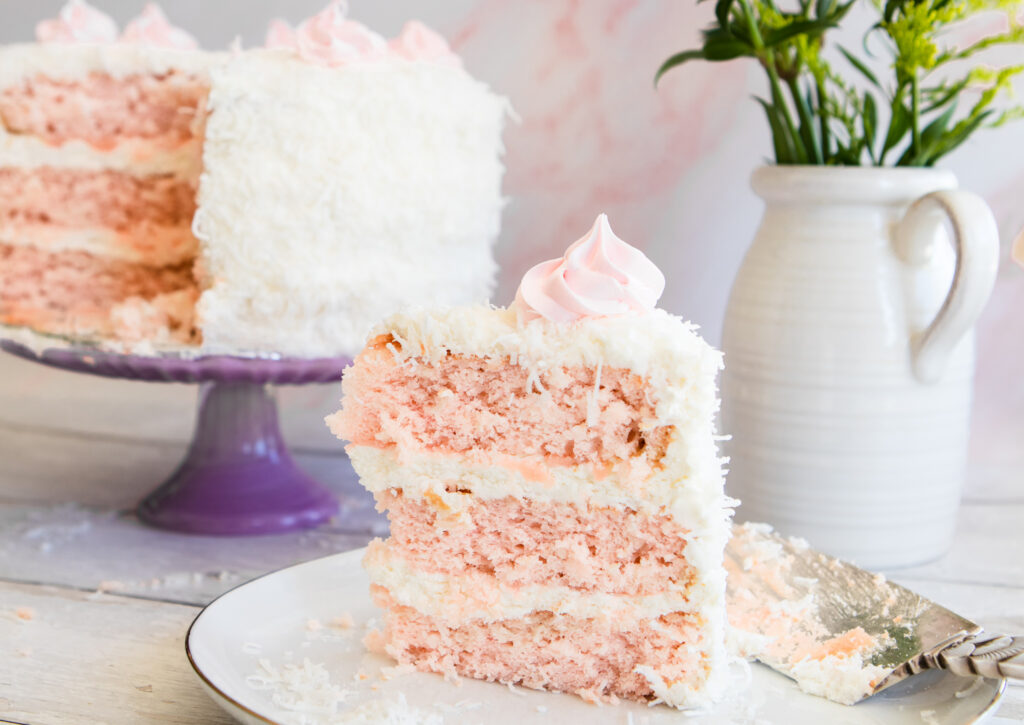
So, what makes this cake so special? First, it is super moist. That’s critical because why would you want a dry cake? Second, by using coconut extract, coconut milk and shredded coconut you are sure to have an intensely flavored coconut cake! Third, if you use the ingredients as written (why would you change them when this cake is so perfect?) the resulting layers will have a fluffy crumb. And, finally, the coconut cream cheese frosting is heavenly!
This recipe begins by mixing your dry ingredients in a small bowl. Then, with room temperature butter (don’t skip this), cream the sugar until it is nicely combined with the butter. Add in your egg whites, sour cream, and extracts. Then add in your dry ingredients, alternating with the coconut milk. That’s all there is to it!
You can add pink food coloring or not. I happen to think it looks more delicious with a pink hue, but it’s up to the purist in you as to whether or not you want to add the food coloring.
Bake it, cool it, make the frosting, and decorate. Then eat! Share it if you like, or not. But, I promise (and so does Jody, Daron, Robyn & Fran) that you are going to love it!
Share Your Thoughts...
Lastly, if you make Amazing Coconut Cake, be sure to leave a comment and/or give this recipe a rating! Above all, I love to hear from you and always do my best to respond to each and every comment. And of course, if you do make this recipe, don’t forget to tag me on Instagram! Looking through the photos of recipes you all have made is one of my favorite things to do!
Amazing Coconut Cake
Makes: 12 servings
Prep Time: 35 minutes
Bake Time: 22 minutes
Total Time: 4 hours
Ingredients
Coconut Cake:
2 & 1/2 cups (263g) sifted cake flour (see baking tips for measuring flour)
2 tsp baking powder
1/2 tsp baking soda
1 tsp salt
3/4 cup unsalted butter, softened to room temperature
1 & 2/3 cups granulated sugar
5 large egg whites, at room temperature
1/2 cup sour cream, at room temperature
2 tsp pure vanilla extract
1 tsp coconut extract
1 cup canned coconut milk, at room temperature
1 cup sweetened shredded coconut
Pink gel food coloring, optional
Coconut Cream Cheese Buttercream:
1 cup unsalted butter, softened to room temperature
one 8 ounce block full-fat cream cheese, softened to room temperature
5 cups confectioners’ sugar
2 tbsp canned coconut milk
1/2 tsp pure vanilla extract
1/2 tsp coconut extract
1/8 tsp salt
2 cups sweetened shredded coconut
Instructions
Preheat oven to 350°F. Grease three 9-inch cake pans, line with parchment paper, then grease the parchment paper. Parchment paper helps the cakes seamlessly release from the pans.
Make the Cake:
Whisk the cake flour, baking powder, baking soda, and salt together. Set aside.
Using a handheld or stand mixer fitted with a paddle or whisk attachment, beat the butter and sugar together on medium-high speed until smooth and creamy, about 2 minutes. Scrape down the sides and up the bottom of the bowl with a rubber spatula as needed. Beat in the egg whites until combined, then add the sour cream, vanilla extract, and coconut extract. Beat until combined. Mixture will look curdled as a result of the varying textures and solid butter combining. Scrape down the sides and up the bottom of the bowl as needed. With the mixer on low speed, slowly add the dry ingredients and coconut milk. Add pink gel food coloring, if using, and blend to desired color.Beat on low speed until combined, then add the shredded coconut. Whisk it all by hand to make sure there are no butter lumps at the bottom of the bowl. The batter will be slightly thick.
Pour batter evenly into cake pans. Weigh them to ensure accuracy, if desired. Bake for around 21-23 minutes or until the cakes are baked through. To test for doneness, insert a toothpick into the center of the cake. If it comes out clean, it’s done. Allow cakes to cool completely in the pans set on a wire rack. The cakes must be completely cool before frosting and assembling.
Make the Frosting:
In a large bowl using a hand-held mixer or stand mixer fitted with a whisk or paddle attachment, beat the butter and cream cheese together on medium speed until creamy and smooth, about 2 minutes. Add confectioners’ sugar, coconut milk, vanilla extract, coconut extract, and salt with the mixer running on low. Increase to high speed and beat for 3 minutes. Add more confectioners’ sugar if frosting is too thin, more coconut milk if frosting is too thick, or an extra pinch of salt if frosting is too sweet.
Assemble and Decorate:
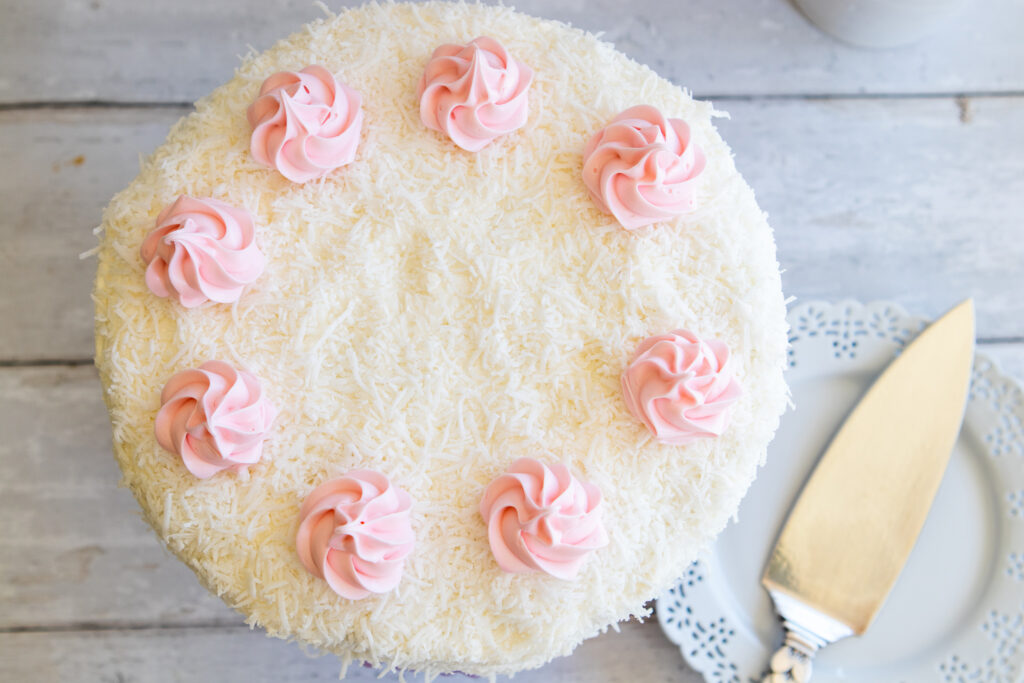
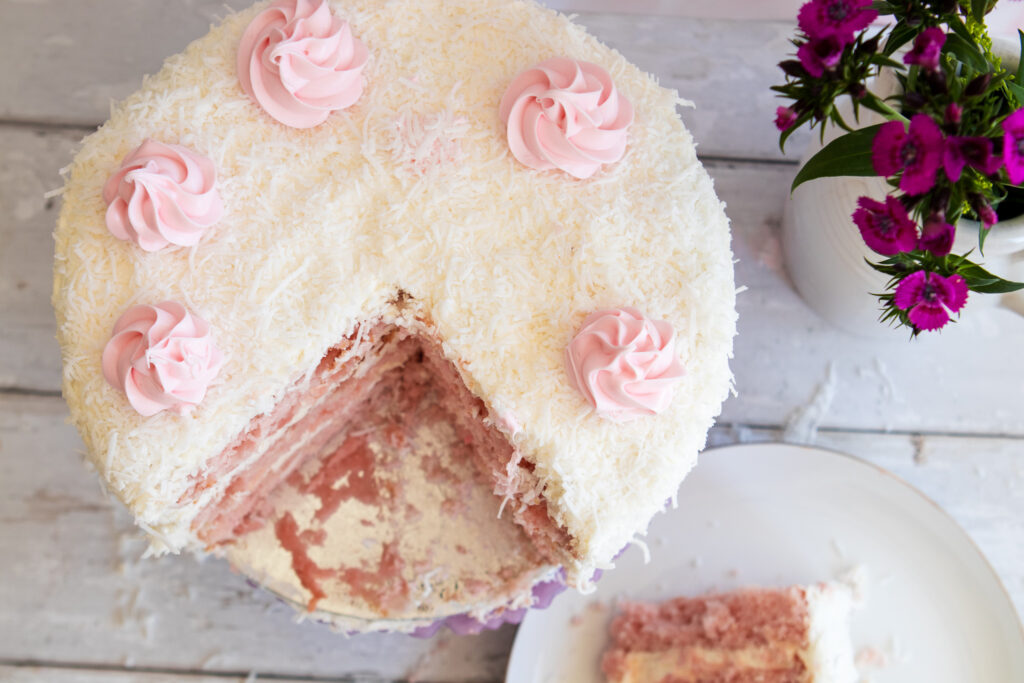
Using a large serrated knife, slice a thin layer off the tops of the cakes to create a flat surface. Discard (or crumble over ice cream!). Place 1 cake layer on your cake stand, cake turntable, or serving plate. Evenly cover the top with about 1 and 1/2 cups of frosting. Top with 2nd cake layer and evenly cover the top with about 1 and 1/2 cups of frosting. Top with the third cake layer. Spread the remaining frosting all over the top and sides. I use and recommend an icing spatula to apply the frosting and bench scraper to smooth the sides. Sprinkle coconut on top of the cake and apply it to the sides.
Refrigerate cake for at least 20 minutes before slicing. This helps the cake hold its shape when cutting, though it’s still a pretty fluffy cake!
Cover leftover cake tightly and store in the refrigerator for up to 5 days.
Chef’s Notes:
Make Ahead & Freezing Instructions: The cake layers can be baked, cooled, and covered tightly at room temperature overnight. Likewise, the frosting can be prepared then covered and refrigerated overnight. When ready to decorate, let the frosting sit at room temperature to slightly soften for 15 minutes, then give it one more mix with the mixer on medium speed for about 1 minute before frosting cake. Frosted cake or unfrosted cake layers can be frozen up to 2-3 months. Thaw overnight in the refrigerator and bring to room temperature before decorating/serving.
Cake Flour: For the best results, I strongly recommend sifted cake flour. Sift before measuring. You can find cake flour in the baking aisle and I have many more recipes using it. If you can’t get your hands on cake flour, here’s a substitute:For each cup of flour needed, measure 1 cup all-purpose flour. Remove 2 tablespoons.Add 2 tablespoons cornstarch to the flour. Sift together TWICE.
Canned Coconut Milk: Canned coconut milk is a cooking ingredient, not a beverage. It is usually unsweetened, so make sure you’re using unsweetened. It’s usually found near the Thai food products. Do not use refrigerated carton coconut milk. You need 1 cup for the cake, not the entire can. You use 2 more Tbsp in the frosting. There will be a little leftover in the can.
Sweetened Shredded Coconut: I recommend using sweetened shredded coconut. It’s moister than unsweetened coconut and that makes a big difference in the cake’s texture. If desired, pulse the coconut shreds in a food processor to chop them up so they aren’t as long inside and outside of the cake. Chopping the coconut is optional.
Why is everything at room temperature? All refrigerated items should be at room temperature so the batter mixes together easily and evenly.
Some measurements that are critical are given in grams.One of the most important tools in my kitchen is my digital scale.I would highly suggest getting one.Flour, in particular, is better being weighed as it can settle and cause a much denser final product than you might like.


Recipe Reviews