This Jumbo Chipwich Ice Cream Sandwich is a walk down memory lane for a lot of us. It takes the delicious childhood treat many of us grew up with and blows it up to a crazy size, making it perfect for sharing (maybe)! I also happen to think it makes the perfect Father’s Day dessert.
Chipwich ice cream sandwiches have been around since the late 1970s and have enjoyed a bit of a renaissance in recent years. With creamy vanilla ice cream sandwiched between chocolate chip cookies and coated with miniature chocolate chips, it’s easy to see why they’ve remained such a beloved summertime treat. This jumbo version captures all that nostalgia in a fun, shareable dessert that’s guaranteed to bring out everyone’s inner kid.
To make the cookie layers, begin by melting the butter and then whisking in the salt, brown sugar and milk until smooth. Whisk in the egg and vanilla until fully incorporated.
Sprinkle the baking powder over the mixture and add the flour, stirring until there are no more streaks of flour. Fold in the chocolate chips.
Divide the batter evenly between two 8-inch baking pans and sprinkle some mini-chocolate chips over the top. Bake for about 15 minutes or until the edges are lightly golden. Let the layers cool slightly before removing them from the pans and transferring to a wire rack to cool completely.
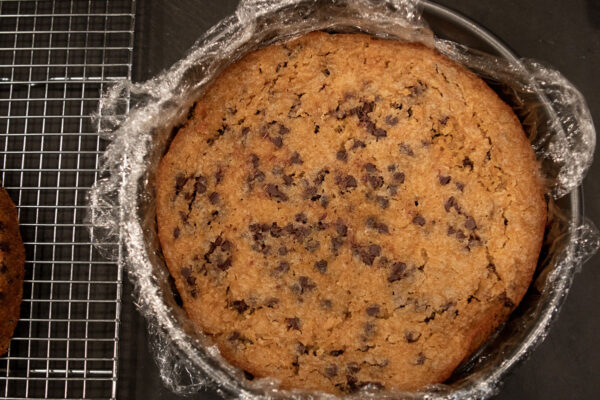
Line one of the two baking pans with plastic wrap with enough overhang to help pull the finished cake out of the pan. Drop one of the cake layers inside the prepared pan.
Scoop softened vanilla ice cream onto the cake layer and spread it into an even layer. Top with the second cake layer.
Fold any extra plastic wrap over the top and freeze for at least 3 hours and preferably overnight.
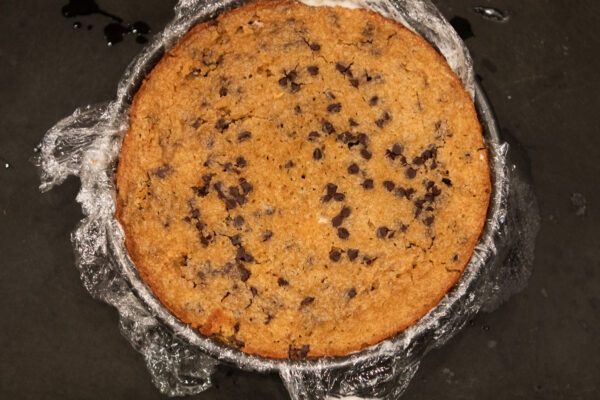
Once frozen, remove the cake from the freezer and use the plastic wrap to help lift it out of the pan.
Press the remaining mini chocolate chips onto the outside of the ice cream sandwich. Slice the cake into wedges or squares and serve immediately.
Enjoy this nostalgic favorite!
Share Your Thoughts...
Lastly, if you make Jumbo Chipwich Ice Cream Sandwich, be sure to leave a review down below at the bottom of this page (stars are also appreciated)! Above all, I love to hear from you and always do my best to respond to each and every review. And of course, if you do make this recipe, don’t forget to tag me on Instagram! Looking through the photos of recipes you all have made is one of my favorite things to do!
Jumbo Chipwich Ice Cream Sandwich
Makes: 8-10 servings
Prep Time: 30 minutes
Bake Time: 15 minutes
Total Time: 45 minutes plus freeze time 3 hours minimum
Ingredients
For the Cookie Layers:
1/2 cup unsalted butter, plus extra for greasing the pans
Scant 1 tsp kosher salt
1 cup packed light brown sugar
1/3 cup milk
1 large egg
1 & 1/2 tsp vanilla extract
1 tsp baking powder
1 cup (130 g) all-purpose flour
1 & 1/2 cups (9 oz or 255 g) miniature chocolate chips, divided
For the Filling:
3 cups vanilla ice cream
Instructions
Prepare the Pans:
Preheat the oven to 350°F. Line two 8-inch round cake pans with parchment paper rounds. Lightly grease the sides of the pans with butter or nonstick spray. A small smear of butter beneath the parchment helps keep it from shifting. If you only have one pan, simply bake the layers one after the other.
Make the Cookie Layers:
Melt the butter in a large mixing bowl, stopping while a few small pieces remain. Stir until the residual heat melts the rest. This prevents the butter from becoming too hot.
Whisk in the salt, brown sugar, and milk until smooth. Allow the mixture to cool slightly if needed, then whisk in the egg and vanilla extract until fully incorporated.
Sprinkle the baking powder over the mixture and whisk thoroughly. Add the flour and stir just until no dry flour remains. Fold in 1/2 cup of the miniature chocolate chips.
Divide the batter evenly between the prepared pans and spread it into smooth, even layers. Sprinkle 2 tbsp of the remaining chocolate chips over the top of each layer.
Bake for about 15 minutes, or until the edges are lightly golden and the centers are set but still soft.Let the cookie layers cool in the pans for 5 minutes before removing them. Carefully peel away the parchment paper and transfer the layers to a wire rack. For easier assembly, place the cookie layers in the freezer for about 10 minutes until completely chilled.
If the ice cream is very firm, move it to the refrigerator while the cookie layers cool so it softens slightly.
Assemble the Cake:
Line one of the 8-inch cake pans with plastic wrap, leaving enough overhang on all sides to lift the cake out later.Place one cookie layer in the bottom of the pan with the top facing down.
Scoop the ice cream over the cookie and spread it into an even layer with an offset spatula or the back of a spoon.Set the second cookie layer on top with the top facing up and gently press it into the ice cream. Fold any overhanging plastic wrap over the top.Place the assembled cake in the freezer for at least 3 to 6 hours, preferably overnight, until completely firm.
Remove the cake from the freezer and run a thin knife around the edge of the pan. Use the plastic wrap to lift the cake out.
Press the remaining 3/4 cup miniature chocolate chips around the sides of the cake. Slice into 8 to 12 wedges and serve immediately.
Make Ahead:
Wrapped well, this ice cream cake will keep in the freezer for several weeks.


Leave a Review