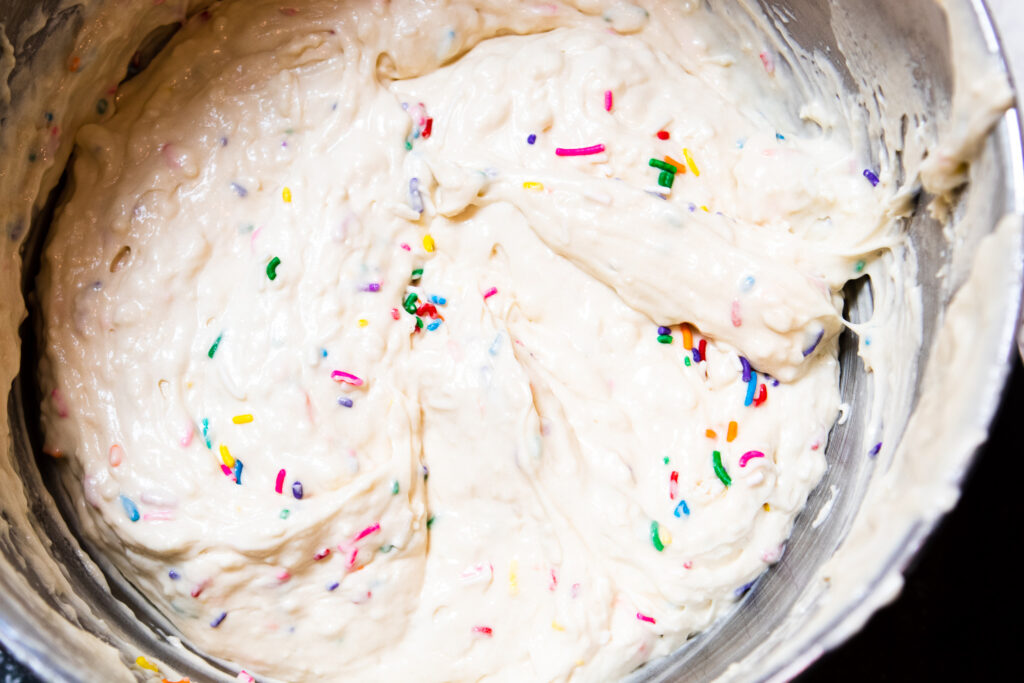
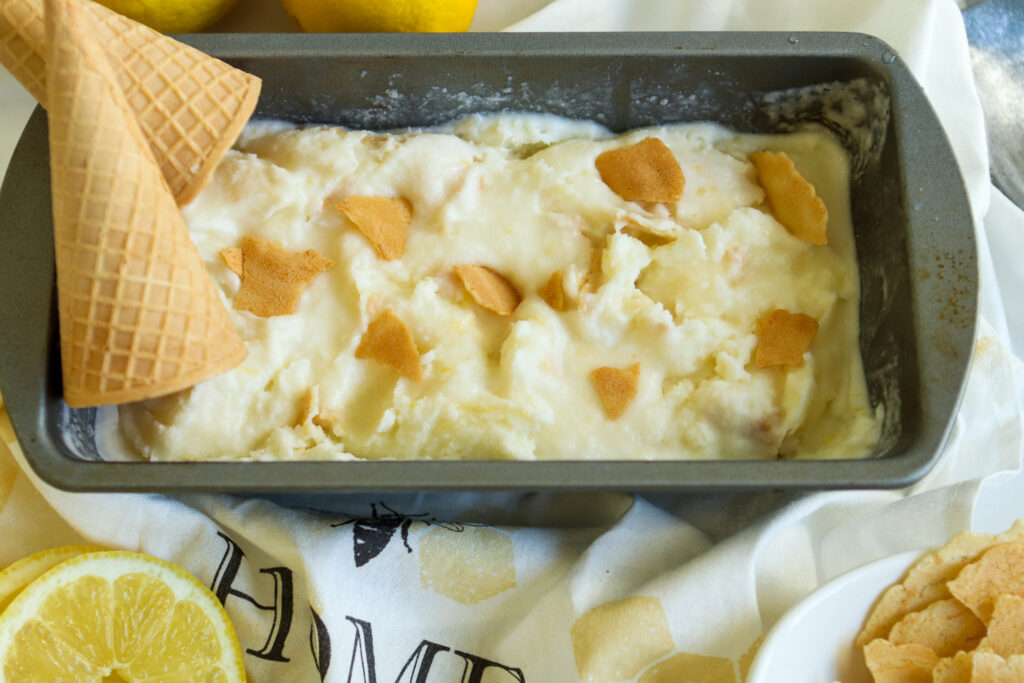
Desserts – The Fancy Pants Kitchen https://thefancypantskitchen.com Quick and Easy Recipes Thu, 18 Jan 2024 15:37:50 +0000 en-US hourly 1 https://wordpress.org/?v=6.5.5 https://thefancypantskitchen.com/wp-content/uploads/2021/02/cropped-Favicon-1-32x32.jpg Desserts – The Fancy Pants Kitchen https://thefancypantskitchen.com 32 32 S’Mores Puff Pastry Tart https://thefancypantskitchen.com/recipe/smores-puff-pastry-tart/ https://thefancypantskitchen.com/recipe/smores-puff-pastry-tart/#respond Tue, 16 Jan 2024 00:09:31 +0000 https://thefancypantskitchen.com/?post_type=ranna_recipe&p=23748

This S’Mores Puff Pastry Tart is like heaven wrapped in puff pastry!  Everything that you love about S’mores is here:  melty marshmallows, graham crackers, smooth warm milk chocolate and we’ve wrapped it up in an easy, but fancy-looking, puff pastry enclosure.

This is too good to be true!  Best of all, from start to bottom, we’re talking 30 minutes of time!

Begin by combining soft butter, cocoa powder and sugar in a small bowl and set aside.

Open up the thawed puff pastry on a sheet of parchment and stretch it out a bit to create a rectangle. Transfer it to a baking sheet.

Spread the cocoa butter down the middle third of the pastry.  Place 3 pieces of graham crackers on the chocolate.  Top with Hershey’s chocolate squares and then marshmallows.

Make diagonal cuts in the non-covered pastry and fold alternating strips over one another per the instructions in the recipe.  Secure the bottom pieces by tucking under.

Brush an egg wash over the pastry and sprinkle Turbinado sugar over the top.

Bake for 10 or 15 minutes or until you see that the chocolate has melted and the marshmallows are bubbling.

Cut the tart while it’s still warm.  Enjoy!

Share Your Thoughts...

Lastly, if you make S’Mores Puff Pastry Tart, be sure to leave a review down below at the bottom of this page (stars are also appreciated)! Above all, I love to hear from you and always do my best to respond to each and every review. And of course, if you do make this recipe, don’t forget to tag me on Instagram! Looking through the photos of recipes you all have made is one of my favorite things to do!

S’Mores Puff Pastry Tart

Makes: 8 slices

Prep Time: 15 minutes

Bake Time: 15 minutes

Total Time: 30 minutes plus thaw time 30 minutes

Ingredients

  • 1 puff pastry sheet, thawed
  • 3 tbsp unsalted butter, softened
  • 1 tbsp unsweetened cocoa powder
  • 2 tbsp granulated sugar
  • 1 & 1/2 graham crackers
  • 1 (4.4-ounce) large Hershey’s Milk Chocolate Bar
  • 6 large marshmallows, cut in half
  • turbinado, Demerara or any other coarse grain sugar
  • 1 egg and a bit of water or milk for “egg wash”

Instructions

Preheat oven to 425°F. In a small bowl mix the 3 tablespoons of softened butter with the tablespoon of cocoa powder and the 2 tablespoons of sugar.

Open puff pastry over a parchment paper and stretch it a bit up and down, right and left, until you have more of a rectangular shape. Pulling the parchment, transfer it to a baking sheet.

Spread the cocoa butter throughout the middle of the sheet, covering about 4” of the dough.

Place 3 crackers on top. Snap the chocolate bar in half and arrange on top of the crackers. Arrange halved marshmallows on top.

From the corners of the top graham crackers, make a cut diagonally to the top with a small and sharp pairing knife. Repeat the same at the bottom. Turn the top piece inside and press the inside corners. Cut the dough on the sides diagonally towards the top.

Start crossing in each strip, alternating sides, leaving the last two stripes on each side open. Close the middle piece of dough at the bottom as you did at the top. Close the remaining stripes to secure the bottom of the braid and tucking them below the tart if necessary.

Beat the egg with a bit of water or milk (about half a teaspoon) and brush all the exposed dough of the tart. Sprinkle coarse grain sugar on top.

Bake 10 to 15 minutes, until the pastry is golden brown and you can see the chocolate and marshmallow bubbling. If at any point towards the end you feel your tart is burning but it’s not quite done, drop the temperature to 400° during the last few minutes.

Cut while still warm. Store any remaining left over in an airtight container on a cool dry place, you don’t need to place it in the fridge. Reheat in a 350° oven 5 to 7 minutes.

Recipe by The Yellow Butterfly

]]>
https://thefancypantskitchen.com/recipe/smores-puff-pastry-tart/feed/ 0
No-Churn Coffee-Cinnamon Ice Cream https://thefancypantskitchen.com/recipe/no-churn-coffee-cinnamon-ice-cream/ https://thefancypantskitchen.com/recipe/no-churn-coffee-cinnamon-ice-cream/#respond Fri, 15 Apr 2022 16:16:46 +0000 https://thefancypantskitchen.com/?post_type=ranna_recipe&p=12743

It may be winter but every season is the right season for No Churn Coffee–Cinnamon Ice Cream!  

If you’re one of those people (like me) that loves a bite (or scoop) of ice cream after dinner, then it really doesn’t matter what time of the year it is, you still need it.  So for that special category of people, this one’s for you.

No churn ice cream is the only way I make ice cream.  I don’t have an ice cream maker, so once I discovered that you really didn’t need one to create creamy, dreamy frozen treats, I was all in.  Check out my posts for Dulce de Leche Brownie Ice Cream, No-Churn Lemon Ice Cream, No-Churn Peppermint Ice Cream, and No-Churn Mixed Berry Soft-Serve for some of my favorites.

It’s super easy to make this ice cream:  Just combine heavy cream, coffee and cinnamon in a bowl.  Add the sweetened condensed milk and whisk it until it starts to thicken, about 3 minutes.

Pour it into a loaf pan and freeze it.  That’s is all it takes to create this amazing frozen treat!

Share Your Thoughts...

Lastly, if you make No-Churn Coffee-Cinnamon Ice Cream, be sure to leave a comment and/or give this recipe a rating! Above all, I love to hear from you and always do my best to respond to each and every comment. And of course, if you do make this recipe, don’t forget to tag me on Instagram! Looking through the photos of recipes you all have made is one of my favorite things to do!

No-Churn Coffee-Cinnamon Ice Cream

Makes: 6 servings

Prep Time: 5 minutes

Total Time: 3 hours

Ingredients

  • 1 & 3/4 cups heavy cream
  • 6 tbsp strong, brewed coffee, cooled
  • 3/4 tsp ground cinnamon
  • one 14-ounce can sweetened condensed milk
  • Toppings: caramel sauce, crushed coffee beans

Instructions

Pour the heavy cream, coffee, and cinnamon into a bowl. Add the sweetened condensed milk and whisk this mixture together until slightly thickened, approximately 3 minutes.

Pour into a loaf pan or medium bowl and freeze for at least 3 hours, until set.

]]>
https://thefancypantskitchen.com/recipe/no-churn-coffee-cinnamon-ice-cream/feed/ 0
Apple Cider Caramels https://thefancypantskitchen.com/recipe/apple-cider-caramels/ https://thefancypantskitchen.com/recipe/apple-cider-caramels/#respond Sat, 15 Jan 2022 17:24:02 +0000 https://thefancypantskitchen.com/?post_type=ranna_recipe&p=12320

Homemade caramels might seem like a laborious task (it’s not) but the resulting Apple Cider Caramels are not to be believed.  Each morsel is chewy and bursting with apple cider flavor.  And you can’t forget the salt.  With the addition of cinnamon and flaky sea salt, the flavor is crazy good!

I will admit that wrapping the caramels is a bit time intensive, but sit down with a chill playlist and relax.  Give yourself about an hour and you’ll be done.

These are caramels worthy of gifting…the host of an upcoming gathering will love a bag of these!

To make Apple Cider Caramels, begin by boiling apple cider until it reduced to about 1/8th of its original volume.  This can take a while (30-40 minutes) but the resulting reduction is rich and flavorful and slightly thickened.

Stir butter, sugars and heavy cream into the reduced apple cider and return the pot to the heat.  Boil until a candy thermometer reaches soft ball stage of 252°F.  It’s okay if you don’t have a candy thermometer;  you can test its readiness by dropping a small bit into very cold water.  It should become firm and chewy and be able to roll into a small ball. If your caramel has reached that point, you are ready to add cinnamon and flaky sea salt.  Pour it into a parchment-lined baking pan to set up.  This can take a few hours. 

Once the caramel is firm, use the parchment paper to lift the slab of caramel out of the pan and place it on a cutting board.  Use a well-oiled knife (very important…I oil it between every cut) and cut 1 inch squares.  Wrap each one in a 4″ square of waxed paper.  You can buy pre-cut wrappers.  I like these ones.

The caramels can be kept at room temperature or in the fridge, but they won’t last long!  Promise!

Share Your Thoughts...

Lastly, if you make Apple Cider Caramels, be sure to leave a comment and/or give this recipe a rating! Above all, I love to hear from you and always do my best to respond to each and every comment. And of course, if you do make this recipe, don’t forget to tag me on Instagram! Looking through the photos of recipes you all have made is one of my favorite things to do!

Apple Cider Caramels

Makes: 64 pieces

Prep Time: 5 minutes

Bake Time: 45 minutes

Total Time: 3 hours 15 minutes

Ingredients

  • 4 cups (945 ml) apple cider
  • 1/2 tsp ground cinnamon
  • 2 tsp flaky sea salt, such as Maldon, or less of a finer one
  • 8 tbsp (1 stick) unsalted butter, cut into chunks
  • 1 cup granulated sugar
  • 1/2 cup packed light brown sugar
  • 1/3 cup heavy cream
  • Neutral oil for the knife

Instructions

Boil the apple cider in a 3- to- 4- quart saucepan over high heat until it is reduced to a dark, thick syrup, between 1/3 and 1/2 cup in volume. This takes about 35 to 40 minutes on my stove. Stir occasionally.

Meanwhile, get your other ingredients in order, because you won’t have time to spare once the candy is cooking. Line the bottom and sides of an 8- inch straight- sided square metal baking pan with 2 long sheets of crisscrossed parchment. Set it aside. Stir the cinnamon and flaky salt together in a small dish.

Once you are finished reducing the apple cider, remove it from the heat and stir in the butter, sugars, and heavy cream. Return the pot to medium- high heat with a candy thermometer attached to the side, and let it boil until the thermometer reads 252 degrees, only about 5 minutes. Keep a close eye on it. (Don’t have a candy or deep- fry thermometer? Have a bowl of very cold water ready, and cook the caramel until a tiny spoonful dropped into the water becomes firm, chewy, and able to be plied into a ball.)

Immediately remove caramel from heat, add the cinnamon- salt mixture, and give the caramel several stirs to distribute it evenly. Pour caramel into the prepared pan. Let it sit until cool and firm—about 2 hours, though it goes faster in the fridge. Once caramel is firm, use your parchment paper sling to transfer the block to a cutting board. Use a well- oiled knife, oiling it after each cut (trust me!), to cut the caramel into 1-by-1-inch squares. Wrap each one in a 4-inch square of waxed paper, twisting the sides to close. Caramels will be somewhat on the soft side at room temperature, and chewy/firm from the fridge.

Do ahead: Caramels keep, in an airtight container at room temperature, for two weeks, but really, good luck with that.

Recipe from Smitten Kitchen

]]>
https://thefancypantskitchen.com/recipe/apple-cider-caramels/feed/ 0
No-Bake S’mores Cheesecake Cups https://thefancypantskitchen.com/recipe/no-bake-smores-cheesecake-cups/ https://thefancypantskitchen.com/recipe/no-bake-smores-cheesecake-cups/#respond Fri, 23 Jul 2021 17:43:19 +0000 https://thefancypantskitchen.com/?post_type=ranna_recipe&p=10221

Don’t even think about turning the oven on for these No-Bake S’mores Cheesecake Cups.  That’s a huge plus when contemplating what dessert I want to serve.  The second “plus” is that I can make these ahead of time.  The third is that they are so quick and easy to make. And the fourth “YES!”  is that these adorable individual portions are crazy good!  Need I say more?  

We all want to make life simple, especially when the heat turns up high.  So, having a dessert recipe that doesn’t involve the oven or cooktop is very desirable.  This dessert also has all of the nostalgic flavors and textures from childhood S’mores treats…graham crackers, marshmallows, chocolate. But, it’s so much easier to eat…spoonful after spoonful vs. bites of crumbling graham crackers and not-quite-melted chocolate.  You know what I mean, right? 

Start this dessert with the crust.  Combine graham cracker crumbs with sugar and melted butter.  Press the crust into your serving cups.  I prefer glass cups so that I can see all the layers.  The presentation is that much more spectacular! Be sure to pop the cups into the refrigerator so that the crust firms up while you are prepping the next layer.

Melt the marshmallows in a microwave oven. 

The only appliance you need is an electric mixer.  You can use a hand mixer, but I prefer the power of a stand mixer.  Whip the cream cheese to a smooth consistency and then add confectioners’ sugar and vanilla.  Then add the melted marshmallows and fold them into the cream cheese mixture.  I like to put this into a piping bag and pipe it decoratively into the cups, but you can also just spoon it over the crust.  Place the cups back into the fridge to await the chocolate ganache topping.

The ganache is a combination of semisweet chocolate and heavy cream that gets melted in the microwave oven.  Spoon it over the cheesecake layer and back in the fridge it goes until you are ready to serve.  You can make these 3 days ahead and still have them taste delish!

Just before you serve the cups, add two toasted marshmallows.  You can use the same store-bought marshmallows or you could elevate this by making Homemade Marshmallows and torching them.  You will be thrilled with how amazing they taste!

Share Your Thoughts...

Lastly, if you make No-Bake S’mores Cheesecake Cups, be sure to leave a comment and/or give this recipe a rating! Above all, I love to hear from you and always do my best to respond to each and every comment. And of course, if you do make this recipe, don’t forget to tag me on Instagram! Looking through the photos of recipes you all have made is one of my favorite things to do!

No-Bake S’mores Cheesecake Cups

Makes: 6 servings

Prep Time: 20 minutes

Total Time: 20 minutes

Ingredients

For the Crust:

  • 1 cup graham cracker crumbs
  • 1 tbsp granulated sugar
  • 4 tbsps butter, melted

For the Cheesecake Filling:

  • 25 regular marshmallows
  • 8 ounces cream cheese, room temperature
  • 1/4 cup confectioners’ sugar
  • 1/2 tsp vanilla extract
  • 8 ounce container of frozen whipped topping (Cool Whip or TruWhip), thawed

For the Ganache:

  • 3 ounces semisweet chocolate, chopped
  • 3 ounces heavy cream

For the Topping:

Instructions

In a medium bowl, stir together the graham cracker crumbs, sugar and melted butter. Evenly divide the crumbs between 6 individual serving dishes and press into the bottoms of the dishes to form a crust layer. Place serving dishes into the refrigerator while you prepare the cheesecake.

Place 25 marshmallows in a large, deep microwave-safe bowl. Microwave on high power for 45-60 seconds. Marshmallows will puff up and begin to melt. Use a buttered spatula to stir the marshmallows until smooth. Set aside.

In a large bowl with an electric mixer, whip the cream cheese for about 2 minutes. Add in confectioners’ sugar and vanilla and beat for an additional minute. Use a buttered spatula to scoop the melted marshmallows into the cream cheese mixture and beat for an additional minute. Use a rubber spatula to fold in whipped topping.

Spoon or pipe the cheesecake filling directly onto the graham cracker crusts and place them back into the refrigerator while you prepare the ganache.

Add chocolate to a heat-safe bowl. Bring cream just to a boil over medium-high heat. Pour heated cream over the chocolate and let stand for 5 minutes and then whisk to combine. Spoon chocolate ganache onto the cheesecake layer and place back into the refrigerator until you are ready to serve.

Just before serving, top each cheesecake with 2 toasted marshmallows. Enjoy!

Chef’s Notes:

You can either toast the marshmallows over a fire or gas flame and place on the top of the cups, or you can use a kitchen torch (as I did) and toast them once the marshmallows are placed on top of the ganache.

No Bake S’mores Cheesecakes will store in the refrigerator for up to 3 days.

Recipe adapted from My Baking Addiction

]]>
https://thefancypantskitchen.com/recipe/no-bake-smores-cheesecake-cups/feed/ 0
Mint-Chocolate Ice Cream Cake https://thefancypantskitchen.com/recipe/mint-chocolate-ice-cream-cake/ https://thefancypantskitchen.com/recipe/mint-chocolate-ice-cream-cake/#comments Sat, 12 Jun 2021 09:00:50 +0000 https://thefancypantskitchen.com/?post_type=ranna_recipe&p=9781

With Father’s Day right around the corner, you need to channel Dad’s inner child and make this mint-chocolate ice cream cake.  This is a throwback to dad’s childhood, when he ate ice cream sandwiches while sitting on the porch on a hot summer’s day.  Okay, maybe he still does that!!  But, this complicated-looking cake is simply stacked ice cream sandwiches layered with mint-chocolate whipped cream and  mint-chocolate cookies.  So easy.  So pretty.  So retro!

What I love about this recipe, besides how delicious it tastes, is the ease with which such a showstopper can be made.  Now, some purists may say that it’s all store-bought ingredients, to which I reply “And the problem is”?  Look, we all want delicious beautiful desserts, but who really wants to work their tails off to produce it, especially in the summer?  I want simple and easy, but tasty and pretty!  So, forget what a purist might say (btw, I don’t know any!) and try this one out!

It starts with whipping some heavy cream that you add chocolate syrup and peppermint extract to.  Then, crush up some mint-and-fudge cookies, such as Keebler Grasshopper cookies.  The next step is to layer ice cream sandwiches, mint-chocolate whipping cream and crushed cookies.  Continue that until you have 4 layers for a tall, stacked beauty of a dessert.

Finally, coat the entire dessert in another layer of whipping cream.  Sprinkle some chopped up cookies on top and ta-da!!!  A dessert worthy of any occasion!

Share Your Thoughts...

Lastly, if you make Mint-Chocolate Ice Cream Cake, be sure to leave a comment and/or give this recipe a rating! Above all, I love to hear from you and always do my best to respond to each and every comment. And of course, if you do make this recipe, don’t forget to tag me on Instagram! Looking through the photos of recipes you all have made is one of my favorite things to do!

Mint-Chocolate Ice Cream Cake

Makes: 8-12 servings

Prep Time: 30 minutes

Total Time: 1 hour & 50 minutes

Ingredients

  • 2 cups heavy cream
  • 2/3 cup prepared chocolate syrup
  • 1 tsp peppermint extract
  • 16 (4-ounce) ice cream sandwiches, divided
  • 1 cup finely chopped mint-and-fudge cookies, such as Keebler Grasshopper cookies (about 10 cookies), divided

Instructions

Using an electric mixer on medium-low speed, beat cream in a large bowl until medium-stiff peaks form. Gently fold in chocolate syrup and peppermint extract. Transfer half of the cream mixture to a medium bowl; cover and chill until ready to use.

Spread a thin layer of remaining cream mixture on bottom of a platter. Top with 4 ice cream sandwiches, placing 3 side by side and 1 along bottom of row for a square-shaped base, or 4 side by side for a rectangular-shaped base. Top with a thin layer of cream mixture and sprinkle with 1/4 cup cookies. Continue layering sandwiches, cream, and cookies, ending with a layer of cream, until all sandwiches are used (you should have 4 layers; reserve remaining 1/4 cup cookies). Wipe any excess cream off platter, then freeze until set, at least 1 hour or up to overnight.

Using a spatula, frost top and sides of cake with reserved cream mixture. Sprinkle reserved 1/4 cup cookies over cake. Freeze again 30 minutes, then slice and serve.

Fully assembled cake can be made 1 day ahead; keep frozen.

Recipe from Epicurious.com

]]>
https://thefancypantskitchen.com/recipe/mint-chocolate-ice-cream-cake/feed/ 3
Baking Tips https://thefancypantskitchen.com/recipe/baking-tips/ https://thefancypantskitchen.com/recipe/baking-tips/#respond Sat, 29 May 2021 17:37:33 +0000 https://thefancypantskitchen.com/?post_type=ranna_recipe&p=9658

There are so many things to think about when it comes to baking.  If you’ve been baking for a long time, these things are instinctual.  You’ve done them forever and you don’t give them a second thought.

But, if you’re new to baking or don’t do it often, some things are daunting.  Or you have simply forgotten.

I am providing some tips and hacks that I have found invaluable when I decide it’s time to bake up some goodies.

I will continue to add tips, so check back often!

Measuring Flour:

If you don’t have a digital scale, or the recipe is not given in grams, to get the most accurate weight, take a butter knife through your flour in a circular motion three times (I like to keep flour in an air-tight container large enough to get a one-cup scoop into it). Then, dip the measuring cup into it and use that same knife to level off the top, trying not to tap it down.

One mistake in baking generally comes from too much flour, so don’t be nervous if a recipe is shown in grams, Get a digital scale (very inexpensive) and weigh it. Then you will be very accurate.

Cake Flour Substitute:

Often, cake flour is a low-protein flour that has been milled into a fine consistency. It is called for in recipes to make soft, tender baked goods like cakes, pastries, or biscuits.

It can be difficult to find, or if you just don’t feel like going to the store, you can make your own but measuring out one cup of all-purpose flour. Then, scoop out 2 tablespoons of the flour and replace it with 2 tablespoons of cornstarch. If the recipe calls for two cups of flour, just double the recipe I’m giving you here, and so on. Sift this flour-corn starch mixture twice. This is very important: the sifting will incorporate the cornstarch to create the consistency of cake flour.

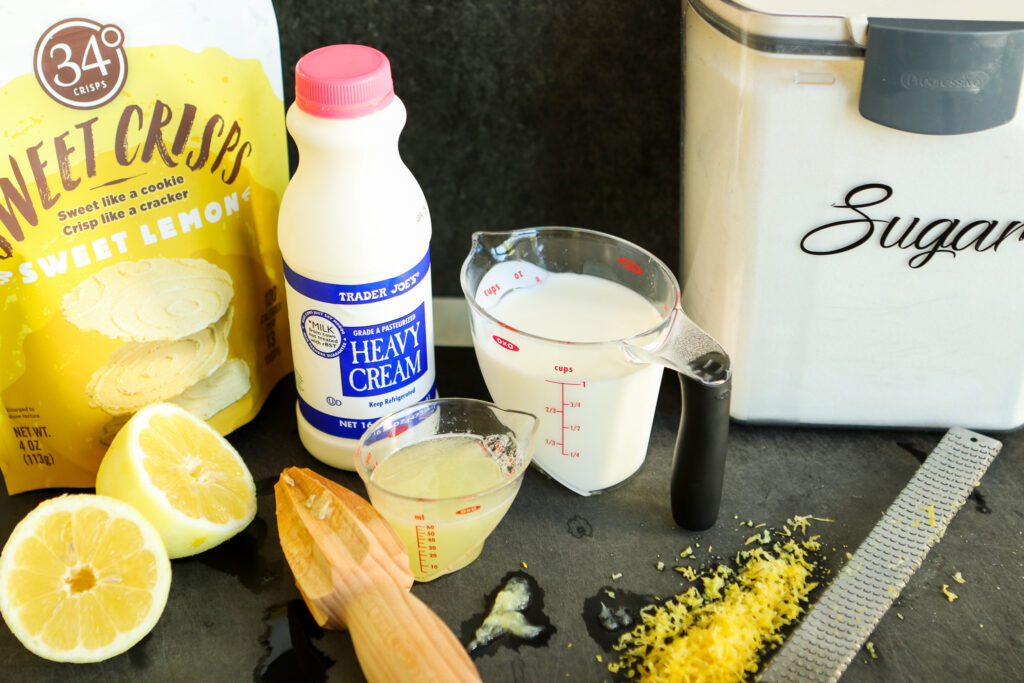
Buttermilk Replacement:

For each cup of buttermilk, combine 1 cup of whole milk with either: 1 tablespoon lemon juice OR 1 tablespoon apple cider vinegar OR 1 3/4 teaspoons cream of tartar. Whisk together and allow to sit for 5 minutes. Once the mixture has a slightly curdled consistency, it is ready to use! Be sure to use only ONE of the three options.

Room Temperature Ingredients:

It is very important to have butter, milk, sour cream, eggs, cream, etc. at room temperature prior to baking. Don’t skip this! There is science to this: when these ingredients are at room temperature they form an emulsion which traps air. That makes for a lighter finished product. As well, room temperature ingredients bond together very easily creating an evenly textured batter. A smooth batter will result in a uniformly textured baked good.

Room temperature butter is very important! I used to pop it in the microwave until it was a little soft and then use it, but this is a no-no. Usually, the middle was completely melted, which will give you an unwanted result. The best way to get room temperature butter is to leave it on the counter for an hour before you’re going to use it. If you can’t, I have found that if I take 2 cups of water and microwave it to boiling (2 minutes), then let my butter sit in the same microwave with the water, it will speed up the softening process. You can also cut the butter into chunks to help it soften faster on the counter.

Bringing Eggs to room temperature is very easy. If you forget to let them sit on the counter for an hour or so, just put them in a bowl with warm water for 10-15 minutes.

For milk and heavy cream, I often use the microwave, but start at 20 seconds at a time. The last thing you want is boiling liquid to go into your batter.

All of your other ingredients, such as yogurt, sour cream, cream cheese, etc. really need to sit on the counter.

Buttercream Coloring:

In order to get deep colors, such as the red and blue above, it takes a lot of food coloring. Unfortunately, that can stain your teeth when you eat it and can sometimes change the texture of the buttercream. Instead, try mixing these colors and then let them sit for a few hours so that the colors can deepen.

To get a red buttercream, start by adding about three drops of soft pink food coloring to your white buttercream. Stir well. Next, add about a teaspoon of true red food coloring. Then, once you’ve mixed the buttercream so that no streaks of food coloring remain, cover the buttercream and let it sit at room temperature for a few hours.

For the navy blue buttercream, repeat the above process using 3 drops of magenta or violet food coloring. Once mixed, add one teaspoon of navy food coloring. Once mixed well, cover and let sit on the counter for a few hours so that the colors intensify.


]]>
https://thefancypantskitchen.com/recipe/baking-tips/feed/ 0
Funfetti Cupcakes https://thefancypantskitchen.com/recipe/funfetti-cupcakes/ https://thefancypantskitchen.com/recipe/funfetti-cupcakes/#respond Wed, 26 May 2021 22:48:51 +0000 https://thefancypantskitchen.com/?post_type=ranna_recipe&p=9597

I can’t say that I understand what happens to people when they see Funfetti Cupcakes, but it’s like this light starts to shine in their eyes, they get a little dewy thinking about days gone by, and they start to salivate.  Ok, yes, I’m talking about me.  But, maybe you too?

The point is that there is something nostalgic about these cupcakes, almost like you’re at that hometown bakery that you grew up going to.

I’m going out on a limb here, but anything with rainbow funfetti sprinkles will evoke that reaction.  My Easy Funfetti Sugar Cookies absolutely do that!  And just like those cookies, these cupcakes are easy to make and so much fun!  The kiddos will love to help you with these pretty babies!

This recipe begins with creaming soft butter with oil.  Take note that the butter MUST be at room temperature or you’ll never get the butter and oil to become homogenous.  Then you’re adding sugar, eggs, and vanilla.  The cake flour, baking powder and salt get whisked together and added to the batter, alternating with buttermilk (see my Chef’s Notes about cake flour & buttermilk).

Finally, fold in the rainbow sprinkles (my favorite part)!  Divide the batter between the cupcake lines, bake and let cool while you make the buttercream.

The frosting is a traditional buttercream…butter, powdered sugar, vanilla, salt and a touch of milk are all you need.  Transfer it to a pastry bag and pipe some swirls to the top of each cupcake.

Now it’s time to let your inner child loose.  I give you permission to eat as many of these as your heart desires!

Share Your Thoughts...

Lastly, if you make Funfetti Cupcakes, be sure to leave a comment and/or give this recipe a rating! Above all, I love to hear from you and always do my best to respond to each and every comment. And of course, if you do make this recipe, don’t forget to tag me on Instagram! Looking through the photos of recipes you all have made is one of my favorite things to do!

Funfetti Cupcakes

Makes: 24 servings

Prep Time: 15 minutes

Bake Time: 20 minutes

Total Time: 35 minutes

Ingredients

For the Cupcakes:

  • 1/2 cup butter, room temperature
  • 1/2 cup oil
  • 1 & 1/2 cups sugar
  • 4 eggs, room temperature
  • 2 tbsp vanilla extract
  • 3 cups cake flour (See Chef’s Notes)
  • 1 tsp salt
  • 2 & 1/2 tsp baking powder
  • 1 & 1/3 cups buttermilk
  • 1/3 cup rainbow sprinkles

For the Frosting:

  • 1 cup unsalted butter, room temperature
  • 1 & 1/2 pounds powdered sugar
  • 1 tablespoon vanilla extract
  • 1/2 teaspoon salt
  • 4 tablespoons whole milk

Instructions

For The Funfetti Cupcakes:

Preheat the oven to 350°F and grease and line 24 cupcake tins with liners. Set aside.

In a large mixing bowl fitted with a whisk attachment, beat the softened butter and oil together until they become homogenous, about 3 minutes. This will not work if your butter is not completely room temperature.

Slowly add the granulated sugar to the oil and butter, beating on high until the mixture is light and fluffy and turns a very pale yellow, about 3 minutes.

Add the eggs in one at time, scraping down the bowl in between each addition. Add the vanilla extract. Beat the mixture on high for 3 minutes more to incorporate as much air as possible.

In separate bowl sift together the cake flour, salt, and baking powder. Alternate mixing in the dry ingredients and the buttermilk in 4 batches, starting with the buttermilk and ending with the dry ingredients. Fold in the sprinkles until well mixed. It’s okay if the batter still has a few lumps in it–you don’t want to over mix it.

Use a large cookie scoop or a 1/4 cup measuring cup to split the batter evenly into the prepared cupcake tins and bake for 20-30 minutes or until the cupcakes are lightly golden brown and spring back when pressed. Take out of the oven and transfer to a cooling rack. Let the cupcakes cool completely and frost with your favorite frosting!

For The Frosting:

In a stand mixer, beat the softened butter and powdered sugar together until fluffy, about 2 minutes.

Add in the vanilla, salt and a tablespoon of milk one at a time. If the frosting seems to be getting too runny, stop adding milk. Beat for 3 minutes, or until light and fluffy. Transfer the frosting to a pastry bag fit with a large star tip and frost the cooled cupcakes. Top with rainbow sprinkles or leave plain. Enjoy!

Chef’s Notes:

If you can’t find cake flour, substitute by measuring out 3 cups of regular flour (following this tip). Remove 6 tablespoons flour and add in 6 tablespoons corn starch. Sift 2 times then use in the place of regular flour.

Make sure all your ingredients are at true room temperature so that they incorporate seamlessly.

If you don’t have buttermilk on hand, you can make a substitute! Find our buttermilk substitute here!

Do not over mix the batter! This can dry out your cake and cause the sprinkles to bleed into the batter!

Recipe by Broma Bakery

]]>
https://thefancypantskitchen.com/recipe/funfetti-cupcakes/feed/ 0
No-Churn Lemon Ice Cream https://thefancypantskitchen.com/recipe/no-churn-lemon-ice-cream/ https://thefancypantskitchen.com/recipe/no-churn-lemon-ice-cream/#comments Thu, 15 Apr 2021 18:30:09 +0000 https://thefancypantskitchen.com/?post_type=ranna_recipe&p=9089

Any time of the year is perfect for No-Churn Lemon Ice Cream, especially if the weather is heating up!  In Arizona, we’ve already experienced the high 90’s (thankfully only for a few days) but we know what’s coming!  So, best be prepared by having some of this light & bright lemon ice cream in the freezer!

I love no-churn ice creams.  That’s probably because I don’t own an ice cream maker. But they are just so simple to make! Mix a few ingredients (and I mean a few), pour it into a pan, and pop it in the freezer.  Once frozen, you have a wonderful treat that you can definitely call your own!

This recipe is all about the lemons:  get the freshest lemons you can and get zesting and squeezing.  We need both the juice and the zest to create this sweet/sour experience!  To the lemon, add sugar and salt, then heavy cream and whole milk.  Once the sugar is dissolved into the milk/cream, you are ready to pop this into the freezer.

There are recipes for no-churn ice creams that call for whipping the cream to a stiff peak first but I really don’t care for the texture.  It’s almost like a frozen mousse instead of a creamy, melty ice cream.  If you check out my other No-Churn ice cream recipes (No-Churn Peppermint Ice Cream, No-Churn Oreo Cookie Ice Cream, and No-Churn Mixed Berry Soft Serve), you will see that none of them whip the cream to a medium or stiff peak.  Feel free to try those other versions out to see which one suits you best.  Or just trust me!! Haha!

As an added bonus, I folded in some lemon wafer cookies after a couple of hours of freezer time, thinking I would get a little extra texture.  If that’s your thing, add some or try Estela’s Candied Sesame Seeds!

Share Your Thoughts...

Lastly, if you make No-Churn Lemon Ice Cream, be sure to leave a comment and/or give this recipe a rating! Above all, I love to hear from you and always do my best to respond to each and every comment. And of course, if you do make this recipe, don’t forget to tag me on Instagram! Looking through the photos of recipes you all have made is one of my favorite things to do!

No-Churn Lemon Ice Cream

Makes: 3 cups

Prep Time: 10 minutes

Total Time: 3 hours

Ingredients

  • 1 tbsp finely grated lemon zest
  • 1/4 cup freshly squeezed lemon juice (from about 2 lemons)
  • 1 cup sugar
  • 1/8 tsp fine sea salt
  • 1 cup heavy cream
  • 1 cup whole milk
  • Thin lemon cookies, optional

Instructions

Whisk together the lemon zest and juice, the sugar, and salt in a large bowl.

Whisk together the cream and milk in a measuring cup and gradually pour into the lemon and sugar mixture, whisking constantly. Continue to whisk until the sugar dissolves—you won’t hear or feel it scraping against the bottom of the bowl anymore, about 2 minutes.

Pour the mixture into an 8-inch square metal baking pan or a metal loaf pan. Cover tightly with aluminum foil and freeze until the mixture is solid around the edges and mushy in the middle, 2 to 3 hours. Stir well, cover again with foil, and continue to freeze until completely firm, about an hour more. Once firm, scoop into chilled bowls to serve.

Chef’s Note:

I added lemon wafer cookies to my mixture after the mixture was in the freezer for 2 hours. I crumbled the cookies up and then stirred them into the ice cream.

Recipe from Food 52/Dori Sanders

]]>
https://thefancypantskitchen.com/recipe/no-churn-lemon-ice-cream/feed/ 4
Basic Pie Dough https://thefancypantskitchen.com/recipe/basic-pie-dough/ https://thefancypantskitchen.com/recipe/basic-pie-dough/#respond Wed, 07 Apr 2021 05:58:39 +0000 https://thefancypantskitchen.com/?post_type=ranna_recipe&p=8840

I love a basic pie dough that is easy and quick to pull together.  Even though it always needs to rest in the fridge for a few hours, the actual work is very simple.

In this recipe, I use a food processor to simplify things.  A few fast pulses and the dough is ready to be gathered up, shaped into a disc, wrapped and refrigerated for a little “chill” time.

I have a few other pastry doughs that I adore (like Perfect Pie Pastry or Buttermilk Pie Dough), but this one is the simplest with the fewest ingredients.  And, for making the strips called for in my Blueberry Rhubarb Pie, this one holds up the best.  But, feel free to try any of these pie doughs.  They will all have excellent results.

This is an easy dough to roll out.  I am not the best at making pie crusts, so a dough that will roll out with the least amount of breakage or tearing makes me happy.  This is just that!  So, get rolling and get baking!

Share Your Thoughts...

Lastly, if you make Basic Pie Dough, be sure to leave a comment and/or give this recipe a rating! Above all, I love to hear from you and always do my best to respond to each and every comment. And of course, if you do make this recipe, don’t forget to tag me on Instagram! Looking through the photos of recipes you all have made is one of my favorite things to do!

Basic Pie Dough

Makes: 1 disk to make a single-crust pie

Prep Time: 15 minutes

Total Time: 3 hours & 15 minutes

Ingredients

  • 1/2 cup ice
  • 1/2 cup cold water
  • 1 & 1/4 cups (175 grams) all-purpose flour
  • 1/2 tbsp granulated sugar
  • 1/2 tsp Kosher salt
  • 1/2 cup cold unsalted butter, cut into 1/2-inch cubes

Instructions

Combine ice and water in a small cup or bowl. Set aside.

Put the flour, sugar, and salt in a food processor and pulse several times to incorporate. sprinkle the butter cubes evenly over the surface of the dry mixture and pulse quickly 20 to 25 times to break up the cubes into small jagged pieces.

Turn the mixture out into a large mixing bowl. Sift through with a spatula for unprocessed butter cubes and flatten any pieces larger than a pecan half with your pointer finger and thumb.

Add 2 tablespoons of the cold water, taking care not to include any ice, and stir through with a spatula. Continue adding water 1 tablespoon at a time, pressing he dough with your hands or a spatula after each addition until it begins o come together. Avoid any heavy kneading, as overworking the dough will lead to a tough crust.

If the dough still has quite a bit of dry mix and doesn’t hold together when a handful is squeezed, add a little more water. Be careful not to add too much water (usually 3-5 tablespoons total are sufficient). The dough should be smooth and supple.

When the dough begins to hold together, turn it out onto your work surface and gently form it into a mound with your hands. Wrap the dough tightly in plastic, then gently press it into a round, flat disk, about 5 inches in diameter and 1 inch thick. Refrigerate for at least 3 hours or overnight before rolling.

Resting the dough in the fridge allows the gluten to relax and the dough to fully hydrate, and prevents shrinkage during baking. If you plan to freeze the pie dough, do so only after the rest period of at least 3 hours in the fridge.

Use the dough in the recipe of your choice. 

Recipe from Lauren Ko

]]>
https://thefancypantskitchen.com/recipe/basic-pie-dough/feed/ 0
Blueberry Rhubarb Pie https://thefancypantskitchen.com/recipe/blueberry-rhubarb-pie/ https://thefancypantskitchen.com/recipe/blueberry-rhubarb-pie/#respond Tue, 06 Apr 2021 06:07:28 +0000 https://thefancypantskitchen.com/?post_type=ranna_recipe&p=8831

This gorgeous Blueberry Rhubarb Pie looks like something that you’d get at a boutique bakery.  But, I want to tell you that if I can make this, you can make this!  I am not the best pie maker, so I’m thrilled that the pie dough is very basic and quick, the filling is simple and delicious, and the spoke design (even though it will add an extra bit of time to the process) is easy to accomplish!

So, where to begin…how about the crust?  This Basic Pie Dough recipe is handled primarily in the food processor.  With some quick pulsing, you are ready to gather it up and send it to the refrigerator for a little down time.  Once it has chilled out (yes, I really said that), it’s time to roll and cut the strips for the spokes.

After the dough gets rolled into a rectangle, I like to roll it around a rolling pin and then gently unfurl it onto a sheet of parchment paper.  I take a straight-edge ruler and a pizza cutter, and cut 1/2-inch strips.  The whole parchment sheet gets slid onto a baking sheet and bake into the fridge to wait for the rest of the pie to come together.

The second pie crust gets rolled into a circle, then rolled over the rolling pin and dropped into the pie dish.

Making the filling is a delight especially when you can you frozen fruit!  You don’t have to use frozen fruit, but the beauty is that you can have a summer fruit pie all winter long!  What a novel idea!  It’s a simple combination of fruit, sugar, lime juice and tapioca starch (to bind it together).  That’s it and it is so darn good!

Mix it up, pour it into the pie shell, and get ready for making the spokes.

Remove the strips from the fridge, and place a small cookie cutter in the middle of the filling, to use as a guide.  start with one strip and lay it across the pie making sure it touches the outside of the cutter.  Continue laying strips, 1/2-inch apart all the way around the pie.  You’ll have enough to double over the top layer.

Brush a little egg wash onto the spokes, sprinkle with coarse sugar, and pop this bad boy into the oven.  

The beautiful and delicious pie will be the result of your efforts!  Happy baking!

Share Your Thoughts...

Lastly, if you make Blueberry Rhubarb Pie, be sure to leave a comment and/or give this recipe a rating! Above all, I love to hear from you and always do my best to respond to each and every comment. And of course, if you do make this recipe, don’t forget to tag me on Instagram! Looking through the photos of recipes you all have made is one of my favorite things to do!

Blueberry Rhubarb Pie

Makes: 1 9-inch pie

Prep Time: 50 minutes

Bake Time: 80-100 minutes

Total Time: 2 hours & 30 minutes

Ingredients

  • 2 disks (a double recipe) of Basic Pie Dough
  • 3 cups (510 grams) fresh or frozen blueberries 
  • 3 cups (454 grams) fresh or frozen rhubarb, cut into 1/4-inch slices 
  • 1 cup granulated sugar 
  • 1/3 cup tapioca starch 
  • 1/2 tbsp fresh lime juice 
  • 1 tsp Kosher salt 
  • Egg Wash (one whole egg whisked with 1 tbsp heavy cream) 
  • Coarse sugar

Instructions

Roll 1 dough disk into an 11×15-inch rectangle. Roll the dough onto the rolling pin and unfurl it onto a sheet of parchment paper. Using a ruler as a straight edge and a rolling pastry wheel or pizza cutter, cut the rectangle widthwise into at least 30 1/4-inch or 1/2-inch strips.

Slide a flat baking sheet under the parchment and place the dough in the fridge to keep cold while proceeding with the pie.

Roll the second dough disk into a 14-inch circle. Roll the dough onto the rolling pin and unfurl it over a 9-inch pie pan. Taking the edges of the dough, gently ease the dough into the pan, nestling it into the inner elbows of the pie pan. Trim the excess dough with kitchen shears to create a 1-inch overhang. Fold the overhang back under, creating an elevated edge.

For the filling, set aside 1/4 cup of the blueberries. Combine the remaining blueberries, rhubarb, sugar, tapioca starch, lime juice, and salt in a large bowl. Gently fold with a spatula until all the fruit pieces are coated. Pour the filling into the pie shell.

Place a 2-inch circle cutter in the center of the filling as a reference point. Using a small pastry brush, lightly dab water around the edge of the pie shell.

Remove the dough strips from the fridge. Gently pick up a strip of dough, handling it only from the ends, and lay it across the pie, with the strip grazing the outside of the circle cutter. Lightly press the strip into the edges of the pie to secure.

Place another dough strip across the pie. The center of this second strip should lay slightly on top of the first and also graze the center circle cutter. The end of the strip in your left hand should rest 1/2- inch to the left of the first trip and the end in your right hand to the right of the first.

Continue laying dough strips in this fashion, working your way around the pie surface twice. Resist the urge to manually curve each strip.

Press the edges of the pie to secure the strips in place. Holding a paring knife at a 45-degree angle to your work surface, run it around the edge of the pie pan to trim the excess dough.

Gently remove the center ring cutter and carefully fill the crater with the 1/4 cup of reserved blueberries.

Chill the entire pie in the freezer until the oven has come to temperature, about 20 minutes. Preheat the oven to 425°F. Line a rimmed baking sheet with parchment and prepare the egg wash.

When the oven has reached temperature, remove the pie from the freezer and place it on the prepared baking sheet. Brush with the egg wash and sprinkle with coarse sugar.

Bake the pie for 25 minutes, then rotate the pie 180° and lower the oven to 350F. If the edges are already brown, cover with a shield. If the top begins to brown excessively, rest a sheet of foil lightly on top. Continue baking until the filling is bubbling in the center, checking every 30 minutes to rotate the pie and adjust the shields as necessary, 80-100 total minutes.

Cool the pie completely on a rack before slicing and serving.

Recipe from Lauren Ko

]]>
https://thefancypantskitchen.com/recipe/blueberry-rhubarb-pie/feed/ 0