Frozen Treats – The Fancy Pants Kitchen https://thefancypantskitchen.com Quick and Easy Recipes Sat, 08 Jul 2023 13:34:36 +0000 en-US hourly 1 https://wordpress.org/?v=6.5.5 https://thefancypantskitchen.com/wp-content/uploads/2021/02/cropped-Favicon-1-32x32.jpg Frozen Treats – The Fancy Pants Kitchen https://thefancypantskitchen.com 32 32 Banana Ice Cream Cake https://thefancypantskitchen.com/recipe/banana-ice-cream-cake/ https://thefancypantskitchen.com/recipe/banana-ice-cream-cake/#respond Fri, 07 Jul 2023 16:49:11 +0000 https://thefancypantskitchen.com/?post_type=ranna_recipe&p=22158

This Banana Ice Cream Cake is creamy, dreamy and absolutely a winner!  Layering vanilla ice cream, banana cream, fresh bananas, and whipped cream over a crunchy sweet/salty crust is sublime!  It’s the perfect choice to finish off a summer meal!

The crust, made of salted mini pretzels and vanilla wafers, is a great way to provide stability and amazing flavor to this frozen treat.  It’s salty, sweet, and crunchy!  

The two layers of plain vanilla ice cream and ice cream mixed with mashed bananas, honey and vanilla give this ice cream cake a banana-cream-pie nostalgia.  Oh, did I mention that there is a sprinkling of honeyed pretzel/vanilla wafer crumbs between those two layers?

Finally, topping it all with fresh bananas and honey whipping cream provides the ultimate in summer-time desserts!

We begin this creamy dessert by crushing mini pretzels and vanilla wafers in a food processor until they are in fine crumbs.  Add melted butter and continue to pulse until  the crumbs are wet.  Press half of the crumbs into a springform pan and spread the remaining crumbs onto a baking sheet and drizzle with honey.  Bake the crumbs on the sheet pan and the crust in the springform until they are toasted.  Let them cool.

Scoop softened vanilla ice cream into the cooled crust and spread into a smooth layer.  Sprinkle half of the pretzel/cookie crumbs over and pop into the freezer for 30 minutes.

Meanwhile, mash some bananas in a bowl with honey, vanilla and a pinch of salt.  Add 2 cups of softened vanilla ice cream and swirl together.  Spread onto the vanilla layer and freeze for another 30 minutes.

Just before you are ready to serve the cake, whip the heavy cream with honey and vanilla.

Remove the cake from the freezer and from the pan.  Top the cake with sliced fresh bananas, freshly whipped cream and the remaining crumbs.

Slice and serve!  Enjoy this delicious frozen treat!

Share Your Thoughts...

Lastly, if you make Banana Ice Cream Cake, be sure to leave a review down below at the bottom of this page (stars are also appreciated)! Above all, I love to hear from you and always do my best to respond to each and every review. And of course, if you do make this recipe, don’t forget to tag me on Instagram! Looking through the photos of recipes you all have made is one of my favorite things to do!

Banana Ice Cream Cake

Makes: 8 servings

Prep Time: 20 minutes

Bake Time: 8 minutes

Total Time: 30 minutes plus freeze time one hour minimum

Ingredients

  • 2 cups mini salted pretzels
  • 30 vanilla wafer cookies (about 2 big cups)
  • 8 tbsp salted butter, melted
  • 4 tbsp honey
  • 5-6 cups vanilla ice cream, divided and slightly softened
  • 2-3 ripe bananas
  • 3 tsp vanilla extract
  • 1 cup sliced fresh bananas
  • 1 cup heavy cream

Instructions

Line a 9-inch springform pan with parchment paper. Line a small baking sheet with parchment paper. Preheat the oven to 350°F.

In a food processor, pulse the pretzels and vanilla wafer cookies into fine crumbs. Add the butter and pulse until the mixture holds together when pinched. Press half of the crumbs into the bottom of the springform pan, spread the remaining crumbs out on the baking sheet, and drizzle with 1 tablespoon honey. Bake the crust and the crumbs on the sheet pan 5-8 minutes, until toasted. Let them cool completely.

Scoop 3-4 cups of vanilla ice cream out onto the cooled crust. Flatten/spread into a mostly even layer. Sprinkle with half of the loose pretzel/cookie crumbs. Freeze for 30 minutes.

Mash 2-3 bananas in a bowl with 2 tablespoons honey, 2 teaspoons vanilla, and a pinch of salt. Add 2 cups vanilla ice cream and gently swirl together. Spread onto the vanilla layer. Freeze for 30 minutes more.

Before serving, use an electric mixer to whip the cream with 1-2 tablespoons honey, 1 teaspoon vanilla, and a pinch of salt until soft peaks form.

Remove the cake from the freezer. Use the parchment paper to lift the cake out of the pan. Top with sliced bananas, whipped cream, and the remaining crumbs. Slice and enjoy immediately.

Recipe by Half Baked Harvest

]]>
https://thefancypantskitchen.com/recipe/banana-ice-cream-cake/feed/ 0
Funfetti Ice Cream Sandwiches https://thefancypantskitchen.com/recipe/funfetti-ice-cream-sandwiches/ https://thefancypantskitchen.com/recipe/funfetti-ice-cream-sandwiches/#respond Mon, 22 May 2023 21:45:40 +0000 https://thefancypantskitchen.com/?post_type=ranna_recipe&p=21679

A holiday weekend would NOT be fun if it didn’t include Funfetti Ice Cream Sandwiches!  Yummy no-churn funfetti ice cream is sandwiched between funfetti cookies.  Like I said, things will definitely be FUN this weekend!

If you’ve never made no-churn ice cream, you’re in for a surprise.  It is so simple…a quick whip of the cream and sweetened condensed milk, add your other ingredients and freeze it.  I started making no-churn ice creams years ago (mainly because I didn’t have room for another appliance such as an ice cream maker) and I’ve never regretted it!  So easy!  Check out these other no-churn ice cream recipes:  Rocky Road, Coffee, Churro, Lemon, Oreo and Mixed Berry!

These cookies are a riff on my traditional Easy Funfetti Sugar Cookies.  They have an extra egg yolk and a little more baking soda which helps keep them chewy even when frozen.  Important if you don’t want to chip a tooth!

To make this super-simple ice cream, line a 9×13-inch baking pan or jelly roll pan with aluminum foil, extending over so that you can lift the frozen ice cream out.

In the bowl of a stand mixer, whip the heavy cream and clear vanilla until it thickens to medium peaks.  A lot of recipes will say to thicken to stiff peaks, but I don’t like the texture of that when it’s frozen.  A medium peak is just perfect!

Mix in the sweetened condensed milk and then the sprinkles.  Spread it in the pan and freeze until it’s solid.  Overnight is preferable.

Making the cookie dough is pretty standard…cream the butter and sugars until fluffy, add the vanilla and egg, and beat again.  Add the remaining dry ingredients, except the sprinkles, and mix until just incorporated.  Now, fold in the sprinkles.

I like to chill the dough for a while to hydrate the flour.  Thirty minutes is enough time for these cookies.  Scoop and roll into balls and place the dough on a cookie sheet.  Bake for 11-12 minutes per pan.  You want them to look slightly undercooked, which will keep them soft even when they are frozen.  Let them cool completely.

To assemble these bad boys, use a cookie cutter that is a similar size to the cookies and cut out rounds of ice cream. Place the ice cream between two cookies. The ice cream melts quickly so immediately place the sandwich on a tray and put back into the freezer.

The cookies will keep in the freezer for a week if they are covered, but I would be shocked if they last that long!  Also, don’t waste the leftover ice cream…just place it in a resealable container and put it back in the freezer.

This fun treat will take you back to birthday cake memories and summer frozen treats!

Share Your Thoughts...

Lastly, if you make Funfetti Ice Cream Sandwiches, be sure to leave a review down below at the bottom of this page (stars are also appreciated)! Above all, I love to hear from you and always do my best to respond to each and every review. And of course, if you do make this recipe, don’t forget to tag me on Instagram! Looking through the photos of recipes you all have made is one of my favorite things to do!

Funfetti Ice Cream Sandwiches

Makes: 12 servings

Prep Time: 45 minutes

Bake Time: 12 minutes per sheet

Total Time: 45 minutes plus freezer time 6 hours20

Ingredients

For the Ice Cream:

  • 2 cups heavy whipping cream
  • 1 tbsp clear vanilla extract (or regular is clear is unavailable)
  • 1 (14-ounce can) sweetened condensed milk
  • 6 tbsp rainbow sprinkles

For the Cookies:

  • 12 tbsp unsalted butter, at room temperature
  • 1 cup sugar
  • 1/2 cup brown sugar
  • 2 & 1/2 tsp clear vanilla (or regular is unavailable)
  • 1 large egg plus 1 large egg yolk
  • 2 & 1/4 cups all-purpose flour
  • 1 tsp baking soda
  • 3/4 tsp salt
  • 1/2 tsp cream of tartar
  • 1 cup rainbow sprinkles

Instructions

To Prepare the Ice Cream:

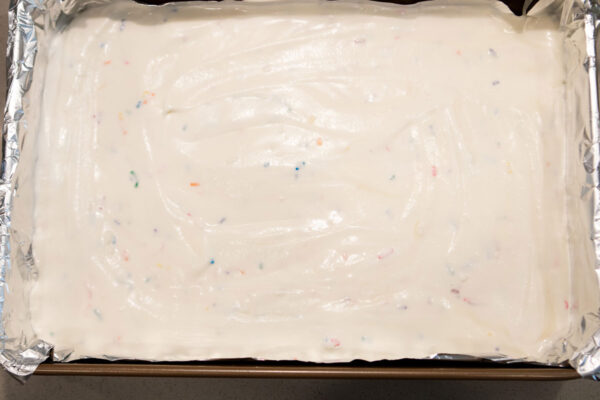
Line a 9×13” or jelly roll pan with a large sheet of aluminum foil. Be sure the foil extends just beyond the sides of the pan for easy removal. Set aside.

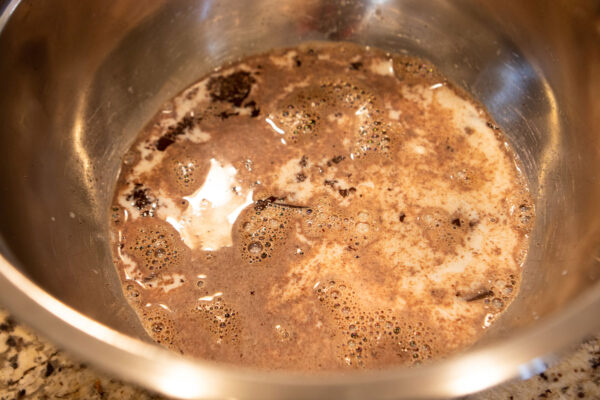
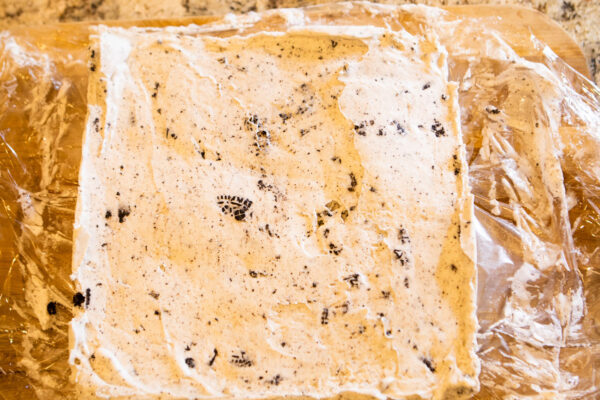
In a large bowl or the bowl of a stand mixer, whip the cream and clear vanilla extract on medium speed until it thickens to fluffy, medium peaks. Fold in the sweetened condensed milk, being careful to not overwork, followed by the sprinkles. Spread it into the prepared pan. Freeze until solid, at least 6 hours but preferably overnight.

To Make the Cookies:

Preheat the oven to 350°F. Prepare sheet pans by lining them with silicone baking mats or parchment paper.

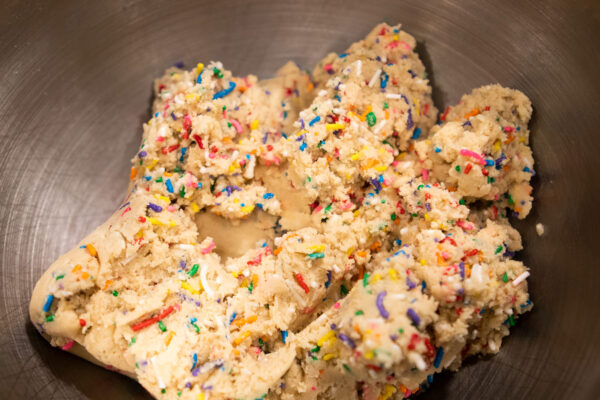
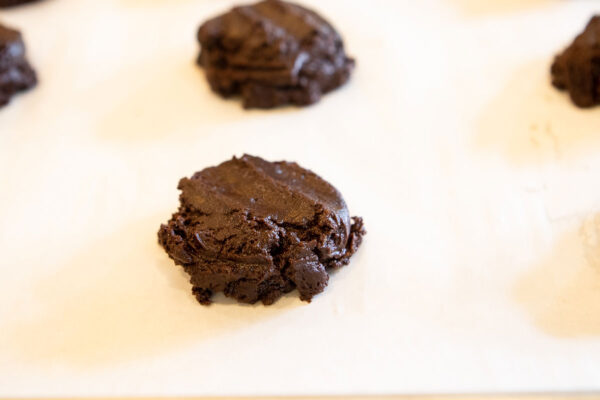
In a large mixing bowl or the bowl of a stand mixer, cream the butter, sugar, and brown sugar on medium speed until light and fluffy, about 2 minutes. Scrape the sides of the bowl and add the vanilla and egg, beating on low until incorporated. Add the flour, baking soda, salt, and cream of tartar, and beat on low speed just until the dry ingredients are combined. Scrape the sides of the bowl and add the sprinkles. Beat just until combined.

Chill the dough in the fridge until it has thickened to a Play-Doh consistency- usually about 30 minutes in the fridge for me. Once chilled, scoop out 1 & 1/2 tablespoon sized scoops (I use a medium cookie scoop) and roll each dough ball briefly in your hands to smooth out the rough edges of dough. Place on the prepared baking sheets 2 inches apart. Bake in the preheated oven for about 11-12 minutes, or until the tops of the cookies have just begun to crack and the edges are set. They will look slightly under-baked. This will help to keep them soft even when frozen. Allow to cool on the sheet pans for about 5 minutes before removing to a cooling rack to complete cooling.

To Assemble the Sandwiches:

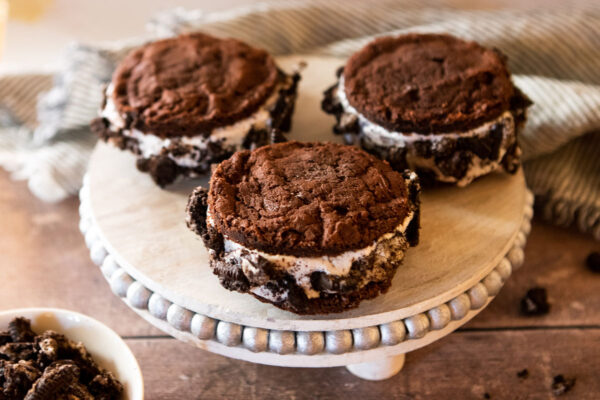
Use a large round cookie cutter or the lip of a wide-mouth mason jar to cut out rounds of ice cream. Place in between two cookies and refreeze the sandwiches quickly. You can save the leftover edges of the ice cream in a sealable container or freezer-safe bowl. Keep the sandwiches covered while in the freezer to protect their taste.

Chef’s Note:

Clear vanilla extract give these cookie that classic funfetti box cake mix flavor that we all know and love. Pure vanilla extract or vanilla bean paste can be substituted, however, the flavor will differ.

Recipe by Wood & Spoon

]]>
https://thefancypantskitchen.com/recipe/funfetti-ice-cream-sandwiches/feed/ 0
No-Churn Rocky Road Ice Cream https://thefancypantskitchen.com/recipe/no-churn-rocky-road-ice-cream/ https://thefancypantskitchen.com/recipe/no-churn-rocky-road-ice-cream/#respond Thu, 16 Mar 2023 17:50:25 +0000 https://thefancypantskitchen.com/?post_type=ranna_recipe&p=20944

Everything about No-Churn Rocky Road Ice Cream appeals to me…no-churn (you know I love that), chocolate, marshmallows, ice cream, almonds…it all simply works!  Rocky Road ice cream is one of my favorites!

If you’ve never tried making ice cream, this no-churn recipe is the way to begin.  I don’t own an ice cream maker and after finding these no-churn recipes, I have realized there’s no reason to have another appliance in my pantry waiting for that every-so-often use.  Better to make ice cream this way!

Once you discover this technique, you’ll want to try my other recipes:  No-Churn Coffee Ice Cream, No-Churn Lemon Ice Cream, No-Churn Oreo Cookie Ice Cream, and No-Churn Mixed Berry Soft Serve.  These are just a few of the many no-churn recipes posted on my website.

Begin this recipe by pouring hot milk over the chopped semi- and bittersweet chocolates to melt them.  Mix until smooth.

All of the remaining ingredients except the heavy cream and chocolate sauce get added to the melted chocolate.

Separately, whip the heavy cream until soft peaks form and fold it into the chocolate mixture.

In a freezable container (I use a loaf pan), layer 1/3 of the chocolate mixture and 1/2 of the chocolate sauce and swirl together with a sharp knife. Continue layering until you have 3 layers.  Top it with extra marshmallows if you like and then freeze it for at least 6 hours.

That’s basically it!  Serve it and enjoy!

Share Your Thoughts...

Lastly, if you make No-Churn Rocky Road Ice Cream, be sure to leave a review down below at the bottom of this page (stars are also appreciated)! Above all, I love to hear from you and always do my best to respond to each and every review. And of course, if you do make this recipe, don’t forget to tag me on Instagram! Looking through the photos of recipes you all have made is one of my favorite things to do!

No-Churn Rocky Road Ice Cream

Makes: 2 quarts

Prep Time: 10 minutes

Freeze Time: 6 hours

Total Time: 6 hours & 10 minutes

Ingredients

  • 4 ounces bittersweet chocolate, chopped*
  • 2 ounces semi-sweet chocolate, chopped
  • 1 cup milk
  • 1 14-ounce can sweetened condensed milk
  • 1 tsp pure vanilla extract
  • 1 tbsp unsweetened cocoa powder
  • 1 tbsp fresh lemon juice
  • pinch salt
  • 3/4 cup miniature marshmallows
  • 1/2 cup roasted salted almonds, chopped
  • 1/2 cup chocolate chips
  • 2 cups heavy cream
  • 1 cup 5-Minute Chocolate Sauce (may use store bought hot fudge topping, NOT chocolate sauce)

Instructions

Add the chopped chocolate to a large bowl. Set aside.

Bring the milk to a near boil in the microwave or stovetop and pour it over the chopped chocolate. Let sit 5 minutes, then stir until smooth and chocolate is melted.

Stir in all of the remaining ingredients EXCEPT the chocolate sauce and heavy cream.

In a separate bowl, whip the heavy cream until soft peaks form then fold cream gently into the chocolate mixture.

In a 2-quart freezable container, layer 1/3 ice cream, drizzle 1/2 chocolate sauce and swirl with a knife, then layer 1/3 ice cream and drizzle almost all remaining chocolate sauce and swirl. Top with remaining ice cream and remaining chocolate sauce and swirl.

Cover with plastic wrap or waxed paper pressed directly on the surface of the ice cream (to help prevent ice crystals), and freeze for at least 6 hours or until frozen.

Chef’s Note:

Any container (plastic, metal, etc) will work as long as it is NOT glass. You can even divide among multiple containers. The more shallow the containers, the faster the ice cream will freeze and be ready to eat. I used my cheesecake springform pan.

Recipe by Carlsbad Cravings

]]>
https://thefancypantskitchen.com/recipe/no-churn-rocky-road-ice-cream/feed/ 0
5-Minute Chocolate Sauce https://thefancypantskitchen.com/recipe/5-minute-chocolate-sauce/ https://thefancypantskitchen.com/recipe/5-minute-chocolate-sauce/#respond Thu, 16 Mar 2023 17:45:17 +0000 https://thefancypantskitchen.com/?post_type=ranna_recipe&p=20950

This silky smooth 5-Minute Chocolate Sauce is the perfect topping for a bowl of ice cream.  Or draped over pound cake.  Or smothering brownies. Or…you get the drift.  And taking only 5 minutes, it’s worth the time to have this homemade sauce whenever you get a hankering!

I love it ribboned through my No-Churn Rocky Road Ice Cream.

Simply combine heavy cream, butter and corn syrup in a saucepan and heat until the butter is melted (you can also do this in a microwave).  Add the chocolate and give it a swirl so that the chocolate is covered.  Now let it stand for three minutes.

Whisk it well until the chocolate is melted and the sauce is completely smooth.

That’s it, folks!

Share Your Thoughts...

Lastly, if you make 5-Minute Chocolate Sauce, be sure to leave a review down below at the bottom of this page (stars are also appreciated)! Above all, I love to hear from you and always do my best to respond to each and every review. And of course, if you do make this recipe, don’t forget to tag me on Instagram! Looking through the photos of recipes you all have made is one of my favorite things to do!

5-Minute Chocolate Sauce

Makes: 1 & 1/2 cups

Prep Time: 3 minutes

Cook Time: 2 minutes

Total Time: 5 minutes

Ingredients

  • 1 cup heavy cream
  • 1 tbsp unsalted butter
  • 8 ounces semi-sweet chocolate, chopped
  • 2 tablespoons corn syrup, optional (see Chef’s Note)
  • 1/2 tsp vanilla extract, optional
  • 1/2 tsp kosher salt

Instructions

Add heavy cream, butter and corn syrup (if using) to a medium saucepan and heat until butter is melted and the mixture just begins to simmer, stirring occasionally OR add heavy cream, butter and corn syrup to a microwave safe bowl and microwave for 2 minutes or just until simmering and butter is melted.

Add chocolate and give it a swirl so the chocolate is covered. Let stand 3 minutes.

After 3 minutes, vigorously whisk in circular motions until chocolate is melted and completely smooth. Whisk in vanilla if using.

Let ganache cool for 10 minutes before using as a dip or sauce or allow to cool to room temperature for frosting, filling, etc., stirring often. Reheat at 50 % power in the microwave with 1 teaspoon vegetable oil if ganache thickens too much as you work or becomes grainy.

Chef’s Notes:

It’s optional to use corn syrup, but it will make the sauce extra smooth, it will keep it shiny even after being refrigerated and will keep it flexible when it sets.

]]>
https://thefancypantskitchen.com/recipe/5-minute-chocolate-sauce/feed/ 0
Oreo Ice Cream Sandwiches https://thefancypantskitchen.com/recipe/oreo-ice-cream-sandwiches/ https://thefancypantskitchen.com/recipe/oreo-ice-cream-sandwiches/#respond Tue, 12 Jul 2022 22:48:01 +0000 https://thefancypantskitchen.com/?post_type=ranna_recipe&p=15372

For a wonderful summer treat, try homemade Oreo Ice Cream Sandwiches.  We all remember the traditional ice cream sandwiches and, if you’re like me, you love them.  Now try it with amazing chocolate cookies sandwiching Oreo ice cream and coat the sides with chunks of Oreo cookies.  Wowza!

One of the beauties of this recipe is that you can use any type of ice cream.  If you love peanut butter ice cream, go ahead and use that and coat the sides with crumbled Reese’s pieces.  If you like caramel ice cream, you could fill the cookies with that and coat the sides with Heath pieces.  So many choices…

Can we talk about the cookies?  These chocolate cookies are out of this world!  They are rich in chocolate flavor with a hint of salt and they are chewy and soft at the same time.  They are the perfect cookie to use for sandwiches or to eat on their own (I confess we scarfed down quite a few before we filled them).

Melt the butter and chocolate together in the microwave.  Separately, mix the flour, cocoa powder, baking powder and salt.  

In another bowl, mix the eggs and sugar.  Whisk in the melted chocolate and fold in the flour mixture.

Scoop the dough onto prepared sheetpans and bake for 10 or so minutes.  Once they have cooled slightly, take a round cookie cutter slightly smaller than the cookie and cut the cookies to make 16 even circles.

While the cookies are baking, soften the ice cream and spread it into a 9 x 9-inch baking pan that has been lined with plastic wrap.  Freeze it for an hour.

To assemble the sandwiches,  cut out ice-cream circles using a round cookie cutter that is slightly smaller than the cutter used for the cookies.  Place the ice cream in between two cookies and then press oreo cookie chunks onto the outside of the ice cream. You might want to put each sandwich into the freezer on a sheet pan as you are making them to keep them from melting.

Store these in the freezer until you’re ready to serve them.  

Share Your Thoughts...

Lastly, if you make Oreo Ice Cream Sandwiches, be sure to leave a comment and/or give this recipe a rating! Above all, I love to hear from you and always do my best to respond to each and every comment. And of course, if you do make this recipe, don’t forget to tag me on Instagram! Looking through the photos of recipes you all have made is one of my favorite things to do!

Oreo Ice Cream Sandwiches

Makes: 8 ice cream sandwiches

Prep Time: 10 minutes

Bake Time: 10 minutes

Total Time: 1 hour & 20 minutes

Ingredients

Chocolate Cookies:

  • 1/2 cup butter
  • 1 & 1/4 cups semi-sweet chocolate
  • 1 cup flour
  • 1/2 cup cocoa powder, sifted
  • 1/2 tsp baking soda
  • 1/2 tsp kosher salt
  • 1 & 1/2 cups sugar
  • 2 eggs

1 & 1/2 quarts Oreo Cookie Ice Cream

10 Oreo Cookies, coarsely chopped for garnish

Instructions

For the chocolate cookies, preheat oven to 350ºF. Line a baking sheet with parchment paper and set aside.

In a microwave-safe dish, melt the butter and chocolate. Let cool. In a medium bowl, combine flour, cocoa powder, baking soda and salt. Set aside.

In a large bowl, whisk sugar and eggs until well combined. Whisk in melted chocolate and fold in flour mixture, just until flour disappears. Scoop 3 tbsp of cookie dough spread 2 inches apart onto prepared baking sheet, pressing dough down slightly. Bake for 10-11 minutes. Remove from oven and let cool slightly. Using a round cookie cutter just slightly larger than cookies, cut the cookies to make 16 even circles (I used a 2 & 3/4″ round cutter).

For the ice cream, allow it to soften for 5 minutes. Spread the ice cream into a 9 x 9-inch baking pan that has been covered on the bottom with plastic wrap. Place in freezer for 1 hour.

To assemble ice cream sandwiches, remove the ice cream from the pan using the plastic wrap and cut out ice cream circles using a round cookie cutter that is slightly smaller than the one used for the cookies. Place ice cream between 2 cookies, garnish edges with chopped cookies and wrap each sandwich with plastic wrap. Store in freezer until ready to serve.

Recipe from Bite Me More

]]>
https://thefancypantskitchen.com/recipe/oreo-ice-cream-sandwiches/feed/ 0
No-Churn Coffee Ice Cream https://thefancypantskitchen.com/recipe/no-churn-coffee-ice-cream/ https://thefancypantskitchen.com/recipe/no-churn-coffee-ice-cream/#comments Thu, 16 Jun 2022 22:45:59 +0000 https://thefancypantskitchen.com/?post_type=ranna_recipe&p=14968

Coffee ice cream is an all-time favorite but how about homemade No-Churn Coffee Ice Cream?  Can it get any better?

You all know I’m a huge fan of no-churn ice creams.  I recently posted No-Churn Churro Ice Cream, and before that Dulce de Leche Brownie Ice Cream and No-Churn Lemon Ice Cream.  I’ve got a bunch more so check out the recipe category Frozen Treats to see them all!  

The point is that no-churn ice cream is the bomb!  I love how easily it comes together, especially without an ice cream maker.  I don’t own one and I see no need after I discovered how easy no-churn ice creams are!

This ice cream has a deep flavor of espresso.  That’s thanks to the instant espresso powder and the generous shot of Kahlúa.  It’s a rich, creamy frozen treat which reminds me of Haagen Dazs’ Coffee Ice Cream.

Combine the heavy cream, sweetened condensed milk, espresso powder and Kahlúa together in a bowl and whisk it until it begins to thicken and you have a beautiful caffe-latte color.

Did you notice that there are only 4 ingredients!  Woo hoo!  Love that!

After whisking, pour the mixture into a loaf pan or two pint containers and freeze until firm, usually overnight will do it.

I confess that I love my ice cream soft. I have been known to microwave my ice cream, just for a few seconds, to get it to the consistency I love.  If this comes out of the freezer a little firmer than you like, try my trick or leave it on the counter for a few minutes to soften up.

Sprinkle some crushed coffee beans over the top and enjoy the heck out of this!

Share Your Thoughts...

Lastly, if you make No-Churn Coffee Ice Cream, be sure to leave a comment and/or give this recipe a rating! Above all, I love to hear from you and always do my best to respond to each and every comment. And of course, if you do make this recipe, don’t forget to tag me on Instagram! Looking through the photos of recipes you all have made is one of my favorite things to do!

No-Churn Coffee Ice Cream

Makes: 2 pints

Prep Time: 5 minutes

Total Time: 6 hours

Ingredients

  • 1 & 3/4 cup + 2 tbsp heavy cream, well-chilled
  • 1 14-oz can sweetened condensed milk
  • 3 tbsp instant espresso powder
  • 3 tbsp espresso liqueur such as Kahluá

Instructions

Whisk all the ingredients together just until the whisk leaves trails of soft peaks in the bowl, about 2 minutes, and you have a gorgeous, caffe-latte-colored airy mixture.

Fill two 1-pint airtight containers or a loaf pan with cream mixture, and freeze for 6 hours or overnight. Serve straight from the freezer.

]]>
https://thefancypantskitchen.com/recipe/no-churn-coffee-ice-cream/feed/ 2
No-Churn Churro Ice Cream https://thefancypantskitchen.com/recipe/no-churn-churro-ice-cream/ https://thefancypantskitchen.com/recipe/no-churn-churro-ice-cream/#respond Thu, 28 Apr 2022 15:39:03 +0000 https://thefancypantskitchen.com/?post_type=ranna_recipe&p=14317

For an amazingly easy Cinco de Mayo dessert, try No-Churn Churro Ice Cream.  It’s my idea of heaven!  Puff pastry churros get swirled into a rich cinnamon ice cream base along with dulce de leche.  Are you feeling me?  This is outstanding!

If you’ve been along with me for a while, you know that I love ice cream, and that I don’t own an ice cream maker.  Instead, I choose to perfect no-churn ice cream.

There are a few different ways to make it.  Most call for whipping heavy cream until soft peaks form and then adding your condensed milk and other flavorings into the whipped cream.  I never really liked this method, as the frozen texture doesn’t really feel like ice cream.  It’s more like a frozen mousse.  

But, if you follow my technique, you’ll get that soft, creamy gelato-type ice cream.  You won’t be able to resist!

In this recipe, we are baking our own churros, but we’re keeping it simple.  This isn’t traditional, but it’s equally as delish:  Cut 1/2-inch wide puff pastry strips, bake them and then brush melted putter on and roll them in cinnamon sugar.  Again, it’s not a true churro, but it will save a ton of time and give you the kind of result you want.  Basically, you want something textural  that complements the cinnamon ice cream.

For the ice cream, mix together the heavy cream, sweetened condensed milk, vanilla and cinnamon.  Whisk the mixture until it starts to thicken.  This usually takes about three minutes.

In a 9 x 5-inch loaf pan, pour some of the ice cream in and then add dollops of dulce de leche along with bite-size pieces of churro.  Continue to layer until you run out of ice cream.

Freeze the concoction for at least six hours. Freezing overnight is ideal.  I like to soften it just a bit before eating, but you do you!

Share Your Thoughts...

Lastly, if you make No-Churn Churro Ice Cream, be sure to leave a comment and/or give this recipe a rating! Above all, I love to hear from you and always do my best to respond to each and every comment. And of course, if you do make this recipe, don’t forget to tag me on Instagram! Looking through the photos of recipes you all have made is one of my favorite things to do!

No-Churn Churro Ice Cream

Makes: 6 servings

Prep Time: 30 minutes

Bake Time: 12 minutes

Total Time: 6 hours

Ingredients

Baked Churros:

  • 1/2 package of store bought puff pastry (1 sheet)
  • 1/4 cup unsalted butter, melted
  • 1/2 cup granulated sugar
  • 2 tbsp ground cinnamon

Cinnamon Ice Cream:

  • 2 cups heavy whipping cream, cold
  • 1 (14-ounce) can sweetened condensed milk
  • 1 tbsp vanilla extract
  • 3 tbsp cinnamon
  • 1/4 cup dulce de leche

Instructions

Baked Churros:

Thaw the puff pastry following the package instructions and preheat your oven to 450F.

Line a large baking sheet with parchment paper. Once thawed, lightly roll the puff pastry on a floured surface just to smooth the top out. Cut in half length-wise then into about 1/2 inch wide strips. You should end up with about 10-12 strips. Bake for 10-12 minutes or until golden brown.

Once the puff pastry is out of the oven and cooled enough to pick up and handle, melt the butter in the microwave and mix the sugar and cinnamon on a plate. Brush all sides of the pastry with butter and roll in the cinnamon sugar mixture to coat. Place back on the sheet to cool completely.

Cinnamon Ice Cream:

While the churros are cooling, start on the ice cream.

Mix together the heavy cream, sweetened condensed milk, vanilla, and cinnamon in a small bowl. Whisk until mixture starts to thicken, about 3 minutes.

In a 9×5 loaf pan, spread a layer of the ice cream at the bottom of the pan. Crumble two of the churros on top (breaking up into tiny bite-sized pieces) and dollop about 5 teaspoons of dulce de leche. Continue building these layers until you run out of ice cream.  If all of the ingredients sink to the bottom, remix the ice cream after it’s been frozen for a few hours.

Tightly wrap the pan in plastic wrap and then foil and place it in the freezer to set overnight. Before eating, let it sit out for about 20-30 minutes so it’s easy to scoop. Enjoy!

Recipe adapted from Butternut Bakery Blog

]]>
https://thefancypantskitchen.com/recipe/no-churn-churro-ice-cream/feed/ 0
No-Churn Coffee-Cinnamon Ice Cream https://thefancypantskitchen.com/recipe/no-churn-coffee-cinnamon-ice-cream/ https://thefancypantskitchen.com/recipe/no-churn-coffee-cinnamon-ice-cream/#respond Fri, 15 Apr 2022 16:16:46 +0000 https://thefancypantskitchen.com/?post_type=ranna_recipe&p=12743

It may be winter but every season is the right season for No Churn Coffee–Cinnamon Ice Cream!  

If you’re one of those people (like me) that loves a bite (or scoop) of ice cream after dinner, then it really doesn’t matter what time of the year it is, you still need it.  So for that special category of people, this one’s for you.

No churn ice cream is the only way I make ice cream.  I don’t have an ice cream maker, so once I discovered that you really didn’t need one to create creamy, dreamy frozen treats, I was all in.  Check out my posts for Dulce de Leche Brownie Ice Cream, No-Churn Lemon Ice Cream, No-Churn Peppermint Ice Cream, and No-Churn Mixed Berry Soft-Serve for some of my favorites.

It’s super easy to make this ice cream:  Just combine heavy cream, coffee and cinnamon in a bowl.  Add the sweetened condensed milk and whisk it until it starts to thicken, about 3 minutes.

Pour it into a loaf pan and freeze it.  That’s is all it takes to create this amazing frozen treat!

Share Your Thoughts...

Lastly, if you make No-Churn Coffee-Cinnamon Ice Cream, be sure to leave a comment and/or give this recipe a rating! Above all, I love to hear from you and always do my best to respond to each and every comment. And of course, if you do make this recipe, don’t forget to tag me on Instagram! Looking through the photos of recipes you all have made is one of my favorite things to do!

No-Churn Coffee-Cinnamon Ice Cream

Makes: 6 servings

Prep Time: 5 minutes

Total Time: 3 hours

Ingredients

  • 1 & 3/4 cups heavy cream
  • 6 tbsp strong, brewed coffee, cooled
  • 3/4 tsp ground cinnamon
  • one 14-ounce can sweetened condensed milk
  • Toppings: caramel sauce, crushed coffee beans

Instructions

Pour the heavy cream, coffee, and cinnamon into a bowl. Add the sweetened condensed milk and whisk this mixture together until slightly thickened, approximately 3 minutes.

Pour into a loaf pan or medium bowl and freeze for at least 3 hours, until set.

]]>
https://thefancypantskitchen.com/recipe/no-churn-coffee-cinnamon-ice-cream/feed/ 0
Dulce de Leche Brownie Ice Cream https://thefancypantskitchen.com/recipe/dulce-de-leche-brownie-ice-cream/ https://thefancypantskitchen.com/recipe/dulce-de-leche-brownie-ice-cream/#comments Thu, 26 Aug 2021 00:55:41 +0000 https://thefancypantskitchen.com/?post_type=ranna_recipe&p=10830

I have never apologized for a recipe, but, in a way, I’m sorry for posting Dulce de Leche Brownie Ice Cream.  I am sorry that it’s so delicious that you will want to consume every last bite of it.  I’m sorry that you won’t want to share any of it.  I’m sorry that you might add a pound or two to your currently svelte figure. It’s that freaking good!

If I’m to be perfectly honest, I made it and tasted some (had to be sure it was worthy of you, my special lovelies).  Then a few minutes after I photographed it, I went back to the freezer for just one more spoonful.  Repeat. Repeat. Repeat.  I finally had to throw it out for fear of eating every last drop by my lonesome!  Who does that???

Anyhoo, this is a killer recipe!  You know that I love no-churn ice cream recipes because I don’t have an ice cream maker!!  And you know, if you’ve been following along for a bit, that I love caramel and dulce de leche.  Brownies are also a big friend of mine.  Mix those all together into a no-churn ice cream, and what can I say…it’s dangerous!

Begin this insane frozen treat by making a small batch of brownies.  It’s really a half batch baked in a standard batch pan, so that it’s a thin little brownie.  It’s also not as sweet as a typical brownie is.  The ice cream has enough sweetness that it’s really not necessary to overdo it with the brownies.

You can use your own brownie recipe, but these ones here are guaranteed to stay soft in the freezer while I can’t say the same about any others.

You won’t need all of the brownie cubes.  The rest are for the benefit of the chef!

To begin the ice cream base, start by mixing half and half with sweetened condensed milk and half of the dulce de leche.  Then, in a stand mixer, whip the heavy cream just until it’s frothy.

Some no-churn ice cream recipes suggest that you whip the cream to a soft peak.  I’m not a fan of that. I like it when the cream is just at that foamy, slightly thickened stage. Otherwise, when you freeze it, it won’t have that creamy dreamy lusciousness to it.

Once it’s thick, add in the half and half mixture and whip a few more minutes.  Finally, fold in the brownie pieces and the rest of the dulce de leche.  Transfer it all to a loaf pan and freeze it.

Every couple of hours, you might want to give it a few churns to mix up the dulce de leche and brownie pieces.  I had a bit extra dulce de leche, so I swirled a little more through but it’s not necessary.

Enjoy this dangerous, slightly insane dessert!

Share Your Thoughts...

Lastly, if you make Dulce de Leche Brownie Ice Cream, be sure to leave a comment and/or give this recipe a rating! Above all, I love to hear from you and always do my best to respond to each and every comment. And of course, if you do make this recipe, don’t forget to tag me on Instagram! Looking through the photos of recipes you all have made is one of my favorite things to do!

Dulce de Leche Brownie Ice Cream

Makes: 4 cups

Prep Time: 20 minutes

Bake Time: 13 minutes

Total Time: 33 minutes plus freezer time 6-8 hours

Ingredients

Brownies:

  • 6 tbsp unsalted butter
  • 3/4 cup sugar
  • 1/4 cup + 1 tbsp unsweetened cocoa powder
  • 1/2 tsp vanilla extract
  • Pinch fine sea salt
  • 2 eggs
  • 1 tsp vegetable oil
  • 1/4 cup + 2 tbsp all purpose flour

Dulce de Leche Ice Cream:

  • 1/2 cup half and half
  • 1 (14-ounce) can sweetened condensed milk
  • 1 (14-ounce) can dulce de leche, divided
  • Dash of fine sea salt
  • 2 & 1/2 cups heavy cream (whipping cream), chilled
  • 1 cup small brownie pieces

Instructions

Brownies:

Preheat oven to 350°F. Grease or spray with baking spray an 8 x 8 -inch cake pan.

Either in a double boiler or in a large bowl in the microwave, melt the butter. Add sugar and mix until it is almost dissolved and you have a thick paste. Let it cool down a few minutes.

Add the cocoa powder, vanilla extract and pinch of salt and mix. Add eggs, one at a time and mixing before adding the next one. Add the oil and mix. Add the flour and gently mix, just until there are no visible flour streaks.

Scrape batter into prepared pan and bake for 10-13 minutes. Let the brownies cool down just enough for you to handle cutting them in small pieces. Place them in the fridge while you prepare your ice cream.

Dulce de Leche Ice Cream:

In a bowl mix half and half, condensed milk, half of the dulce de leche and the dash of salt.

In the bowl of a stand mixer, whip the heavy cream until frothy and foamy in slow to medium speed. Whip for 2 to 3 minutes. Reduce speed to the lowest and slowly pour the half and half mixture while still whipping the cream. Mix until combine.

Fold in the brownie pieces and then drizzle the remaining ½ can of dulce de leche. Swirl it through the ice cream as much as you can. Transfer to a 9 x 5-inch loaf pan and wrap it a few times with plastic paper. In two hours take it out of the freezer and give it a few churns with a spoon. You can repeat this process in 1 to 2 hours just to make sure it is freezing well but it’s not completely necessary. Let it freeze for 6 to 8 hours until firm.

Chef’s Note:

You may want to warm the dulce de leche in order to make it loose enough to drizzle into the unfrozen ice cream mixture. I transferred the remaining half can to a mixing bowl and microwaved it for 2 15-second bursts.

Recipe from Dev Amadeo

]]>
https://thefancypantskitchen.com/recipe/dulce-de-leche-brownie-ice-cream/feed/ 2
No-Bake Lemon Icebox Cake https://thefancypantskitchen.com/recipe/no-bake-lemon-icebox-cake/ https://thefancypantskitchen.com/recipe/no-bake-lemon-icebox-cake/#respond Wed, 23 Jun 2021 22:02:17 +0000 https://thefancypantskitchen.com/?post_type=ranna_recipe&p=9947

If you love lemons the way that I do, you must try this No-Bake Lemon Icebox Cake!  It’s creamy and dreamy, sweet and tart and best of all, doesn’t require you to turn the oven on.  Sold!

Okay, let me reiterate…this pie (more like a cake, if you ask me) is the perfect summer treat.  It’s got a graham cracker crust that gets filled with a lemon- cream cheese mixture and topped with a whipped cream layer.  Like I said, creamy & dreamy, sweet & tart!

This lemon icebox pie is very easy to make.  Begin by crushing the graham crackers (or make it easy on yourself and buy the crumbs!) and combining them with melted butter and brown sugar.  Pat the crumb mixture into a 9-inch springform pan (here’s a good one if you don’t have one) and set it aside.

You make the filling by whipping up heavy cream until stiff peaks form.  Separately, beat cream cheese until it’s smooth and stir in condensed milk, lemon zest & juice and then fold in the whipped cream.  Spread that filling into the prepared crust and freeze for a few hours.

After that’s firmed up, make the whipped cream topping, spread it on the lemon filling and send it back to the freezer until it’s very firm.  That’s the only problem with this recipe…waiting for it to freeze!!  You’ll want to eat it right away!

I like to decorate it with lemon slices and sugared lemon twists.  The twists take some extra time, but you’ve got lots of time while this baby is in the freezer, so give it a go!  Otherwise, lemon wheels and/or zest look beautiful on top of this pie/cake!

Share Your Thoughts...

Lastly, if you make No-Bake Lemon Icebox Cake, be sure to leave a comment and/or give this recipe a rating! Above all, I love to hear from you and always do my best to respond to each and every comment. And of course, if you do make this recipe, don’t forget to tag me on Instagram! Looking through the photos of recipes you all have made is one of my favorite things to do!

No-Bake Lemon Icebox Cake

Makes: 9 servings

Prep Time: 20 minutes

Freezer Time: 8 hours

Total Time: 8 hours & 20 minutes

Ingredients

For the Crust:

  • 16 graham crackers, crushed to crumbs
  • 1/2 cup unsalted butter, melted
  • 6 tbsp brown sugar, packed
  • 1 tsp kosher salt

For the Filling:

  • 1 & 1/2 cups heavy whipping cream
  • 4 ounces cream cheese, room temperature
  • 1 (14 ounce) can sweetened condensed milk
  • 1 & 1/2 tbsp lemon zest
  • 1/2 cup fresh squeezed lemon juice (from about 3 large lemons)

Topping:

  • 1/2 cup heavy whipping cream
  • 3 tbsp sugar

Garnish:

Instructions

To make the crust:

Combine all of the ingredients together in a large bowl until it comes together into a sandy mixture. Pat the crumbs into the bottom and 1” up the sides of a 9” springform pan. Set aside while you assemble your filling.

To make the pie:

In a large bowl, whip the heavy whipping cream on medium speed using the whisk attachment until stiff peaks form and the mixture becomes fluffy and cloud-like. Set aside.

In a separate bowl, beat the cream cheese until smooth and no lumps remain. Stir in the condensed milk, lemon zest, and lemon juice until smooth. Use a rubber spatula to fold in the whipped cream until fluffy and combined. Spread the mixture into the pan on top of the crust and place in the freezer to firm up, about 2 hours.

Once firm, make the topping by whipping the cream and sugar on medium speed until it thickens to a cloud-like consistency. Gently spread this on top of the lemon filling and place back in the freezer to freeze until solid, about 6 hours. When ready to consume, run a warm knife along the edges of the pan to release the pie from the sides.  Decorate with lemon slices, lemon zest and/or Sugared Lemon Twists.  Slice and serve cold!

Recipe from Wood & Spoon

]]>
https://thefancypantskitchen.com/recipe/no-bake-lemon-icebox-cake/feed/ 0